Showing posts with label peanut butter. Show all posts

Monday, December 2, 2013

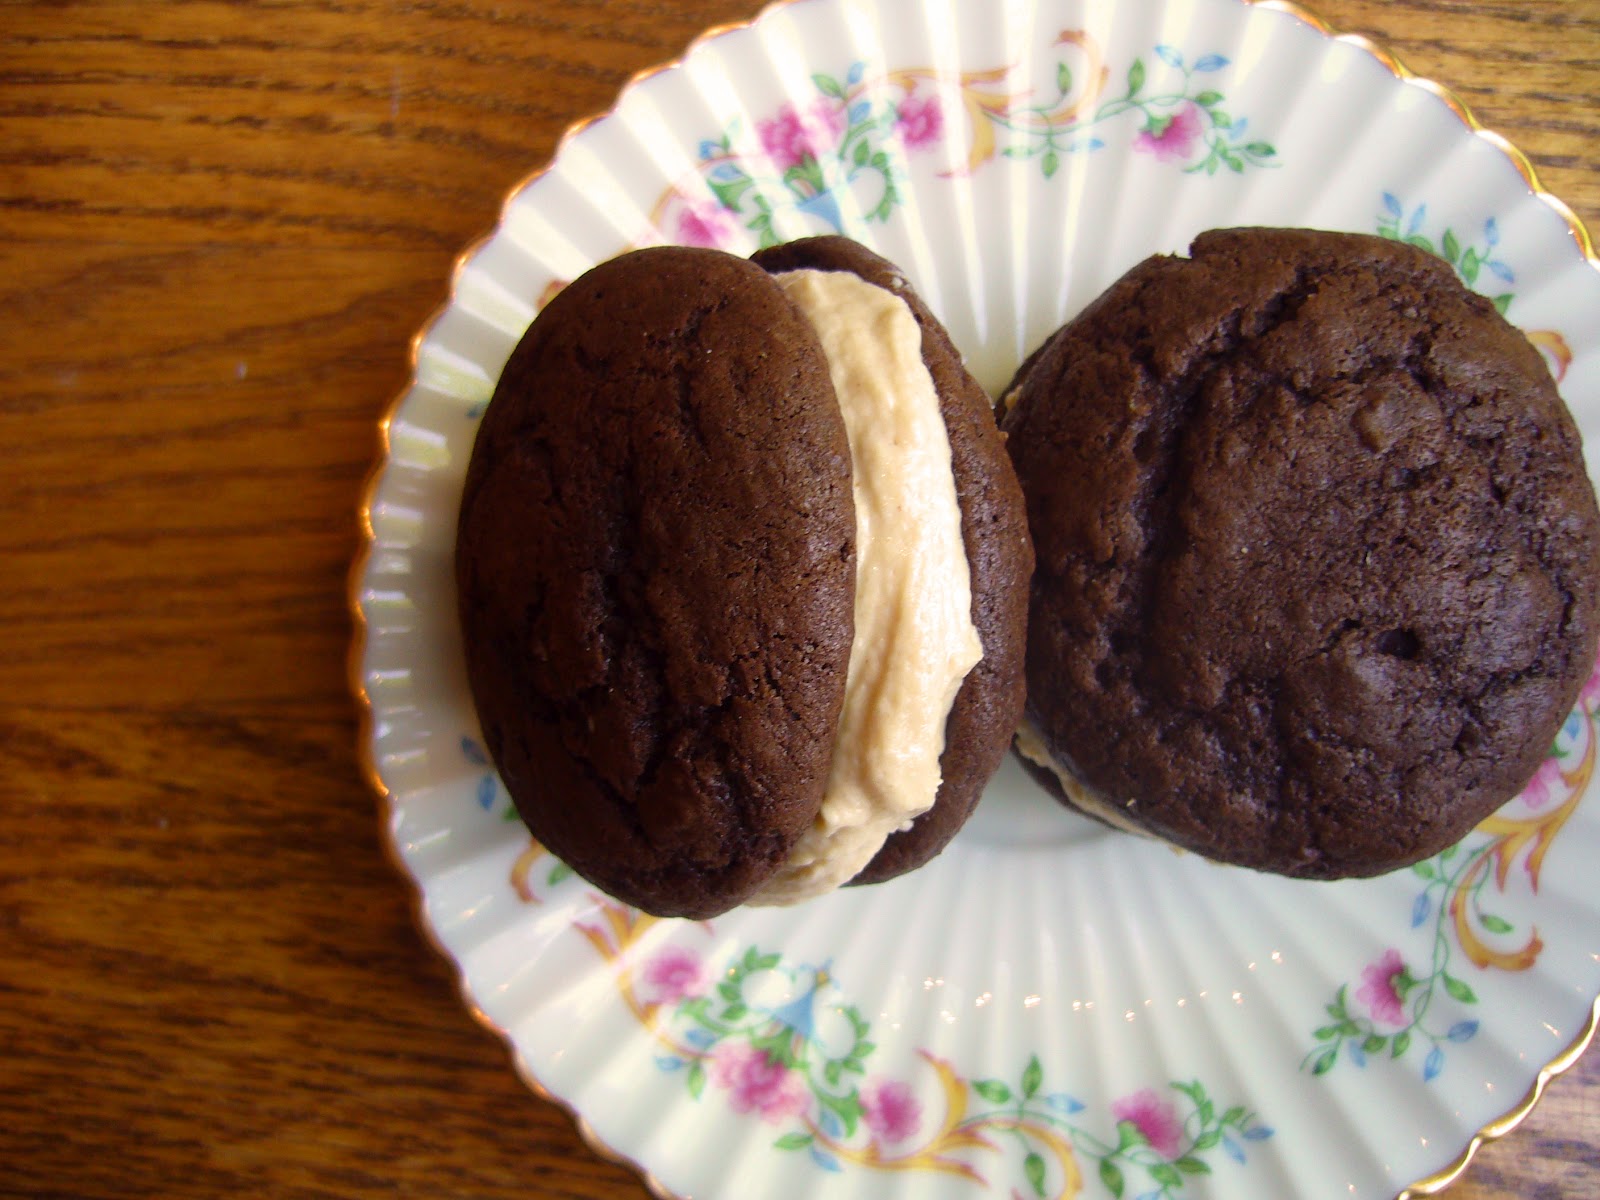
Brownie Cut-Out Lintzer Cookies with Peanut Butter Cream Cheese Filling

These cookies are incredible. Like peanut butter oreos, but soft and chewy and more chocolatey.


Well, I admit this is not really a new recipe. The cookie dough is the same as in the Brownie Cut-OutCookies, but rolled thinner and cut to have the hole in the top that characterizes linzer cookies. Don't worry though--unlike most cut-out cookies, these are baked only until still soft and barely set, and their deep chocolate flavor (courtesy of dutch-process cocoa powder) belies the vanilla tradition of their sometimes hard and bland cookie kin.

You could certainly just cut two circles to make a normal sandwich cookie, but it's a beautiful and festive addition (subtraction?) to cut a little hole in the top cookie. I had linzer cutters that cut the circle and the star at the same time, but you could use a very small circle or cut a diamond with a knife. They would look beautiful this way on a holiday cookie platter.


Let's talk frosting for a minute. Joy put out a cookbook about a year ago, and she has several pages devoted to cream cheese frosting. I am so on board! The cheesieness keeps the frosting from being sickly sweet and the texture makes the frosting incomparably smooth. I only used half of her recipe (which frosts 24 cupcakes or a whole two layer round cake or a whole 9x13 sheet cake) and it was the perfect amount.

Given that the frosting is less stiff than oreo creme filling, the cookies benefit from refrigeration to firm everything up. Once chilled, the filling holds its own against the cookies and doesn't sploosh out the sides when you bite into it.


Love love love these. A bit of labor, but not that bad. This dough is seriously so easy to work with that rolling it out is a pleasure.

See recipe for Brownie Cut-Out Cookies

Roll about 1/8" thick and bake for 8 minutes, turning halfway through. Let cool on sheets for a few minutes, then transfer to wire racks to finish cooling

Peanut Butter Cream Cheese Frosting
Frosts 1 batch of cookies above in sandwiches, or double for 24 cupcakes, a round layer cake, or a 9x13 sheet cake!

Ingredients:


  • 4 oz (half a package) cream cheese, softened -- I used Neufchatel
  • 1/4 cup (1/2 stick) butter, softened
  • 1/4 cup smooth peanut butter (eyeball if you can, measuring peanut butter is a pain)
  • Pinch salt
  • 1 cup powdered sugar
  • 1 teaspoon vanilla extract

Method:


  1. Using a stand or hand held mixer, beat cream cheese alone, ensuring it's soft. Add butter and beat to combine and soften (essential if, like me, you always forget to soften the butter).
  2. Add peanut butter and salt, beat to combine. Then, slowly and carefully add the powdered sugar and beat on low to combine. Add vanilla, mix to combine, then beat the whole mixture on medium/high speed to aerate.
  3. Frost cookies above with about a teaspoon or so of frosting per sandwich. The back of a butter knife is a good tool for this. 


Eat up! Holiday cookies are coming!

Recipe for frosting from the Joy the Baker Cookbook

Sunday, January 6, 2013

Peanut Butter and Jelly Muffins


I am a firm believer that good desserts include chocolate, peanut butter, caramel, or coffee. And really excellent ones include two or three of the aforementioned dessert flavor enhancers.


This is not a dessert. But it is breakfast, and good breakfasts include these delectable traits as well.

The line is thinly drawn 'tween 'ssert and breakfast.

very focused.
I had a blogger date with my good friend Maxine, who writes posts that feel like cocoa and blankets and Christmas. We made these muffins. And then, we proceeded to take pictures for 15 minutes--of the muffins, of each other, instagrams, and random things around the house that struck our fancy to photograph.

She's so cute!
Then we devoured the muffins and talked about our how first semester had gone. It was an awesome time and great to see each other again!

These muffins are a peanut butter base with jam sandwiched between layers of batter. They are like the eponymous sandwich and full of comfort, with less stick-to-the-roof-of-your-mouth-osity to them. Warmed up in the microwave the next morning for breakfast? Devine.

This is how Maxine styled the muffins! I like it better than the way I did it, so you're seeing my photograph of her setup.
They're pretty healthy as well, with no added butter or oil besides the peanut butter! Which, bonus, also means the peanut butter flavor comes through strongly. Next time, I might want to add chopped peanuts to the top for a bit of crunch and extra peanut flavor.


Peanut Butter and Jelly Muffins
Yield: 12 muffins

Ingredients:
• 2 cups (10 oz) flour
• 1/2 cup (3.5 oz) granulated sugar
• 2 teaspoons baking powder
• 1 teaspoon salt
• 3/4 cup (6.75 oz) peanut butter, creamy or chunky (we used creamy)
• 1 egg
• 1 cup buttermilk (I know, I'm being a jerk. Milk works just as well since the leavening is baking powder, not baking soda).
• About 1/2 cup jelly or jam

Method:
1. Preheat oven to 350 degrees and grease a muffin tin (or put in paper liners).
2. Stir together flour, sugar, baking powder, and salt.
3. Add peanut butter, cutting into the dry ingredients with a fork until mixed and crumbly (this is the best part! So fun.).
4. Stir together egg and (butter)milk, add to flour/peanut butter mixture, and fold together until just mixed.
5. Put a spoonful of batter in each muffin cup, then a spoonful of jam, then another spoonful of batter.
6. Bake 20-30 minutes or until toothpick inserted in center comes out clean.

Recipe adapted from food.com.

Monday, December 31, 2012

Chewy Peanut Butter Chocolate Chip Cookies

I have found it. The peanut butter cookie.


Not surprisingly, it comes from America's Test Kitchen. I swear, there isn't a dud recipe comes out of that organization...probably because they test the recipes to extreme perfection.


This is the peanut butter cookie which is chewy and peanut buttery, not crumbly or dry or cakey or bland. The one which will hold its own sans add-ins or graciously welcome chocolate (or other kinds of) chips, coconut flakes, dried fruit, chopped nuts, oreo crumbles, seeds, etc.

I am so excited about this recipe. Cannot wait to make it again and add something new. They're so unctuous and hearty and unapologetically good. My brother kept going back for more when he was home!


Oh, and also? Happy New Year! It's been a great year meeting new people, figuring out how to bake at school, and learning what's fun to eat in the dining hall. It's my 50th post on this blog, too! So much new knowledge and wisdom this year, and yet I know it's only a fraction of what's to come.

Bring it, 2013. I'm ready.


Chewy Peanut Butter Chocolate Chip Cookies
Yield: about 4 dozen cookies


Ingredients:

  • 1 1/2 cups (7.5 oz) all-purpose flour
  • 1 teaspoon baking soda
  • 1/2 teaspoon salt
  • 1 1/4 cups (~11 oz) creamy peanut butter  (processed is best, and you could instead do 1 1/2 cups chunky peanut butter if you want peanut chunks in there!)
  • 3/4 cup (5 1/4 oz) packed light brown sugar
  • 8 tablespoons (1 stick) unsalted butter, melted and cooled slightly
  • 1/2 cup (5 7/8 oz) light corn syrup
  • 1/4 cup (1 1/4 oz) granulated sugar
  • 1 large egg plus 1 egg yolk
  • 1 teaspoon vanilla extract
  • 4 big handfulls (2 cups?) chocolate chips

Method:

  1. Combine flour, baking soda, and salt in medium bowl. Whisk peanut butter, brown sugar, butter, corn syrup, granulated sugar, egg, yolk, and vanilla until smooth. Stir in flour mixture until just combined. Divide dough in half, wrap with plastic wrap, and refrigerate until firm, about 1 hour.
  2. Adjust oven racks to upper-middle and lower-middle positions and heat oven to 350 degrees. Line 2 baking sheets with parchment paper. Scoop dough by the heaping tablespoon and shape as with chocolate chip cookies, breaking in half and smooshing together to make a craggy surface.
  3. Bake cookies until puffed and edges are lightly browned, 12 to 14 minutes, switching and rotating sheets halfway through baking. Cool 5 minutes on sheets, then transfer to wire rack to cool completely. Cookies can be stored in airtight container for 3 days, if they last.
Note: dough can be frozen in balls and baked straight from the freezer whenever you want fresh cookies! Just add a minute or two to the baking time. 

Recipe from Cook's Country.

Sunday, May 20, 2012

Peanut Butter Cup Truffles

It's the end of the the school year...and for me, the end of high school. And that means thanking the people who have been there for the whole thing.


These were for my friend, as a belated birthday present. Happy Birthday Lindsey!!

Let me put this out there right now.
Peanut butter. Chocolate. Truffle.


Did you just feel super excited in your taste buds? I did. (P.S. My mom calls that "ZING" because she gets that feeling when she smells Celestial Seasonings Zinger Teas)

These are delicious. Amazing. Transcendent. So so so much better than Reece's, but incredibly familiar at the same time.


ANDDDD...

I learned to temper chocolate! Turns out it's not as fussy as I expected, and I felt remarkably at ease, compared to that time I made chocolate cookies and the chocolate seized up in the microwave.

I used Nestle chocolate for the coating on these truffles. None of that fancy pants business.

But I did use bars, which makes the whole thing work a lot better. They put stuff in chocolate chips so they stay melty in your chocolate chip cookies for longer. And while that is extraordinarily desirable when one is making chocolate chip cookies and doesn't make a whole lot of difference if you're making brownies, it does mess with the tempering process.


Tempering is important because it makes the chocolate able to fully re-solidify so you don't have to refrigerate it after you have melted it. If you don't want to take the trouble (it does take some time, especially if you've never tempered chocolate before), just keep the truffles in the refrigerator.

Have at it! Conquor your cooking fears!


Peanut Butter Cup Truffles
Yield: about 18 truffles

Ingredients:
1/2 cup (4.5 ounces) creamy peanut butter
2 tablespoons unsalted butter
2 tablespoons light brown sugar
1/2 plus 1/8 cups (2.5 ounces) powdered sugar
8 ounces chocolate (I used a mixture of dark and semisweet, but milk would be delicious too!)

Method:
  1. In a medium saucepan, combine the peanut butter, butter and brown sugar over medium heat. Heat until completely melted and starting to bubble a little, stirring constantly. Remove from the heat. Add the powdered sugar a ¼ cup at a time (sift if it's clumpy), stirring until completely combined with the peanut butter mixture after each addition. Let cool, then pop in the fridge for about 30 minutes.
  2. Scoop portions of the peanut butter mixture (put it back in the fridge if it gets too soft) and roll into balls. Set on a baking sheet lined with wax paper and put in the freezer while you prepare the tempered chocolate.
  3. Temper chocolate. Feel the glory. Or don't and just melt it in the microwave or a double boiler.
  4. Dip peanut butter insides in chocolate, completely coating. (I didn't get the coating over everything on some of them and they dripped peanut butter grease...not attractive). Let set on the baking sheet at room temperature if you've tempered your chocolate or in the fridge if not.
  5. Eat and enjoy!

Adapted from Brown Eyed Baker.

Tuesday, April 24, 2012

Chocolate Peanut Butter Whoopie Pies

Amazing whoopie pies: The chocolate cupcake tops (let's face it, whoopie pies are like muffin tops except cupcake tops and you get two and they have frosting smashed between them) are fluffy and deeply chocolaty. You don't even need to melt any chocolate--bonus! No overcooking it in the microwave or getting a double boiler messy. 

The frosting in the middle is a blanket for the soul. It's like a fluffernutter sandwich with crunchy peanut butter had a baby with buttercream frosting. It's eat it with a spoon good.
Or with that extra odd cookie you knew wasn't going to have a sandwich partner. You can't let it get lonely!


People. This is worth a trip to the grocery store (or the forethought to add it to the list before you go) to get marshmallow fluff. It totally makes the texture of the frosting such that you'll feel your soft palate suffocated by elastic, airy, sticky frosting by the third bite of the cookie.

In a good way, I promise. Just have some milk next to you!


This recipe comes from my favorite blogger and real-life role model, Joy the Baker. It's from her new cookbook! I was lucky enough to meet her at a book signing...could not have been more nervous/excited in my life.

DUDE. 


She's the kind of person I want to be when I grow up. Heck, she's the kind of person I want to be right now!

Chocolate Peanut Butter Whoopie Pies
Yield: 18 whoopie pies

Ingredients:
For the cookies:
2 cups all-purpose flour
2 cup unsweetened cocoa powder 
1 1/4 teaspoons baking soda
1 teaspoon salt
1 teaspoon instant espresso powder
1/2 cup (1 stick) unsalted butter, softened
1/2 cup granulated sugar
1/2 cup packed brown sugar
1 large egg
2 teaspoons pure vanilla extract 
1 cup buttermilk (I used tablespoon of vinegar with enough milk to make a cup)

For the frosting:
1/2 cup (1 stick) unsalted butter, softened
1 (7-ounce) container marshmallow creme
1/2 cup smooth peanut butter
Pinch of salt
1 cup powdered sugar
1 teaspoon pure vanilla extract 
1/4 cup coarsely chopped roasted and salted peanuts

Method:
  1. Preheat oven to 350 degrees F (or 325 convection). Line a baking sheet with parchment paper and set aside.
  2. In a medium bowl, whisk together flour, cocoa powder, baking soda, salt, and espresso powder.
  3. In the bowl of a stand mixer fitted with a paddle attachment, beat together butter and sugars until light and well incorporated, 3 to 5 minutes. Stop mixer and scrape down the sides of the bowl. Add the egg and beat on low speed for 1 minute until mixture is light and fluffy. Beat in vanilla.
  4. Stop the mixer and scrape down the sides of the bowl. Add half of the flour mixture and mix on low speed. With mixer running, slowly add the buttermilk. When just incorporated, add the remaining flour mixture. Mix until just blended. Finish incorporating the ingredients with a spatula.
  5. Spoon the batter by the heaping tablespoonful onto prepared baking sheet. Leave at least an inch of space between the dough. Bake for 12 to 14 minutes, until centers are cooked through but cookies are still soft and tender.
  6. Remove from oven and let cool on the pan for 10 minutes before removing to a wire rack to cool completely before filling.
  7. To make the filling: in the bowl of an electric stand mixer fitted with a paddle attachment, beat together butter, marshmallow, peanut butter, and salt. Beat until smooth and no butter lumps remain. Add the powdered sugar and vanilla. Beat on medium speed for 3 minutes, until fluffy. Stop the mixer and remove the bowl. Fold in peanuts with a spatula.
  8. When cookies have cooled, spread a scant 2 tablespoons of filling onto the bottom of one cookie. Top with another, similar-sized cookie. Fill all cookies and sandwich. 
Cookies are best stored in the refrigerator, where they will last 5 days.

Recipe from the joy the baker cookbook!

Sunday, February 26, 2012

Oatmeal Peanut Butter Chocolate Chip

Or, How many words fit in one description?
Or, How much deliciousness can fit in one cookie?

These are cookies for sharing with friends. They're homey, easy, make a bunch (especially if you double the recipe), and no exotic flavors.

I love these ladies:

We sat on my kitchen floor eating WAY too much cookie dough and chocolate chips. And talked, of course.

The product of our labors was a double batch of these Oatmeal Peanut Butter Chocolate Chip Cookies:
(recipe here)

Seriously. The potato chip sticking out of that weird colored one on the left (I still haven't gotten the hang of editing pictures taken at 10 pm with lightbulbs...) was such a good idea. Shout out to Lindsey.

I would add an extra quarter cup or half cup of oats to make them more oaty, or use the peanut butter dough sans oats as a delicious chewy pb cookie base for other delicious things (chopped peanuts? chocolate chips? those new reses minis that look like they were designed for lazy bakers?).

This is a good recipe to have in your back pocket. The cookies themselves are thick and chewy, with plenty of chocolate chips.
Good girl-time food.

Saturday, December 31, 2011

Harvey Mudd Brownies


My brother's girlfriend, Courtney, is visiting for the holidays. There she is, in the picture, smiling and looking perdy!


This pan of deliciousness was hatched up by her inspiration. We were talking about Harvey Mudd College (since I'm a senior and college is sort of a ubiquitous topic these days). Her reaction:

"Harvey Mudd...that sounds like a brownie. You know what I mean? Like, maybe a brownie with peanut butter."


Thus was born the Harvey Mudd Brownie.


This recipe is from Brown Eyed Baker. My notes are in blue, and my suggestions for next time are in green!

Harvey Mudd Brownies
Yield: 24 brownies
Prep Time: 35 minutes | Bake Time: 30 minutes

For the Brownies:
1¼ cups (6.25 ounces...we just got a new scale!) all-purpose flour
1 teaspoon salt
2 tablespoons dark unsweetened cocoa powder
11 ounces dark chocolate, coarsely chopped
1 cup (8 ounces or two sticks) unsalted butter, cut into 1-inch pieces
1 teaspoon instant espresso powder
1½ cups (10.5 ounces) granulated sugar
½ cup (3.5 ounces) packed light brown sugar 
(or do like we did and make your own...you want a total of 14 ounces of granulated sugar plus 1/2 tablespoon molasses)
5 eggs, at room temperature
2 teaspoons vanilla extract

For the Peanut Butter Swirl: (We thought there was too much...hardly any brownie showed through the top)
1/4 cup (8 tablespoons) unsalted butter, melted
1/2 cup (2 ounces) powdered sugar
3/4 cups (6.75 ounces) creamy peanut butter
1/4 teaspoon salt
1/2 teaspoon vanilla extract

1. Preheat the oven to 350 degrees F. Butter the sides and bottom of a 9×13-inch glass or light-colored baking pan. Line the pan with parchment paper.

2. In a medium bowl, whisk the flour, salt, and cocoa powder together.

3. Put the chocolate, butter and instant espresso powder in a large bowl and set it over a saucepan of simmering water, stirring occasionally, until the chocolate and butter are completely melted and smooth. Turn off the heat, but keep the bowl over the water and add the sugars. Whisk until completely combined, then remove the bowl from the pan. The mixture should be room temperature.

4. Add 3 eggs to the chocolate mixture and whisk until combined. Add the remaining eggs and whisk until combined. Add the vanilla and stir until combined. Do not overbeat the batter at this stage or your brownies will be cakey.

5. Sprinkle the flour mixture over the chocolate mixture. Using a rubber spatula (not a whisk), fold the flour mixture into the chocolate until just a bit of the flour mixture is visible.

6. Pour the batter into the prepared pan and smooth the top.

7. In a medium bowl, whisk together all of the peanut butter swirl ingredients. Using a spoon, place dollops (Courtney called these drooples) of the peanut butter mixture all over the top of the brownie batter. It's very important to droople it. Using a butter knife, swirl the chocolate and peanut butter, running the knife crosswise and lengthwise through the batters.

8. Bake in the center of the oven for 40 minutes (We needed some extra time, you might need anywhere from 30 to 40 minutes if you use a half batch of the swirl), rotating the pan halfway through the baking time, until a toothpick inserted into the center of the brownies (not the peanut butter part, since it stays gooey) comes out with a few moist crumbs sticking to it. Let the brownies cool completely, then lift them out of the pan using the parchment paper. Cut into squares and serve.

9. Store at room temperature in an airtight container or wrap with plastic wrap for up to 3 days.

And, it's New Years! What a way to celebrate! Do you have any traditions?
My family always watches the Rose parade the next morning, since my Dad hails from SoCal.

Tuesday, December 20, 2011

Peanut Butter Blossoms


My friends are pretty awesome. It was Maxine's birthday, and so I asked her "what's your favorite kind of cookie?"
Out of the blue.
3 days before her party.

Yet her face still lit up in surprise she opened the big box, showing off those Early Bird Yoga muscles ripping through packing tape.

You go Maxine. You go glen coco.


To start, get your mise en place going. (That's when you have everything in place. I usually don't...it was an OCD kind of day). 

Common Scents of the day: keep those butter wrappers after you put the butter in the mixing bowl--they make a great spatula rest and keep the counter clean! They also make easy work of buttering a pan, if it's that sort of a recipe.


Butter. and peanut butter.

♪ We go together like ramalama lama lama dingity doop do wop. ♫


Add some sugar to the party.

And flour and eggs, the things that make cookies different from candies.


Unwrapping the kisses. See that one in the bowl? He was lonely. But only for a moment!


Then lots of friends joined. More OCD evidence...those balls of tin foil each have 5 wrappers stuck together. I was counting, then I lost track.

VoilĂ !


Peanut Butter Blossoms
makes approximately 48 cookies
2 sticks butter, softened
1 1/2 cups creamy peanut butter
1 cup sugar
1 cup packed brown sugar
2 eggs
1 teaspoon vanilla extract
3 1/2 cups flour
2 teaspoons baking soda
1/2 teaspoon salt
2 tablespoons milk
1/2 cup sugar, for rolling
1 bag Hershey Kisses (you only need ~48), unwrapped
Preheat oven to 375 degrees.

Cream butter and peanut butter together until smooth. Add sugars and cream for 2-3 minutes. Add eggs, one at a time, beating until combined. Stir in vanilla. Add flour, baking soda and salt, just mixing until combined, then add in milk and mix to combine. Cover and refrigerate dough for 30 minutes or up to 2 days.

Roll cookies into 1 inch balls and roll in sugar. Lay on baking sheet about 1 inch apart. Bake at 375 for 5 minutes. Remove from oven and push a kiss down into the middle of each cookie. Return to oven and bake for 2 1/2 more minutes. Remove and let cool completely.

From how Sweet is is. (It's the recipe from the back of the bag of kisses, apparently. My bag had no such recipe on the back, probably because it was dark).