Showing posts with label cookie. Show all posts

Wednesday, October 12, 2016

Decadent Crispy Chocolate Chip Cookies

I feel apologetic about these cookies. They seem to need justification, in the form of a "decadent" before their name. Like many people, my favorite cookies are the large, chewy, thick, bakery-style cookies. But...these were...incredible.


The flavor of a super caramelized, shatteringly crisp (Mary Barry would be proud...just imagine her saying "crisp" in her perfectly articulated British accent) cookie laced with lots of chocolate chips, in a just right batch size of 15 cookies.


I was so excited to try a recipe from Alice Medrich's cookie book. Cookies are my favorite, and she is the queen of chocolate. My cookbooks were lost in the mail (well, the post office hasn't found them 2 months later), so I bought myself this cookbook at my neighborhood used bookstore. I'm so glad I did: the first week, I put approximately 50 post-it flags in the book on recipes I want to try!


So, these cookies. They are unapologetically crisp, despite my apology at the top of this post. They have no egg, contributing to their crispness, and start with melted butter (thank goodness for not having to soften the butter).


The batter is rested overnight in the fridge, or for however long you can spare, which is recommended for lots of cookie recipes. It's a bit fussy, but if you think ahead it breaks up the work nicely over two days. I wanted to try the recipe exactly as written, but on tasting, I think a sprinkle of nice sea salt would not go amiss.


A radically different cookie than both Chips Ahoy and the typical chewy chocolate chip cookie, they are delicious with a glass of cold milk or just snuck in shards from the cookie jar.

Decadent Crispy Chocolate Chip Cookies
Yield: 15 large, flat, and delicious cookies

Ingredients:

  • 1 1/3 cups (6 ounces) all-purpose flour
  • 1/2 teaspoon baking soda
  • 10 tablespoons (1 1/4 sticks) unsalted butter, melted
  • 1/2 cup (1.5 ounces) rolled oats
  • 1/2 cup (3.5 ounces) granulated sugar
  • 1/4 cup (1.75 ounces) brown sugar (dark brown is best) 
  • 2 tablespoons plus 1 teaspoon (2 ounces) light corn syrup
  • 2 tablespoons milk
  • 1/2 teaspoon salt
  • 8 ounces or 1 generous cup chocolate chips or chopped bitter/semisweet chocolate

Method:

  1. Combine flour and baking soda in a small bowl and mix to combine.
  2. In a large bowl, combine the butter, oats, sugar (granulated and brown), corn syrup, milk, and salt. Whisk to combine, then gently mix in the flour mixture. If the mixture is still warm from the butter, let it cool down a bit before mixing in the chocolate.
  3. Let batter rest in the fridge for a few hours or overnight, up to probably 3 days would be fine!
  4. When ready to bake, heat oven to 325 degrees F. Position racks in upper and lower thirds of the oven.
  5. Line 2 baking sheets with foil, dull side up, and put an extra foil liner on a spare part of countertop. Divide dough equally into 15 pieces, roll each into a ball, and place 5 on each baking sheet/liner. Smoosh each ball down until the dough balls are about 3.5" in diameter.
  6. Bake sheets 20-25 minutes, rotating and flipping sheets halfway through baking, until the cookies are thin and quite brown. This makes the caramelization and makes them completely dry (that is, amazingly easy to store). Slide the extra liner onto one of the baking sheets and bake the third sheet like the others. 
  7. Let cool to room temperature on wire racks, then store in an airtight container as long as they stick around.
Recipe from Chewy Gooey Crispy Crunchy Melt-in-Your-Mouth Cookies by Alice Medrich.

Friday, January 8, 2016

Caramel Macaroon Thumbprint Cookies

Or, what I wish Caramel deLites were.

Tea for two, and two for tea...
These cookies are almost candy. And they're made especially easy by the purchase of dulce de leche, a confection of boiled sweetened condensed milk sent by the gods. It's in a can, right next to the sweetened condensed milk, and for basically no extra charge they caramelize it for you.


You make basic coconut macaroons and form into disks, except after baking you push a little well into the center and fill it with delicious dulce de leche. A drizzle of chocolate seals the deal and will make you the most popular kid in high school.

If you've never made macaroons, this is a great chance to try. They're not too tricky, and the ingredient list is short. You start with egg whites, sugar, and flavorings (salt and vanilla), and whisk it until frothy. Then just dump in the coconut, shape, and bake!


Of course, if you're looking for extra credit, extra flavor, or extra fanciness, you can lightly toast the coconut before mixing it in. A billion points extra credit, as one of my professors likes to say.

Also pictured: "guard" dog Sally, in the background, watching for intruders
Whatever adventure you pick, these are quick cookies that look fancy. They're chewy and sweet and sticky and everything wonderful. Make a batch, make some friends!

Caramel Macaroon Thumbprint Cookies
Yield: About 24 cookies

Ingredients:

  • 3 cups sweetened, shredded coconut
  • 4 large egg whites
  • 1/2 cup sugar
  • 1 teaspoon vanilla
  • 1/4 teaspoon salt
  • 1 can dulce de leche (available by the sweetened condensed milk or in the hispanic foods section)
  • 4 oz dark chocolate, broken into pieces
Method:
  1. Preheat oven to 350 degrees. Prepare two baking sheets with parchment paper, silicone baking sheets, or foil and nonstick spray.
  2. On one of the baking sheets, put coconut. Toast in the oven 5-7 minutes, or until just starting to color around the edges. Let cool slightly.
  3. In a large bowl, combine egg whites, sugar, vanilla, and salt. Whisk until frothy and completely combined. Add coconut and stir to combine. If it seems like there's a lot of extra liquid, add some more coconut (I didn't do this and some of mine were too soppy) until the mixture doesn't have extra liquid in the bowl.
  4. Scoop by heaping tablespoons onto prepared baking sheets. Flatten with the bottom of a glass (dipping your hands and the glass in water help keep them from sticking) and shape into nice round disks.
  5. Bake for 15-20 minutes, rotating sheets halfway through, until golden brown around the edges. Immediately after taking out of the oven, use two small spoons or your thumb to press an indentation in the middle of each cookie.
  6. Melt about half a cup of dulce de leche in a microwave safe bowl in the microwave for about 30 seconds, then spoon into the divots. I didn't do this but I wish I had!
  7. Melt the chocolate in a microwave safe bowl in 30 second bursts. Use a fork to drizzle over cookies.
  8. Serve with tea or as dessert! Cookies keep stored in an airtight container for 4 or 5 days, but they sure didn't last that long in my house.
Inspired by Bakers Royale, recipe from the Kitchn


Wednesday, August 19, 2015

A Dinner Party

My first! This weekend I had my brother and his wife and her family over for dinner. It's been so nice to be close to family this summer, and what better way to show my appreciation than to cook for them!
Joanna and Courtney...ready for dessert!

I've read before that you're supposed to try no new recipes for a dinner party. That advice is probably wise. I'd still recommend that for any new dinner party you use only recipes you're already comfortable with.

But I've cooked meat, what...3 times? (not really, but very few times overall). So I chose a new recipe for steak, cobbled together from various websites and inspired by the haul of mushrooms I bought from the farmers market.


I chose this recipe also because it includes a marinade. I've had much better success with the flavor and cooking of marinaded and/or brined food (see: pork chops!), but it's especially good when you happen to be planning a dinner party. It requires some foresight (easy to do when you're already in planning mode) and gives some extra insurance against dry/bland meat.


The mushrooms though. There's no reason every meal shouldn't include sauteed mushrooms. With their deep, buttery, salty flavor, they're the bacon of the vegetarian world. Thank you fungus! You rock. These are extra special because they're thrown back in a red wine pan sauce at the end, to make a gloriously glossy coating that drips off onto the tender steak.


Another thing I learned about dinner parties (and this one, I think I did right): It's easiest if only one dish is being made at a time. This means cold things are particularly awesome!
In other news, only two burners of our stove work...


I paired the steak with pre-made polenta, green salad (thanks to Joanna for helping out with that--you make a nice salad!), and green bean salad with pickled shallots. All were delicious. I just microwaved the polenta with some chicken broth to make it loose again, and it made a great base for the meat and saucy mushrooms.

SAUCY.


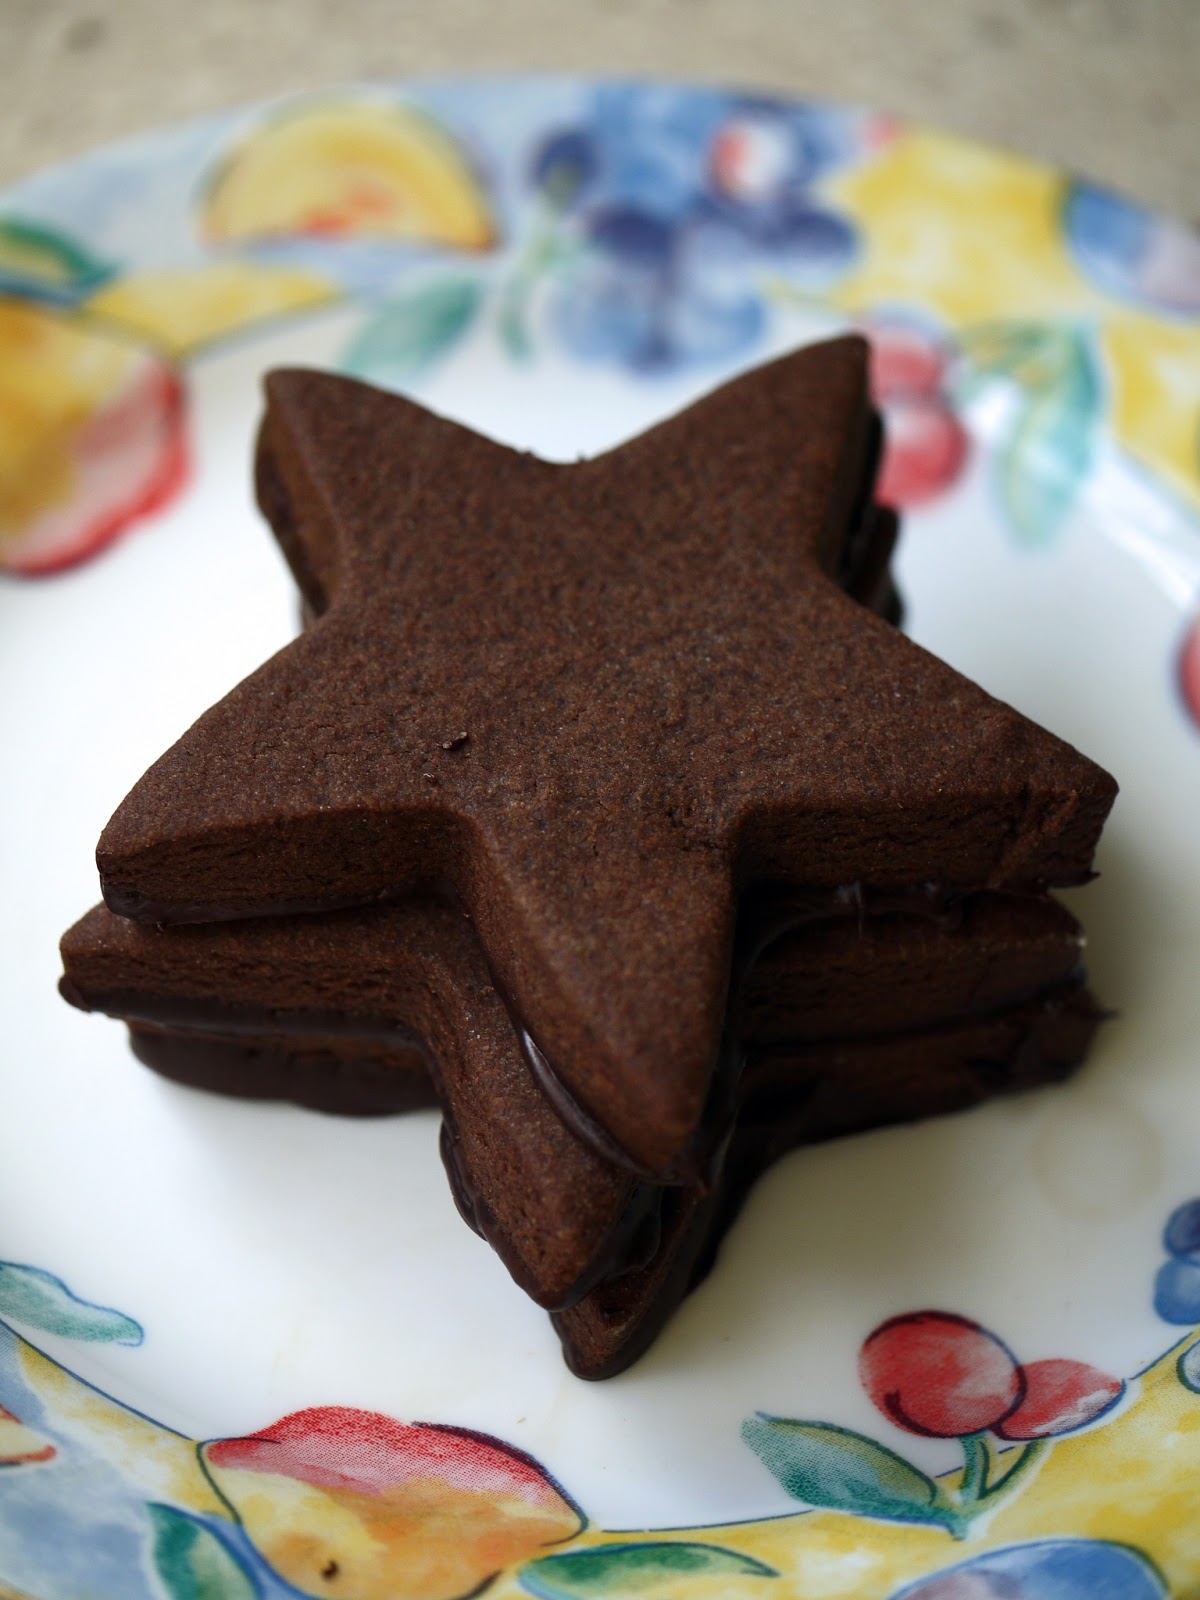
If you're wondering about the cookies...they're just as chocolaty as they look! Sort of a soft sable or shortbread but intensely and unabashedly filled with chocolate flavor. Crumbled over vanilla ice cream, it's practially perfect.

Here's the steak recipe, and links to the other dishes!

Grean Bean Salad with Pickled Shallots
World Peace Cookies

Marinated Flank Steak with Red Wine Sauteed Mushrooms
Yield: enough for 4 people

Ingredients:

  • 1/4 cup vegetable oil
  • 1/2 cup dry red wine
  • 1/4 cup soy sauce
  • 2 tablespoons red wine vinegar
  • 1 tablespoon Worcestershire sauce
  • 1 tablespoon dijon/grainy mustard
  • 1 tablespoon fresh thyme leaves
  • 1 1/2 - 2 pounds flank steak (I threw in a strip steak as well since I was worried there wouldn't be enough, but there was plenty)
  • 12 ounces assorted mushrooms, torn or cut into large pieces
  • 1 tablespoon olive oil
  • 6 tablespoons butter, divided
  • 3 garlic cloves, lightly crushed
  • 1 6" sprig rosemary
  • 1 cup dry red wine
  • 3/4 cup low-salt chicken stock
Method
  1. Combine first 7 ingredients in a dish large enough to hold the steak, and whisk together. Place steak in marinade, poke all over with a fork, and flip to coat. Marinate in fridge for 1-3 hours, slightly longer if needed.
  2. Melt 2 tablespoons of butter in a large skillet over medium high heat. Add the mushrooms and season with a bit of salt. Stir to coat with the butter and continue to cooking, stirring so mushrooms cook evenly, for about 7 minutes, or until golden brown and smelling heavenly. Transfer to a bowl and set aside.
  3. Melt 1 tablespoon of butter with a tablespoon of oil in the same skillet. Add the garlic and rosemary to skillet and move to the edges, then remove the steak from the marinade and place in skillet. Cook for about 3 minutes per side. Depending on the thickness of your meat and how you like it done, you can then put it in a 350 degree oven for an additional 5-10 minutes to finish cooking to your liking. Just check the inside with a small knife, but be aware that the meat will continue to cook a bit as it rests. Once done, remove and tent with foil. 
  4. Pour off all but a tablespoon of the oil, then deglaze with the red wine, scraping the bottom of the pan to get all of the delicious browned bits up and in the sauce. Reduce to 3/4 cup, then strain out any burned solid bits and return the liquid to the pan. Add the stock and reduce to 1/2 cup. Whisk in a knob of butter, then add the mushrooms back into the sauce and stir to reheat and coat. Taste for seasoning and add salt and pepper if needed.
  5. Slice the steak thinly against the grain and serve with mushroom sauce on top.
Recipe frankensteined from: epicurious and Emeril Lagasse

Saturday, August 2, 2014

Cakey Frosted Sugar Cookies


CELEBRATE! good times come on! We're gonna celebrate and have a good time.

Soundtrack of my youth! This was definitely that song they played at our school field day and stuff in elementary school. Good times.

Elementary school also had birthdays and sprinkles and all of that room mom rotation stuff. I remember one year, my dad sent me in with a loaf or two of homemade bread (we used to always have homemade bread from our bread machine and never bought it!) and apple slices. And everyone loved it!


Obviously we have always known the wisdom of carbs.

Okay, so enough tempting with these pictures and no explanation. No, I did not go to my nearest Jewel and get a package of those gloriously soft and white cookies with plasticky, melt in your mouth frosting and sprinkles. Nope, that would be too much work.

And not enough butter. [though, sidenote, this recipe actually has a surprisingly small amount of butter considering that there are cookies and frosting--less than two sticks in the batch].

So I made them at home! Honestly, they are eerily similar to the ones in the store, except a bit more "real." Really soft cookies, delicious frosting that gets a nice little crunchiness from drying out and setting just a teensy bit. And of course, party sprinkles! Some of the cookies got dinosaur sprinkles, but of course those were all gone before I got around to taking pictures (of the last 4 cookies remaining!).


The beautiful orchid (which actually was on sale at Jewel!) makes a great backdrop for these ever so sophisticated cookies, right? ha.


Have a cookie!

Since I didn't change much in this recipe, I'll just link to the recipe I used, from Cooking Classy. The only changes I made were to leave out the almond extract and use green and yellow food coloring instead of red! I picked it because it seemed like the vigorous whipping of butter and sugar, cake flour/cornstarch, and extra egg white would help the cookies be appropriately cakey, and we had all of the ingredients on hand.

If you'd like to experiment with other recipes, this post has a bunch of links to different recipes for these kinds of cookies. I'm sure you can find one that fits what you have on hand in your kitchen! Enjoy.

Saturday, July 19, 2014

Cherry Chocolate Almond Cookie Bars

As the title states, these are bar cookies with cherries, chocolate, and almonds. A winning combination.

The base is a buttery shortbread with chopped dried cherries mixed into it. Then, when the bars come out of the oven, you immediately scatter chocolate chips over the hot cookie slab, wait a couple of minutes for them to melt, then spread to coat. A final shower of chopped, toasted almonds puts the cherry on top.
wait, but the cherry is on the bottom...
Anyway, the point is that these are dead simple, even though they look and taste fancy!

They also stay fresh, since they're just shortbread, for over a week in an airtight container, and are quite sturdy, so they would be a great cookie to send in the mail. I'm looking at you, holiday season!


[P.S. I burned some of the almonds I was toasting for these bars. wah wah. I also pretty majorly burned half of the granola I made earlier this week, so here's hoping I don't burn the next recipe (or undercook it, which I often seem to do too)...there's such a narrow window of success, and when it's not quite as obvious as a cake tester or browning, it's hard to know when something is done!]

This weekend is simply gorgeous in Chicago--sunny and warm with a cool breeze by the lake--so we went up to the Chicago Botanic Gardens on our bikes. It's so lovely there and they've got an amazing collection. I always love the rose garden, since the smells are as varied as the flowers themselves!


And a shout out to my mom, who is showing some of her plants at the Bromeliad show happening this weekend! If you're in the area and have some free time, I'd highly recommend going by and seeing the wonderful plants on show. They partner with the Cactus and Succulent society, so there is a lot to see, and all of them really unique!

Enjoy the day!

Cherry Chocolate Almond Cookie Bars
Yield: about 20 bars

Ingredients:
  • 2 1/2 cups (12 1/2 ounces) flour
  • 3/4 cup (5 1/2 ounces) superfine sugar, or sugar processed in a food processor for 30 seconds
  • 1/4 teaspoon salt
  • 16 tablespoons (2 sticks) unsalted butter, slightly softened, cut into half inch pieces
  • 2 teaspoons vanilla extract
  • 2 tablespoons (1/4 of an 8 ounce package) cream cheese, room temperature
  • 1 cup dried cherries, chopped*
  • 1 1/2 cups semisweet chocolate chips
  • 1 1/2 cups toasted, chopped almonds (or any other nut you like!)
Method
  1. Preheat oven to 375 degrees Fahrenheit. Line an 18x12 inch rimmed baking sheet with parchment, or foil sprayed with nonstick spray.
  2. In a large bowl with an electric mixer, briefly combine the flour, sugar, cherries, and salt at low speed, just to mix well. Add the butter one piece at a time with the mixer running, slowly incorporating it into the dry ingredients. Keep mixing until the dough holds together when squeezed and looks crumbly. 
  3. Add vanilla and cream cheese and mix on low speed until the mixture just starts to come together in large clumps. Knead a few times in the bowl to finish mixing, then turn onto your prepared baking sheet and press into an even layer.
  4. Bake bars for about 20 minutes or until golden brown. Immediately upon removing the pan from the oven, sprinkle with the chocolate chips and let sit for 3 minutes to let the chocolate melt. 
  5. Spread the melted chocolate evenly over the surface of the bars, then top with the almonds (or nut of your choice). Let cool completely before cutting into diamonds.
Cookies keep well in an airtight container for a week or longer.

Adapted ever so slightly from Baking Illustrated.

*Buyer beware: Craisins has a cherry dried fruit product that would seem to be dried cherries, but it's actually dried cranberries flavored with cherry juice. The dried cherries I got were from Sunmaid, and there wasn't quite a full cup in the bag but it was totally fine!

Monday, December 30, 2013

Butterscotch Pudding Chocolate Chip Cookies

I've been wanting to try making pudding cookies forever. Maria over at two peas & their pod has a slew of recipes and she swears they make them chewy for days.

She's not kidding! They're some of the softest, chewiest cookies I've had without any of that gooey raw-ness of some chewy cookies that are chewy by virtue of a short baking time. Not that that's bad, just different--these are soft but cooked, and the butterscotch lends lovely caramely notes to the dough without being overpowering.


I put regular tollhouse chips in these, not fancy chocolate, because they seemed a bit more...well, homey...that way. There's pudding mix in these! Not a flake of sea salt on top (though it would be a nice addition, now that I think about it!), not a 60% cacao product, not a European butter, not a 5 inch diameter perfectly round form in sight. These are cookies to eat with milk, and they're comforting in their unassuming humble appearance.


In the original recipe, white and butterscotch chips are also used, and I think the butterscotch flavor would really be highlighted and heightened with those additions, though as a plain chocolate chip cookie these are fabulous. Other variations using vanilla, white chocolate, banana creme, lemon, or Oreo flavor puddings would also be delicious, and two peas has plenty of varieties on their site. Crush some banana chips or Oreos and pair with their corresponding pudding, or add dried cranberries to a dough made with lemon pudding. The world of pudding cookies is your oyster and I promise this isn't the last time I'll be making a batch!


Don't wait to get your hands on some of these--they'll steal your heart like they stole mine.

Butterscotch Pudding Chocolate Chip Cookies
Yield: about 3 1/2 dozen

Ingredients:
  • 1 cup (2 sticks) unsalted butter, softened
  • 3/4 cup (5.25 oz) brown sugar
  • 1/4 cup (1.75 oz) granulated sugar
  • 1 (3.4 oz) package butterscotch pudding mix
  • 2 large eggs
  • 1 teaspoon vanilla extract
  • 2 1/2 cups (12.5 oz) all-purpose flour
  • 1 teaspoon baking soda
  • 1/2 teaspoon salt
  • 2 1/2 cups semi-sweet chocolate chips (or whatever add-ins you like!)
Method:

  1. Preheat oven to 350 degrees F. Line a baking sheet with parchment paper or a baking mat or foil and non-stick spray and set aside.
  2. In a medium bowl, whisk together the flour, baking soda, and salt. 
  3. In a mixer, beat together butter and sugars until creamy. Add in butterscotch pudding mix, eggs, and vanilla extract and mix to combine. 
  4. Add the dry ingredients to the wet ingredients and mix until just combined. Finally, add the chocolate chips (and/or other add-ins).
  5. Drop cookie dough by rounded tablespoons onto prepared baking sheet. Bake for 10 minutes, or until slightly golden around the edges and set. 
  6. Remove cookies from oven and let cool on baking sheet for two minutes. Transfer to a cooling rack and cool completely.
Cookies will keep well in an air-tight container, thanks to the pudding (I think the preservatives in the mix help), for about a week, though they may dry out a bit and not be quite as soft.

Recipe adapted from two peas & their pod.

Monday, December 2, 2013

Brownie Cut-Out Lintzer Cookies with Peanut Butter Cream Cheese Filling

These cookies are incredible. Like peanut butter oreos, but soft and chewy and more chocolatey.


Well, I admit this is not really a new recipe. The cookie dough is the same as in the Brownie Cut-OutCookies, but rolled thinner and cut to have the hole in the top that characterizes linzer cookies. Don't worry though--unlike most cut-out cookies, these are baked only until still soft and barely set, and their deep chocolate flavor (courtesy of dutch-process cocoa powder) belies the vanilla tradition of their sometimes hard and bland cookie kin.

You could certainly just cut two circles to make a normal sandwich cookie, but it's a beautiful and festive addition (subtraction?) to cut a little hole in the top cookie. I had linzer cutters that cut the circle and the star at the same time, but you could use a very small circle or cut a diamond with a knife. They would look beautiful this way on a holiday cookie platter.


Let's talk frosting for a minute. Joy put out a cookbook about a year ago, and she has several pages devoted to cream cheese frosting. I am so on board! The cheesieness keeps the frosting from being sickly sweet and the texture makes the frosting incomparably smooth. I only used half of her recipe (which frosts 24 cupcakes or a whole two layer round cake or a whole 9x13 sheet cake) and it was the perfect amount.

Given that the frosting is less stiff than oreo creme filling, the cookies benefit from refrigeration to firm everything up. Once chilled, the filling holds its own against the cookies and doesn't sploosh out the sides when you bite into it.


Love love love these. A bit of labor, but not that bad. This dough is seriously so easy to work with that rolling it out is a pleasure.

See recipe for Brownie Cut-Out Cookies

Roll about 1/8" thick and bake for 8 minutes, turning halfway through. Let cool on sheets for a few minutes, then transfer to wire racks to finish cooling

Peanut Butter Cream Cheese Frosting
Frosts 1 batch of cookies above in sandwiches, or double for 24 cupcakes, a round layer cake, or a 9x13 sheet cake!

Ingredients:


  • 4 oz (half a package) cream cheese, softened -- I used Neufchatel
  • 1/4 cup (1/2 stick) butter, softened
  • 1/4 cup smooth peanut butter (eyeball if you can, measuring peanut butter is a pain)
  • Pinch salt
  • 1 cup powdered sugar
  • 1 teaspoon vanilla extract

Method:


  1. Using a stand or hand held mixer, beat cream cheese alone, ensuring it's soft. Add butter and beat to combine and soften (essential if, like me, you always forget to soften the butter).
  2. Add peanut butter and salt, beat to combine. Then, slowly and carefully add the powdered sugar and beat on low to combine. Add vanilla, mix to combine, then beat the whole mixture on medium/high speed to aerate.
  3. Frost cookies above with about a teaspoon or so of frosting per sandwich. The back of a butter knife is a good tool for this. 


Eat up! Holiday cookies are coming!

Recipe for frosting from the Joy the Baker Cookbook

Tuesday, October 29, 2013

Pumpkin Whoopie Pies with Cream Cheese Frosting

Hey fall. It's been a beautiful time. I see you sneaking out that door, and letting the cold air in behind you.

But I don't even care. We had so many amazing weeks of 60s and 70s together that all I can think of is the phrase "if you love it let it go, and if it's meant to be, it'll come back."


And that's how I feel about fall. Pumpkin, apples, spices, warm socks, the heat finally coming on in my dorm room (praise be!), leaves changing color, coats, scarves, and crisp air blowing through my hair.

I took this picture on a recent hike with some friends, at the Ward Pound Ridge Reservation in New York. The sunlight was unreal, and we had a great time. It was fall break, so my acappella group (shout out to Redhot & Blue!) took the chance to do some gigs near campus, and took some time to do fun things like this hike.


And, on my day off, I baked! Oh the glory. It's so complicated here, where a trip to the grocery store requires either a car, tons of planning around their once-weekly shuttle, or a 20 minute walk through some sketchy areas (which you'd better do with a friend at 3pm). I took the car route, and being able to bake was so worth it.


I realized, pumpkin is so good because it has a particular kind of starch-moisture combination that you just don't get with flour and eggs. Or banana--I also made granola with some banana and some pumpkin, and pumpkin definitely helps it clump together and stay that way, with it's long fibers!


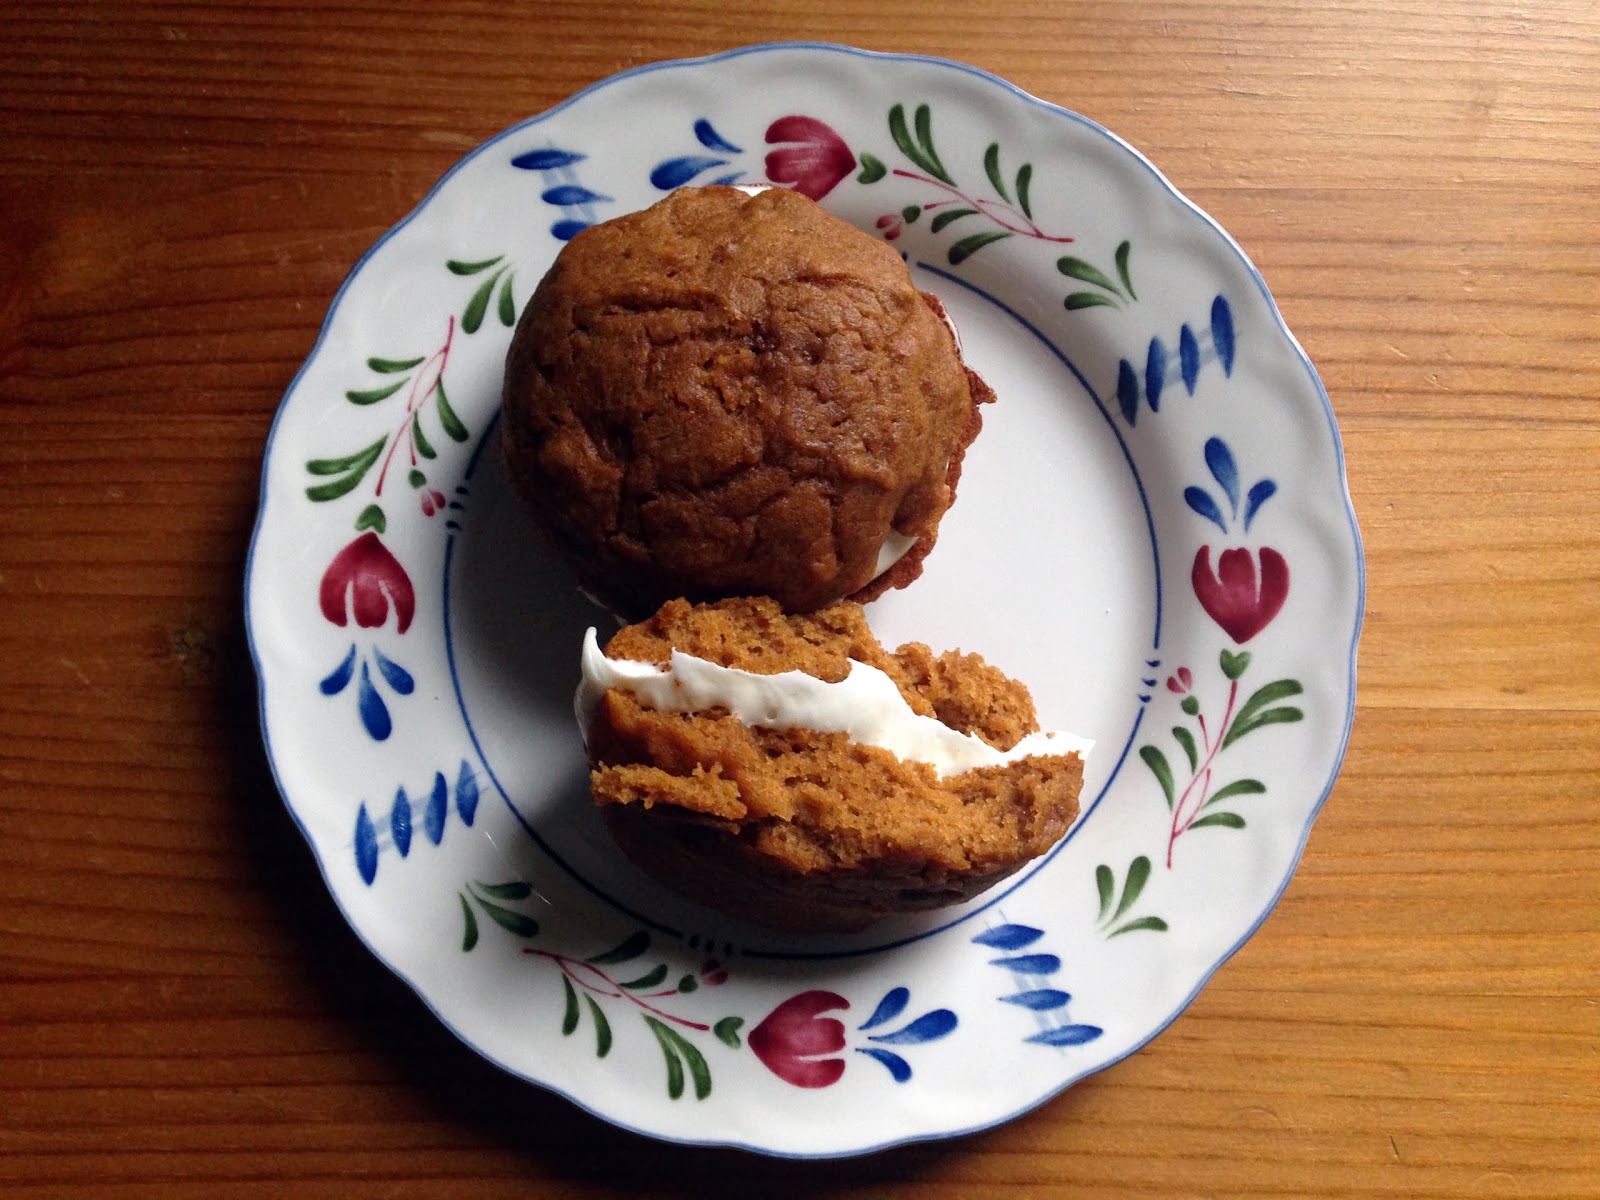
So, we get whoopie pies. Luscious, mounds of cakey pumpkin cookie, heavily spiced and smashed together with creamy, dreamy, tangy cream cheese frosting. It's like muffin tops (the ones at a certain chain bakery, not the ones around your hips!), except cupcake tops and sandwiched with frosting.

It's amazing. Believe in the power of pumpkin. I'd totally stay with Linus to wait for the Great Pumpkin on Halloween!


Pumpkin Whoopie Pies with Cream Cheese Frosting
Yield: about 2 dozen

Ingredients:
For the cookies:

  • 3 cups all-purpose flour
  • 2 tablespoons cinnamon
  • 1 teaspoon baking powder
  • 1 teaspoon baking soda
  • 1 teaspoon salt
  • 1 teaspoon ground ginger
  • ½ teaspoon ground nutmeg
  • 1 cup granulated sugar
  • 1 cup dark brown sugar
  • 1 cup canola or vegetable oil
  • 3 cups pumpkin puree
  • 2 eggs
  • 1 teaspoon vanilla extract
For the frosting:
  • 3 cups powdered sugar
  • 8 ounces cream cheese, at room temperature
  • 4 ounces (½ cup) unsalted butter, at room temperature
  • 1 teaspoon vanilla extract
Method:
  1. Preheat oven to 350 degrees F. Line baking sheets with parchment paper/silicone/grease.
  2. In a large bowl, whisk together flour, cinnamon, baking powder, baking soda, salt, ginger and nutmeg.
  3. In another bowl, whisk granulated sugar, dark brown sugar, and oil together. Add pumpkin puree and whisk to combine thoroughly. Add eggs and vanilla and whisk until combined.
  4. Gradually add flour mixture to pumpkin mixture and whisk until just combined.
  5. Drop big spoonfuls of batter onto baking sheet, about 2 inches apart (probably about 2 tablespoonfuls).
  6. Bake for 10 to 12 minutes, or until a toothpick inserted into the center of a cookie comes out clean. Let the cookies cool completely before assembly.
  7. To make the frosting, beat butter on medium speed until smooth with no visible lumps. Add the cream cheese and beat until smooth and combined (times will vary depending on your room temperature and if you actually remembered to take out the butter and cream cheese in advance). Add the powdered sugar a little at a time, beating smooth with each addition. Finally, add the vanilla extract.
  8. Assembly: dollop about a tablespoon or more (depending on the size of the cookie) of frosting onto a cookie, then top with another, making a sandwich. Refrigerate 30 mins to set.
Recipe adapted from Brown Eyed Baker, who got it from a friend but also discovered it's an adaptation from the book Baked: New Frontiers in Baking.

P.S. Anyone know a way to prevent the outsides of the cookies from getting soggy in the fridge? Mine softened up and got all sticky after just a few hours!

Wednesday, July 24, 2013

Gibassié et Truffles au Chocolat

Another fun cooking class with Hélène!


This time we made Gibassié, a Provençal dessert traditional to Christmas.


There's a ton of tradition surrounding the Christmas meals and table decorations in Provence: there are three meals, at the second they eat a little bit of each of thirteen desserts, and  there are three candles and three tablecloths, one of which is removed/blown out after each meal, so by the last one there is one candle lit and one tablecloth.


Gibassié is one of the thirteen desserts, and it's a crumbly cookie (sort of like a hard scone) in a circle with the rays of the sun patterning the top.


It's a sort of sable dough made with star anise, orange blossom water, and olive oil, and it is so delicious. A ton of flavors that go well together, and I don't even usually like anise.


The other recipe we made is also traditional to Christmas: chocolate truffles. Kids love to make these, since there's plenty of rolling and coating involved.


You can make truffles by simply making a stiff ganache, but here there's an egg yolk, added sugar, and butter (we also added some Grand Marnier), which does not decrease the chocolate flavor (there's still a ton of chocolate) but does add a lovely soft texture and butteriness.


Ours was a bit grainy, but I think sifting the powdered sugar as we gradually added it would have helped with that, so I've changed the recipe accordingly.


Enjoy a Provençal Christmas, in July!

Gibassié

Ingredients:

  • 500 g flour
  • 150 g granulated sugar
  • 15 cL (what is this system? That means half a cup plus two tablespoons) olive oil, plus more if needed
  • 3-4 tablespoons orange blossom water
  • 3-4 tablespoons star anise seeds

Method:

  1. Mix the flour and sugar. Add the orange blossom water and olive oil and mix.
  2. Add the anise seeds, mix. The dough should start to come together like a sable cookie, if not, add some more orange blossom water. Then some more oil, adding both bit by bit until the dough just comes together.
  3. Form into a disk, and pierce the top like rays of sun into as many pieces as you have people who will be eating.
  4. Bake at 180 degrees C (350 degrees F) for 20 minutes. Let cool, then cut on the rays (It will crumble. Let it.).

Truffles au Chocolat

Ingredients:

  • 150 g dark chocolate
  • 50 g butter
  • 1 egg yolk
  • 2 tablespoons heavy cream
  • 60 g icing/confectioners/powdered sugar
  • 1 tablespoon alcohol (optional)
  • 125 g (about) cocoa powder, for rolling
Method:
  1. Melt the chocolate over low heat in a single layer
  2. Add the butter, egg yolk, and cream, stirring to combine. Then, add the sugar, sifting into the bowl and mixing as you go to avoid lumps. Add alcohol and stir.
  3. Refrigerate filling for 2 hours.
  4. Roll into little balls, then roll in the cocoa powder (a "parisian scoop," or tiny melon baller, works great for this).
Recipes courtesy of Hélène Biesse.

Monday, July 15, 2013

Brown Butter Oatmeal Raisin Peanut Cookies

I'm here in France, and I'd really like to share all of the quintessentially american recipes I know with my host family!


Problem is, peanut butter doesn't exist in this country. I mean, it exists, but it's either smuggled from the states or it's "puree of peanuts" found in health food stores only. Not Jif, not Skippy, not Peter Pan.

And I love making cookies for them--my host brother is 9 and loves cookies (in his accent, cOOkees). These are awesome. Soft and nutty from brown butter, hearty from oats. Sweet and just a tad juicy from the raisins, and the peanuts add a bit of the flavor of a peanut cookie and some much needed crunch.


It's like GORP and an oatmeal cookie, mashed up.

The only problem is that it's not exactly the smartest thing to do to turn on your oven in the height of summer in the south of France. So worth the sweat.


P.S. You could halve the recipe, but why would you want to do that? They freeze well, and I think the dough would also freeze well!

Brown Butter Oatmeal Raisin Peanut Cookies
yield: 30-40 substantial cookies

Ingredients:

  • 1 cup unsalted butter
  • 1 cup granulated sugar
  • 1 cup loosely packed brown sugar (2/3 cup white sugar and a couple of tablespoons of caramel sauce for me, since molasses is hard to find here too!)
  • 2 large egg
  • 1 tablespoon vanilla extract
  • 2 1/2 cup all-purpose flour
  • 1 1/2 cups rolled oats
  • 1/2 teaspoon salt
  • 1 teaspoon baking powder
  • 2 teaspoons cinnamon
  • 1 1/2 cups raisins
  • 1 1/2 cups roasted, salted peanuts
Method:
  1. Heat a small saucepan over medium-low heat and add butter. Whisking constantly, cook butter until bubbly (most of the water has evaporated) and until small brown bits appear on the bottom of the pan – about 5-6 minutes. The brown bits are caramelized milk solids! Watch closely and immediately remove the butter from the heat, whisking for an additional 30 seconds or so. Set aside and let cool  (or put it in the fridge for a while).
  2. In a bowl, combine flour, salt, baking powder, oats and cinnamon, mixing, then set aside.
  3. Once butter has cooled, add to a large bowl. Whisk in sugars, stirring until smooth. Add in egg and vanilla, whisking until smooth once again. Slowly begin to stir in dry ingredients. Fold in raisins and peanuts, distributing them (as) evenly (as possible). Refrigerate dough for 30 minutes or more.
  4. Preheat oven to 375 degrees F. Using an ice cream scoop or your hands, form dough into 1 1/2 inch balls. Place about 2 inches apart on a nonstick baking sheet, then bake for 10-12 minutes, or until bottoms and edges are golden. Between batches, put your baking sheets in the freezer for 5 minutes or so to minimize spreading in the hot summer months! Keep the cookies thick and chewy, just chill it out.
Recipe adapted (and doubled) from How Sweet It Is.

            Friday, March 22, 2013

            Brownie Cut-Out Cookies

            These cookies are pretty amazing.


            Remember how I found a peanut butter cookie for all occasions? This is the chocolate equivalent, except different. It's a cut out cookie (I know, what a pain, right? Except not, this dough is as easy as drop cookies and really easy to work with) but can serve as a base for ice cream sandwiches, soft oreos, royal icing, a dusting of powdered sugar, or a dunk in chocolate. And they're fantastic plain too...the chocolate flavor shines right through.

            They're chocolaty. Simple. Dough in the amount of time it takes to measure ingredients. Roll 'em thick for chewy cookies.


            You're a star if you make stars!

            I wanted to make a project of this batch, since I'm home for break and have the time to bake, so I dipped the bottom in tempered chocolate. This time, I used the seed method, which means (in a nutshell), microwaving the chocolate until just all melted, then stirring in chopped chocolate until it gets down to about 90 degrees (curtesy of Baking Bites). It was slightly easier than the method I used for the peanut butter cup truffles.

            Which by the way would be delicious in an Easter basket!


            But I digress. Tempering chocolate is the opposite of making these cookies...it's hard, lengthy, messy, and fussy. The result, though, is amazing--chocolate which doesn't need to be refrigerated and keeps a hard, glossy coat.
            Use good chocolate bars. Don't be me and use chips. It won't work as well...the chocolate still tempered, but it was slightly grainy from the preservatives and stuff they put in to make the chocolate stay melty in your fresh-out-of-the-oven chocolate chip cookies.

            Really, these cookies live to serve your higher purpose. Rolled slightly thinner and sandwiched with ice cream, they're a great ice cream sandwich (I did this, except minus the rolling out thinner part, with the leftover cookies which didn't get a chocolate coating...it's pretty dang amazing). Cut into hearts for valentine's day, plain circles for lunchboxes, ruffled edges for tea parties. I bet if you added mint, they'd be like thin mints.
            It's the Burger King of cookies...have it your way.


            Brownie Cut-Out Cookies
            Yield: 3  dozen-ish...depends on how big you make them!

            Ingredients:
            • 3 cups all-purpose flour
            • 1/2 teaspoon salt
            • 1/2 teaspoon baking powder
            • 1 cup butter, softened (I'd love to see how these turn out if you melt the butter! Could be even chewier and brownie-er)
            • 1 cup granulated sugar
            • 1/2 cup brown sugar
            • 2 large eggs
            • 1 teaspoon vanilla extract
            • 1 tablespoon espresso powder
            • 2/3 cup unsweetened cocoa (I used dutch process, but Deb says you can use either; you'll just get a different flavor)
            Method:
            1. Preheat oven at 350 degrees (325 if using convection). Line two baking sheets with parchment, silpat, foil and a bit of baking spray, what have you.
            2. Whisk flour, salt and baking powder in bowl and set aside. 
            3. Mix butter, sugars, eggs, vanilla, espresso, and cocoa in mixer (if your butter isn't fully softened, whip it around a bit by itself first to loosen it up, so you don't end up over-mixing the eggs to get butter chunks smoothed out later). 
            4. Gradually add flour mixture, and mix until smooth. 
            5. Split dough and wrap in plastic in two disks. Chill for about one hour, longer if you have time. 
            6. Roll out cookie dough on floured counter, 1/4 inch for thicker, softer cookies or 1/8 inch for thinner cookies, good if you're making ice cream sandwiches or like cookies a bit crisper. Cut into desired shapes, brushing extra deposits of flour off the top. 
            7. Bake on a parchment-lined baking sheet for 8 to 11 minutes (the former for 1/8-inch thick cookies, the latter for 1/4-inch cookies) until the edges are firm and the centers are slightly soft and puffed. Transfer to a wire rack to cool.
            Recipe courtesy of Smitten Kitchen (it was originally Deb's mom's recipe!)

            Monday, December 31, 2012

            Chewy Peanut Butter Chocolate Chip Cookies

            I have found it. The peanut butter cookie.


            Not surprisingly, it comes from America's Test Kitchen. I swear, there isn't a dud recipe comes out of that organization...probably because they test the recipes to extreme perfection.


            This is the peanut butter cookie which is chewy and peanut buttery, not crumbly or dry or cakey or bland. The one which will hold its own sans add-ins or graciously welcome chocolate (or other kinds of) chips, coconut flakes, dried fruit, chopped nuts, oreo crumbles, seeds, etc.

            I am so excited about this recipe. Cannot wait to make it again and add something new. They're so unctuous and hearty and unapologetically good. My brother kept going back for more when he was home!


            Oh, and also? Happy New Year! It's been a great year meeting new people, figuring out how to bake at school, and learning what's fun to eat in the dining hall. It's my 50th post on this blog, too! So much new knowledge and wisdom this year, and yet I know it's only a fraction of what's to come.

            Bring it, 2013. I'm ready.


            Chewy Peanut Butter Chocolate Chip Cookies
            Yield: about 4 dozen cookies


            Ingredients:

            • 1 1/2 cups (7.5 oz) all-purpose flour
            • 1 teaspoon baking soda
            • 1/2 teaspoon salt
            • 1 1/4 cups (~11 oz) creamy peanut butter  (processed is best, and you could instead do 1 1/2 cups chunky peanut butter if you want peanut chunks in there!)
            • 3/4 cup (5 1/4 oz) packed light brown sugar
            • 8 tablespoons (1 stick) unsalted butter, melted and cooled slightly
            • 1/2 cup (5 7/8 oz) light corn syrup
            • 1/4 cup (1 1/4 oz) granulated sugar
            • 1 large egg plus 1 egg yolk
            • 1 teaspoon vanilla extract
            • 4 big handfulls (2 cups?) chocolate chips

            Method:

            1. Combine flour, baking soda, and salt in medium bowl. Whisk peanut butter, brown sugar, butter, corn syrup, granulated sugar, egg, yolk, and vanilla until smooth. Stir in flour mixture until just combined. Divide dough in half, wrap with plastic wrap, and refrigerate until firm, about 1 hour.
            2. Adjust oven racks to upper-middle and lower-middle positions and heat oven to 350 degrees. Line 2 baking sheets with parchment paper. Scoop dough by the heaping tablespoon and shape as with chocolate chip cookies, breaking in half and smooshing together to make a craggy surface.
            3. Bake cookies until puffed and edges are lightly browned, 12 to 14 minutes, switching and rotating sheets halfway through baking. Cool 5 minutes on sheets, then transfer to wire rack to cool completely. Cookies can be stored in airtight container for 3 days, if they last.
            Note: dough can be frozen in balls and baked straight from the freezer whenever you want fresh cookies! Just add a minute or two to the baking time. 

            Recipe from Cook's Country.