Showing posts with label fancy. Show all posts

Wednesday, November 30, 2016

Chocolate Bundt Cake with Ganache Frosting

Ooooh chocolate cake.
Ooooooooh bundt.
Ooooooooooohhh baby.


This is a delicious, moist, decadent cake complete with ganache. Ganache is a fancy word for the laziest frosting made with two of the most delicious manmade compounds, cream and chocolate. 


Our ganache had a smidge too much cream, so it was a bit runny, but we made up for that by warming up extra and pouring it over our slices. No harm, no foul.


The cake is lovely--deeply chocolatey, spongey, not too sweet. A perfect pairing for the rich ganache. I love the ridges provided by the bundt pan...it looks so fancy!


All in all, it's a delicious cake for chocolate-lovers, and just might convert some not-so chocolate lovers too.


Oh yes, I forgot to mention...it's fussy. It calls for buttermilk and fancy cocoa (though cocoa is really usually okay if you switch it out, just a different result), separated eggs, brewed coffee, awkward measurements, yadda yadda. The original recipe even calls for sifting the flour, but ain't nobody got time for that. I promise, it's worth (most of) the trouble :).

Chocolate Bundt Cake with Ganache Frosting
Yield: a bundt cake, what do you think??

Ingredients:

cake:
  • 1 1/4 cups plus 1 Tablespoon brewed coffee
  • 3/4 cup (Dutch process prefered, Hershey's if you can't find anything else!) cocoa powder
  • 2 1/4 cups sugar
  • 1 1/4 teaspoons kosher salt
  • 2 1/2 teaspoons baking soda
  • 2 whole eggs
  • 1 egg yolk
  • 1 1/4 cups plus 1 Tablespoon buttermilk
  • 1 cup plus 2 Tablespoon canola oil
  • 1 1/2 teaspoons vanilla extract
  • 2 1/2 cups, plus 2 Tablespoons all-purpose flour (whisk it up for a bit to aerate, or sift if you'd like)
ganache:
  • 10 ounces chocolate (chips are okay but block chocolate is better)
  • 6 ounces (3/4 cup) cream
  • ^note that I changed the ratio from 8:8 to 10:6 in order to account for the fact that ours was too thin 
Method:
  1. Preheat the oven to 350 F and move the rack to the middle position. Grease and flour a 10-inch bundt pan.
  2. Boil coffee and cocoa powder on the stove, or microwave the coffee until very hot and mix in the cocoa powder. The idea is to bloom the cocoa so it's aromatic compounds are activated in the hot liquid. Whisk carefully or risk getting cocoa powder all over yourself! Set aside to cool.
  3. Using a stand mixer, hand mixer, or strong arm, whisk sugar, salt, baking soda, eggs and egg yolk until combined. Then, add the buttermilk, oil, and vanilla, and whisk again until fully combined. 
  4. Mix in flour for 2 minutes, then add the coffee-cocoa mixture and mix another few minutes or so until your batter is thin, runny, and smooth. Pour into prepared pan and bake 1 hour or until a skewer comes out clean.
  5. When cake is done, cool in the pan until it reaches room temperature, then invert onto a plate.
  6. For the ganache: microwave or heat on stove the cream until just scalding (not boiling). Pour immediately over the chocolate chips in a medium bowl and let sit for about 1 minute. Then, stir to combine. If the chocolate is not entirely melted, microwave for short (15 sec) bursts until you are able to just combine the two. Aim for a smooth, homogeneous, glossy mixture. 
  7. Let cool on the counter about 20 minutes, then spread over cooled cake. Extra ganache makes delicious hot fudge sauce for ice cream, if there's any left!
Video of stirring ganache, one of those weirdly meditative things to watch...


Adapted from Joy the Baker

Friday, August 19, 2016

Lemon Bar Tart

We do not have a 9 inch pan, we do not have it, Sam I am.


We do not like them in a square, it's so passé I wouldn't dare.


A round pan works, 'cuz in a pinch, you just pull out your bag of tricks.


Like cutting bars in the form of a kite, or sifting powdered sugar oh so white.


This tart, alas, dirties many a bowl, but the creamy custard's got me sold.


The crust's a very good bake, it's crisp for heaven's sake!


Lemon Bar Tart
Yield: One tart and one nibbling pan (4x4). Alternatively, a 9 inch square pan of traditional lemon bars.

Ingredients:

For the crust:

  • 1 1/4 cups (6 1/4 ounces) all-purpose flour
  • 1/2 cup (2 ounces) powdered sugar, plus more for decoration
  • 1/2 teaspoon kosher salt
  • 8 tablespoons softened unsalted butter, cut into 16 pieces
For the filling:
  • 7 large egg yolks
  • 2 large eggs
  • 1 cup + 2 tablespoons (7 7/8 ounces) granulated sugar
  • 2/3 cup lemon juice (2 1/2 lemons gave me more than enough, but you might need more if they're small or dry)
  • 1/4 cup lemon zest (I needed 4 lemons for this)
  • pinch salt
  • 4 tablespoons unsalted butter, cut into 4 pieces
  • 3 tablespoons heavy cream, cold
Method:
  1. Prepare the pans. If you're using a tart pan, butter the inside of the dish and disk, and butter a small, ~4x4 inch ramekin of some sort (this is for snacking, because the recipe is not designed for a tart pan!). If you're using a 9x9 inch pan, butter it and make a parchment or aluminum foil sling so it's easier to take them out of the pan.
  2. For the crust: In a food processor, pulse the flour, powdered sugar, and salt a couple of times to combine. Add the butter chunks and pulse a few more times until the mixture looks like crumbs. Press into prepared pans, going up the sides if you're using a tart pan. Chill in the refrigerator for 30 mins.
  3. Preheat oven to 350 degrees and position the rack in the middle of the oven. Bake crust for about 20 minutes, or until golden brown.
  4. While the crust is baking, prepare the filling: whisk eggs and sugar together in a medium saucepan. Add lemon juice, lemon zest, and salt and whisk again to combine. Add butter and cook over medium-low heat until the mixture reaches 170 degrees F, or until it thickens significantly (you'll feel it).
  5. Strain custard into a medium sized bowl, then stir in the cold cream. Pour directly into the hot crusts and bake again for 10-12 minutes, or until the filling still jiggles a bit.
  6. Cool on wire racks to room temperature, about 45 minutes, before taking out of the pan and cutting. 
  7. *While it looks beautiful to sift powdered sugar over the whole tart, it won't last in the fridge overnight so just sift over the pieces you're going to serve (ignore the pictures above which I did for beauty's sake sifting over the whole thing). Keeps in the refrigerator a few days, but top will get wet. Just blot off the moisture, sift some sugar over the whole shebang, and serve!
Recipe from Baking Illustrated, modified for pan size.

Sunday, August 2, 2015

Caramelized Peach and Lavender Scones

This weekend I visited friends and had basically every sunny summery experience that tends to be curiously absent in foggy San Francisco (what's up, Karl?). My friend Caroline kindly lent me her air mattress to crash on, and when we woke up we mozyed over to whole foods and the farmer's market to get ingredients for breakfast.


I think you can tell a lot about a person by the type of eggs they buy. I'm a $3 egg kind of person, but all due respect to those who are $9 egg people. (again, hello SF). You can also tell a lot about a person by the way they like their eggs cooked...mostly I think I just really like runny yolks. But for some, it is strangely accurate.


Anyhow, we ate scrambled eggs with cheese while waiting for the peaches to roast for these scones. I'm not going to say the scones are quick to make, but they are fairly simple, and the complex, flowery, and fruity flavors are well worth the wait. Also, by the time they come out of the oven, you can count elevensies as brunch, breakfast, and lunch.

(P.S. Whole foods sells lavender in a little package for about $3...a price I was happy to pay over the $8 we were quoted at the farmer's market! Again, you can tell a lot about a person by their grocery shopping strategies and habits)

The recipe starts with three peaches, sliced and coated in olive oil and brown sugar. Good things are starting.


Then, butter is rubbed into the dry ingredients. It's my favorite part...get your hands in there! Then come the peaches, soft and caramelized, and buttermilk (or milk curdled with lemon juice, in our case). A gentle stir and slight bit of kneading, and then the dough is ready to form straight on the baking sheet.
This could be the same baking sheet as you used to cook the peaches.
Got that? One baking sheet, one bowl!

The scones are done pretty quickly, in 15 or so minutes, and then a glaze is made with a few leftover caramelized peach slices. These scones rocked my world! They're rich and almost cake-like, not too dry and crumbly, and full of summery peach flavor and sophisticated lavender. It's a treat...treatyoself!


Caramelized Peach and Lavender Scones
Yield: 8 big or 12-16 smaller scones

Ingredients:

  • 3 peaches, sliced
  • 2 tablespoons olive oil
  • 3 tablespoons brown sugar
  • 3 1/4 cups all-purpose flour
  • 1/3 cup sugar
  • 1 tablespoon culinary lavender
  • 2 1/2 teaspoons baking powder
  • 1/2 teaspoon baking soda
  • 1/2 teaspoon salt
  • 3/4 cups (1 1/2 sticks) cold unsalted butter, cut into cubes, or grate frozen butter on a box grater for easy handling!
  • 2/3 cup buttermilk (or milk with a scant tablespoon of lemon juice)
  • 2 teaspoons vanilla extract
  • milk or cream, for brushing and glazing
  • sugar (coarse if you have it), for sprinkling
  • 1 to 2 cups powdered sugar

Method:

  1. Preheat oven to 400 degrees F. Toss peaches with olive oil and brown sugar, then spread in a *rimmed* baking sheet or other baking pan with sides. Roast for 35 minutes, stirring halfway through. 
  2. Mix together all dry ingredients in a large bowl. Rub the butter into the dry ingredients with your fingertips (or your usual method) until chunks are about the size of peas. Toss in three quarters of the peach slices and stir to combine.
  3. Add buttermilk and vanilla extract, then stir until a soft dough forms. Near the end, reach in the bowl and knead a few times to help incorporate all the dry ingredients. Turn out onto a baking sheet, and either form into two smaller disks or one larger disk. Cut each disk into 6 or 8 slices and separate the scones from each other by pulling the wedges away from the center of the circle.
  4. Bake for 12-16 minutes (depending on size), in that same 400 degree oven, until golden brown around the edges. 
  5. To make the glaze, mash up the remaining peach slices with a tablespoon or so of milk. Slowly add powdered sugar until the consistency is to your liking, then smother the scones in glaze and chow down!
Recipe from How Sweet It Is.

Saturday, July 19, 2014

Cherry Chocolate Almond Cookie Bars

As the title states, these are bar cookies with cherries, chocolate, and almonds. A winning combination.

The base is a buttery shortbread with chopped dried cherries mixed into it. Then, when the bars come out of the oven, you immediately scatter chocolate chips over the hot cookie slab, wait a couple of minutes for them to melt, then spread to coat. A final shower of chopped, toasted almonds puts the cherry on top.
wait, but the cherry is on the bottom...
Anyway, the point is that these are dead simple, even though they look and taste fancy!

They also stay fresh, since they're just shortbread, for over a week in an airtight container, and are quite sturdy, so they would be a great cookie to send in the mail. I'm looking at you, holiday season!


[P.S. I burned some of the almonds I was toasting for these bars. wah wah. I also pretty majorly burned half of the granola I made earlier this week, so here's hoping I don't burn the next recipe (or undercook it, which I often seem to do too)...there's such a narrow window of success, and when it's not quite as obvious as a cake tester or browning, it's hard to know when something is done!]

This weekend is simply gorgeous in Chicago--sunny and warm with a cool breeze by the lake--so we went up to the Chicago Botanic Gardens on our bikes. It's so lovely there and they've got an amazing collection. I always love the rose garden, since the smells are as varied as the flowers themselves!


And a shout out to my mom, who is showing some of her plants at the Bromeliad show happening this weekend! If you're in the area and have some free time, I'd highly recommend going by and seeing the wonderful plants on show. They partner with the Cactus and Succulent society, so there is a lot to see, and all of them really unique!

Enjoy the day!

Cherry Chocolate Almond Cookie Bars
Yield: about 20 bars

Ingredients:
  • 2 1/2 cups (12 1/2 ounces) flour
  • 3/4 cup (5 1/2 ounces) superfine sugar, or sugar processed in a food processor for 30 seconds
  • 1/4 teaspoon salt
  • 16 tablespoons (2 sticks) unsalted butter, slightly softened, cut into half inch pieces
  • 2 teaspoons vanilla extract
  • 2 tablespoons (1/4 of an 8 ounce package) cream cheese, room temperature
  • 1 cup dried cherries, chopped*
  • 1 1/2 cups semisweet chocolate chips
  • 1 1/2 cups toasted, chopped almonds (or any other nut you like!)
Method
  1. Preheat oven to 375 degrees Fahrenheit. Line an 18x12 inch rimmed baking sheet with parchment, or foil sprayed with nonstick spray.
  2. In a large bowl with an electric mixer, briefly combine the flour, sugar, cherries, and salt at low speed, just to mix well. Add the butter one piece at a time with the mixer running, slowly incorporating it into the dry ingredients. Keep mixing until the dough holds together when squeezed and looks crumbly. 
  3. Add vanilla and cream cheese and mix on low speed until the mixture just starts to come together in large clumps. Knead a few times in the bowl to finish mixing, then turn onto your prepared baking sheet and press into an even layer.
  4. Bake bars for about 20 minutes or until golden brown. Immediately upon removing the pan from the oven, sprinkle with the chocolate chips and let sit for 3 minutes to let the chocolate melt. 
  5. Spread the melted chocolate evenly over the surface of the bars, then top with the almonds (or nut of your choice). Let cool completely before cutting into diamonds.
Cookies keep well in an airtight container for a week or longer.

Adapted ever so slightly from Baking Illustrated.

*Buyer beware: Craisins has a cherry dried fruit product that would seem to be dried cherries, but it's actually dried cranberries flavored with cherry juice. The dried cherries I got were from Sunmaid, and there wasn't quite a full cup in the bag but it was totally fine!

Monday, July 29, 2013

Madeleines au Citron et Crêpes Suzette

Another (the last) class with Hélène! There is no chocolate in this post. That sort of made me sad!
...but not that sad.


Because can we talk oranges? I love them. My dad's dad was a citrus farmer so we're into it at my house. Marmelade is such a good jam-like thing, because of the bitterness in the peel. It balances the sweetness the same way the bitterness of cocao balances the sweetness in chocolate.


Crêpes Suzette is a delicious dessert of crêpes with orange juice/zest caramel sauce and flambé-ed Grand Marnier.


I didn't really taste the alcohol (or what was left--all of the alcohol burns, so it's kid-friendly!) but the orange was out of this world. We melted granulated sugar, freshly squeezed orange juice, and all of the zest from both oranges to make a caramel, then dipped each crêpe.


It is a sticky situation. I was totally scraping my plate.

We also made Madeleines with lemon oil. Hélène swears by it, as opposed to lemon extract, because it has a much stronger flavor. But, be forewarned...too much essential oil is nasty. A little bit is heavenly!


These were amazing! The baking process is really interesting: you preheat to a hot temperature, immediately lower the temperature when you put the cakes in, then lower another two times in the process.


The heat-shock at the beginning of the cooking process allows the outer sides to attach to the mold and the middle to puff up dramatically, and the lower tempuratures allow the cakes to fully cook through without burning. It's a scientific miracle.

Butter the dish with your fingers...it's the most fun you'll have all day. Also, a nice coating of butter gives the outsides a lovely golden brown as if they were fried, but they're not too greasy. It's fantastic!


So yeah...not missing chocolate. That's the first time I think I've ever said that!


P.S. Also...none of these recipes have salt in them. I think if you want to add a pinch, it could help balance/intensify the sweetness!

Crêpes Suzette
Yield: probably around 12-16

Ingredients:

  • 250 g flour
  • 4 eggs
  • 1/2 liter milk (2 cups plus a tablespoon or so)
  • 5 tablespoons vanilla sugar (leave a vanilla pod in a bunch of sugar for about a week, or just use 5 tablespoons sugar and a teaspoon of vanilla extract)
  • 120 g sugar
  • 2 oranges, zested and juiced
  • Butter, to cook crepes
  • Grand Marnier (about 1 cup)
Method:


  1. Mix eggs and milk. Add vanilla sugar and mix to combine. Add flour and mix to combine. Allow batter to rest, and add milk after resting if you flour is feeling particularly absorbative today.
  2. Melt in a wide, flat saucepan the orange juice, zest, and sugar to caramalize and reduce. Gentle, low heat.
  3. Cook crepes: put a pad of butter in a small saucepan over low heat (we made small crepes--they're easier to flip), ladle in a thin layer of batter, swirl to coat. Flip once the first side is golden/brown in spots, using a butter knife/frosting spatula and fork. Cook all crepes like this, layering on a plate on the side as you finish them
  4. Put the Grand Marnier in a saucepan and heat to warm. Set on fire and let burn until all of the alcohol has burned off (liquid will be very hot).
  5. Put each crepe in the orange sauce, fold over, and place on a plate. Pour a bit of the Grand Marnier on the top and serve warm.


Madeleines au Citron
Yield: 2-3 dozen Madeleines

Ingredients:

  • 3 eggs
  • 130 g sugar
  • 20 g honey
  • 150 g flour
  • 150 g butter (soft)
  • 5 g baking powder
  • 3-4 drops of lemon essential oil


Method:

  1. Preheat oven to 230 degrees C (450 F). Butter madeleine mold.*
  2. Mix sugar, honey, and butter to combine. Add eggs and lemon oil and mix to combine. Mix flour and baking powder in a separate bowl, then add and mix to combine. Smell, if it needs more lemon add 1-2 more drops. Fill molds (not all the way to the top; see picture above) with batter.
  3. Put pan in oven and immediately lower temperature to 200 degrees C (about 400 F). Bake 5 minutes, then lower temp to 180 degrees C (350 F) for another 5 minutes.
  4. Unmold as soon as they come out of the oven!

*Note: if you don't have a madeleine mold, you can make these cakes in real shells off the beach! Just wash them and butter them up. The cakes will be bigger...is that a bad thing or something?

Recipes courtesy of Hélène Biesse.

Thursday, July 11, 2013

Fondants au Chocolat et Tuiles au Grué de Cacao

That's a mouthful of a title.


Kind of like the mouthful of cake I had after we made these amazing treats. I took a cooking course with a lovely woman in Arles who, in previous years, has hosted students on my program. I'm so glad I signed up, and can now share the recipes with you!

(P.S. The title means molten chocolate cake and lacy cacao nib cookies!)


There's an extraordinary amount of chocolate in these two desserts. It's so delicious. The molten chocolate cake develops a nice crust, like the edges of a brownie.


And the lacy tuiles seep butter but crisp up minutes after baking into the perfect crumble-able ice cream topping. They're rich, and the cacao nibs add crunch and a deep chocolate flavor.

Without further ado, the recipes! Pictures included for some, but not all steps, because I'm an airhead (name that blog...)

Fondants au Chocolat
Yield: about 10 cupcake-sized fondants

Ingredients:

  • 200g good-quality chocolate
  • 70g butter
  • 4 eggs
  • 70g granulated sugar
  • 50g all purpose flour
  • lemon curd, marshmallow fluff, etc for a surprise inside
  • cupcake liners (or butter and flour for the pan, but that could get tricky to unmold. We used silicone cupcake liners, with which I am now in love)
Mise en place
Method:
  1. Preheat oven to 220 degrees C (425 degrees F) and prepare the baking cups/cupcake tin (come to think of it, little ramekins would work great!
  2. Melt the chocolate (alone and without stirring!! This is very important so as to not disturb the crystalline structure of the chocolate) in a saucepan over very low heat, or in the microwave.
    Before stirring, after melting. You can still see the imprint the top of the chocolate pieces had!
  3. Add butter, stir to combine. Add eggs, stir to combine. Add sugar and flour and mix again until well combined. The batter should be liquidy and glossy.
  4. Add about half an inch of batter to the bottom of each of the cakes, then a dollop of curd, jam, fluff, whatever you like. Add more batter to cover, reaching about 3/4 full. 

  5. Bake 8-10 minutes, until the edges are set but the centers still have a bit of jiggle to them. Cool for about 5 minutes, then unmold and serve warm. Though we didn't have it, vanilla ice cream would be an incredible addition.
Tuiles au Grué  de Cacao
yield: about 20 cookies

Ingredients:
  • 30g all purpose flour
  • 100g granulated sugar
  • 10g cocoa powder (dutch process)
  • 90g butter
  • 2 tablespoons milk
  • 20g cacao nibs

Method:
  1. Preheat oven to 180 degree C (350 degrees F). Prepare baking sheets with something nonstick (silicone or parchment are my preferred, but foil+nonstick spray works too!).
  2. Mix all ingredients. The consistency of the dough should be that of ganache, thick and stiff and fragrant with chocolate.
  3. Drop on baking sheet by the rounded tablespoonful, smoothing tops to make rounds that are about a centimeter tall and 2.5 inches diameter. Leave about two inches between (ours spread and fused, but cut apart into rectangles they looked good too!).
  4. Bake for 8-? minutes. This is the trickiest part, because they're so dark you can't see when they're burned. But they should be caramelized, such that when you take them out they're still flexible, entirely flattened, and there are holes between the nibs. They'll look black as asphalt (see picture above).
  5. Cut apart, if fused, and wait to cool if you want the crunch. During this maleable time, you can form the tuiles around a glass or jar to make pringle-shaped cookies, or roll around a stick to make cigarettes.
Recipes courtesy of Hélène Biesse

Friday, March 22, 2013

Brownie Cut-Out Cookies

These cookies are pretty amazing.


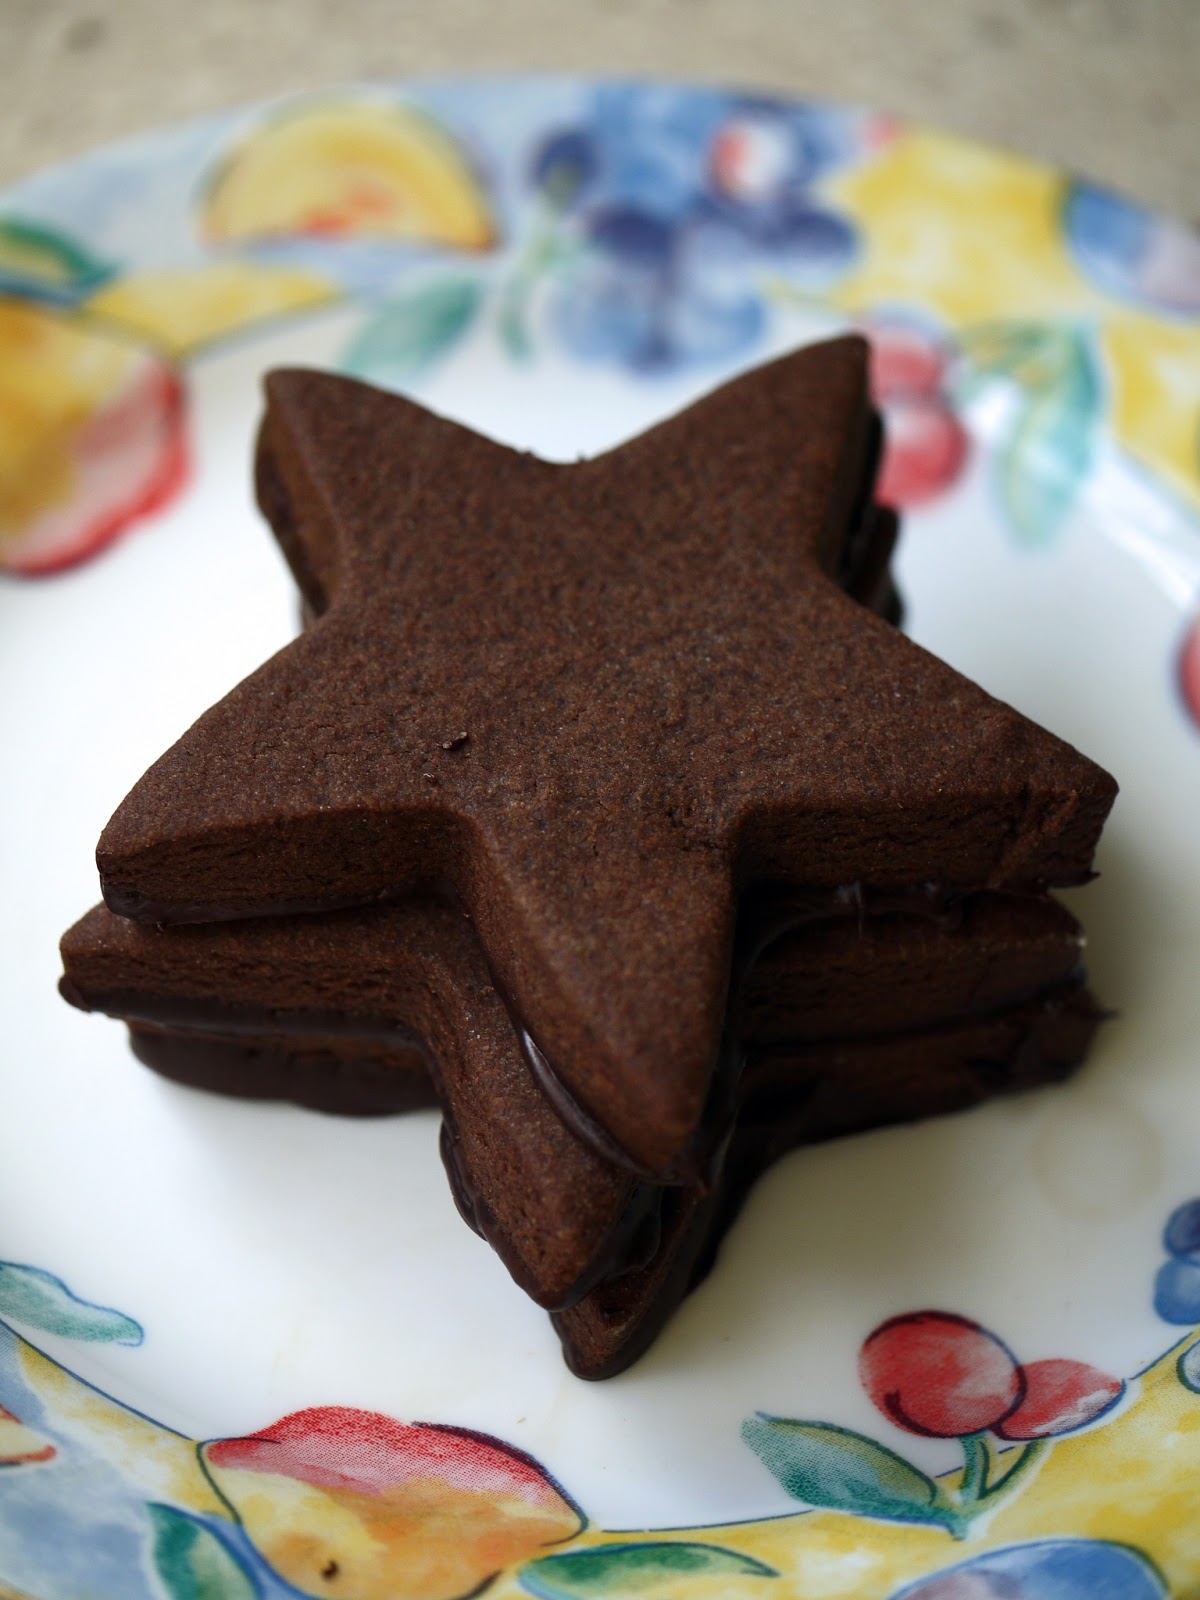
Remember how I found a peanut butter cookie for all occasions? This is the chocolate equivalent, except different. It's a cut out cookie (I know, what a pain, right? Except not, this dough is as easy as drop cookies and really easy to work with) but can serve as a base for ice cream sandwiches, soft oreos, royal icing, a dusting of powdered sugar, or a dunk in chocolate. And they're fantastic plain too...the chocolate flavor shines right through.

They're chocolaty. Simple. Dough in the amount of time it takes to measure ingredients. Roll 'em thick for chewy cookies.


You're a star if you make stars!

I wanted to make a project of this batch, since I'm home for break and have the time to bake, so I dipped the bottom in tempered chocolate. This time, I used the seed method, which means (in a nutshell), microwaving the chocolate until just all melted, then stirring in chopped chocolate until it gets down to about 90 degrees (curtesy of Baking Bites). It was slightly easier than the method I used for the peanut butter cup truffles.

Which by the way would be delicious in an Easter basket!


But I digress. Tempering chocolate is the opposite of making these cookies...it's hard, lengthy, messy, and fussy. The result, though, is amazing--chocolate which doesn't need to be refrigerated and keeps a hard, glossy coat.
Use good chocolate bars. Don't be me and use chips. It won't work as well...the chocolate still tempered, but it was slightly grainy from the preservatives and stuff they put in to make the chocolate stay melty in your fresh-out-of-the-oven chocolate chip cookies.

Really, these cookies live to serve your higher purpose. Rolled slightly thinner and sandwiched with ice cream, they're a great ice cream sandwich (I did this, except minus the rolling out thinner part, with the leftover cookies which didn't get a chocolate coating...it's pretty dang amazing). Cut into hearts for valentine's day, plain circles for lunchboxes, ruffled edges for tea parties. I bet if you added mint, they'd be like thin mints.
It's the Burger King of cookies...have it your way.


Brownie Cut-Out Cookies
Yield: 3  dozen-ish...depends on how big you make them!

Ingredients:
  • 3 cups all-purpose flour
  • 1/2 teaspoon salt
  • 1/2 teaspoon baking powder
  • 1 cup butter, softened (I'd love to see how these turn out if you melt the butter! Could be even chewier and brownie-er)
  • 1 cup granulated sugar
  • 1/2 cup brown sugar
  • 2 large eggs
  • 1 teaspoon vanilla extract
  • 1 tablespoon espresso powder
  • 2/3 cup unsweetened cocoa (I used dutch process, but Deb says you can use either; you'll just get a different flavor)
Method:
  1. Preheat oven at 350 degrees (325 if using convection). Line two baking sheets with parchment, silpat, foil and a bit of baking spray, what have you.
  2. Whisk flour, salt and baking powder in bowl and set aside. 
  3. Mix butter, sugars, eggs, vanilla, espresso, and cocoa in mixer (if your butter isn't fully softened, whip it around a bit by itself first to loosen it up, so you don't end up over-mixing the eggs to get butter chunks smoothed out later). 
  4. Gradually add flour mixture, and mix until smooth. 
  5. Split dough and wrap in plastic in two disks. Chill for about one hour, longer if you have time. 
  6. Roll out cookie dough on floured counter, 1/4 inch for thicker, softer cookies or 1/8 inch for thinner cookies, good if you're making ice cream sandwiches or like cookies a bit crisper. Cut into desired shapes, brushing extra deposits of flour off the top. 
  7. Bake on a parchment-lined baking sheet for 8 to 11 minutes (the former for 1/8-inch thick cookies, the latter for 1/4-inch cookies) until the edges are firm and the centers are slightly soft and puffed. Transfer to a wire rack to cool.
Recipe courtesy of Smitten Kitchen (it was originally Deb's mom's recipe!)

Sunday, January 6, 2013

Galette des Rois

As I write, I am somewhere in the bright, clear, U.S. air, flying to San Francisco to do a tour with my a capella group. I could not be more excited!

The sun is streaming in from the window. The light reflects off the pebbly clouds below like bloggers and journalers everywhere at the end of the year, who fill with resolutions and intents for the new year ahead.


And I made a Galette des Rois, or King Cake, an epiphany tradition in France. Maybe there's an epiphany hidden in the cake...more likely though, there's a monopoly hotel, because I didn't have a dried bean or baby Jesus figurine to hide inside.
What? That doesn't make any sense, does it. Or does it?

Well, traditionally, a bean or figurine is hidden near the crust inside the cake, and the cake is divided into as many pieces as there are people, plus one (the extra piece was kept in case a beggar came to the door for food.) Whoever gets the piece with the bean is King (or Queen) for the day.


This cake is one of my oldest taste memories, too. I lived in France for a year when I was 3, and very distinctly remember the flavor and texture. It's amazing to me that I could still remember after so long, but as such, Galette des Rois has been on my baking bucket list for a while, and I'm glad I finally got around to making it.

I was always disappointed in French class at school when we would get king cake, and every year I hoped I could taste again what I remember so strongly, and every year we got the traditional New Orleans-style king cake. Which is also good, just not what I remember.


Alas, I blab. This cake is kind of a tart, with an almond "frangipane" filling surrounded by a puff pastry crust and sealed at the edges. Mine wasn't entirely sealed, so some filling seeped out, but you know what? It tastes fantastic scraped off the baking sheet with a spoon. It's brushed with egg yolk, which creates a beautiful leathery lacquered sheen, and decorated with a simple pattern drawn in the top crust with a sharp knife.


Galette des Rois
Yield: one galette

Ingredients:
  • 125g (about 1 cup) almond meal 
  • 125g sugar 
  • 125g (about 1 stick) unsalted butter 
  • 1 teaspoon rum 
  • 1 teaspoon vanilla extract 
  • 1 teaspoon corn flour (omit if you don't have...I tried cornmeal and it detracted from the smoothness of the frangipane) 
  • 2 eggs 
  • 1 package (2 sheets) puff pastry (I used Pepperidge Farm) 
  • 1 egg yolk 
Method:
  1. Preheat oven to 400 degrees. 
  2. Cream almond meal, butter, and sugar with an electric mixer until smooth. 
  3. Add rum, vanilla extract, and corn flour and mix to combine. 
  4. Add the eggs and mix again to combine. 
  5. Lay one piece of puff pastry on a baking sheet. Fix cracks with fingers dipped in water. Use a plate (or eyeball) to give and cut form of circle. 
  6. Put frangipane on this circle of dough and smooth towards edges. Leave about an inch on all sides to seal. 
  7. Cut the other piece of puff pastry to make a circle, then lay it gently on top of the frangipane (do not press down). Seal the edges of the top and bottom with a bit of water and by pressing down with your fingers. 
  8. Brush the top of the galette with egg yolk, then cut a pattern in the top. You could do a diamond pattern, like I did, or a flower, or make your own pattern. 
  9. Bake for 20-30 minutes or until deep golden brown and puffy. Cool to room temperature or just slightly warm before serving--cut into as many pieces as you have people plus one, and see who's your king for the day! 
Recipe from Mme. Strock, my parent's friend from France.

P.S. You know those corners you cut off to make the galette round? They are awesome with some cinnamon sugar, folded in half and baked for 20 mins at 400. Little cookie/croissant/turnover babies.

Thursday, December 27, 2012

Bûche de Noël

I used to love craft projects when I was a kid. Clay, beading, those beads that fuse together when you iron them to make coasters, loop looms, painting various terra cotta vessels, you name it. I went through phases of knitting and crocheting, macrame, friendship bracelets, embroidery, bedazzeling...you get the picture.

Making a cake like this Bûche de Noël is half craft project, half science experiment, and half culinary exploration. Except unlike that scarf that refuses to be long enough to wrap even once about your neck, it's done in less than a day. People eat it, it's gone, and there's room for another project to be made!


This was a fun project:
Getting messy? Check, you'll separate 7 eggs.
Decorating? Check, do as much or as little as you want to the outside of the cake.
Science? Check, cooking the meringue syrup for the frosting (it's not hard, don't worry, and there's no chance to mess it up) and weighing ingredients.

And besides, it tastes amazing! Bûche de Noël is often made with a vanilla Génoise or sponge cake, rolled with chocolate frosting, but this one has a chocolate sponge cake and espresso Swiss meringue buttercream filling. My family swooned over it. The rich, creamy frosting, the light, deeply chocolaty cake, and soon it was gone.


To half of the espresso buttercream you add some melted chocolate to make a mocha frosting for the outside. There is definitely more frosting than cake in this situation.

The buttercream has 3 sticks of butter. But it also has 4 egg whites--protein, right? Hmmm, nevermind. Just enjoy and luxuriate.


This recipe comes from Portuguese Girl Cooks, a wonderful blog. It's a bit tricky, and you basically need a dozen eggs, but once you get going, it's not too hard. Make it a project, experiment, have fun, get messy. Go forth with confidence into the world of meringue and chocolate and holiday tradition!

Wednesday, August 15, 2012

Peach Tart

I made pastry cream! Bucket list, check.


Pastry cream is a homemade custard (just like you would make for ice cream or pudding), and at the end you add in butter.

It's flavored with vanilla.
It's divine.
You'll want to lick the spatula ad infinitum.


We got the peaches for this tart at the farmers market. They're like candy: sweet, soft, trickle-down-your-face juicy. So amazing.

I love how at farmers markets you can talk to the people who made the food you're buying. It's more meaningful than buying from your grocery cashier (which is also totally wonderful and I don't doubt that you could have a fantastic relationship with your local grocery store and get fabulous produce there too).

But I betcha don't get free samples! Farmer's market samples are the best. And the guy always throws in an extra peach or tomato, which is so nice.


Oh, goodness, and the crust. It's a super flaky, rich, buttery shortbread cookie crust. Yumyumyum.

We had extra dough. I made cookies out of it. They were gone within 15 minutes of coming out of the oven. Plain, no decorations, just straight-up good.

And then the tart is finished off with a glaze that includes the leftover peach juice! Leave no flavoring unused!


Peach Tart

Note: the original recipe suggests berries, and I do think they would make for a neater tart, since a blueberry/raspberry/blackberry doesn't gush juice everywhere. If you're subbing in berries, skip the maceration step!

Yield: 1 tart

Ingredients:

For the pastry cream:

2 cups half-and-half
1/2 cup (3 1/2 ounces) sugar Pinch salt
5 large egg yolks
3 tablespoons cornstarch
4 tablespoons (1/2 stick) cold unsalted butter, cut into 4 pieces
1 1/2 teaspoons vanilla extract

For the tart shell:

1 large egg yolk
1 tablespoon heavy cream ½ teaspoon vanilla extract
1 1/4 cups (6 1/4 ounces) unbleached all-purpose flour, plus more for dusting the work surface
2/3 cup (2 2/3 ounces) confectioners' sugar
1/4 teaspoon salt
8 tablespoons (1 stick) cold unsalted butter, cut into 1/2-inch cubes

Putting it together:
Berries, peaches (peeled/sliced, macerate in a couple of tablespoons of sugar to get some moisture out), other fruit--we used 4 peaches
1/3 cup red currant or apple jelly


Method:

Prepare the pastry cream first:

  1. Heat the half-and-half; 6 tablespoons of the sugar, and the salt in a medium heavy-bottomed saucepan over medium heat until simmering, stirring occasionally to dissolve the sugar.
  2. Meanwhile, whisk the egg yolks in a medium bowl until thoroughly combined. Whisk-in the remaining 2 tablespoons sugar and whisk until the sugar has begun to dissolve and the mixture is creamy, about 15 seconds. Whisk in the cornstarch until combined and the mixture is pale yellow and thick, about 30 seconds.
  3. When the half-and-half mixture reaches a full simmer, gradually whisk the simmering half- and-half into the yolk mixture to temper. Return the mixture to the saucepan, scraping the bowl with a rubber spatula; return to a simmer over medium heat, whisking constantly, until a few bubbles burst on the surface and the mixture is thickened and glossy, about 30 seconds. Off the heat, whisk in the butter and vanilla. If mixture looks curdled, whisk like your life depends on it, then strain the pastry cream through a fine-mesh sieve set over a medium bowl. Press plastic wrap directly on the surface to prevent a skin from forming and refrigerate until cold and set, at least 3 hours or up to 2 days.
Then, prepare the tart shell while the cream cools:
  1. Whisk together the yolk, cream, and vanilla in a small bowl; set aside. Place the flour, sugar, and salt in a food processor and process briefly to combine. Scatter the butter pieces over the flour mixture; process to cut the butter into the flour until the mixture resembles coarse meal, about fifteen 1-second pulses. With the machine running, add the egg mixture and process until the dough just comes together, about 12 seconds. Turn the dough onto a sheet of plastic wrap and press into a 6-inch disk. Wrap in plastic and refrigerate at least 1 hour or up to 48 hours.
  2. Remove the dough from the refrigerator (if refrigerated longer than 1 hour, let stand at room temperature until malleable). Unwrap and roll out between 2 lightly floured large sheets of parchment paper or plastic wrap to a 13-inch round, fixing cracks by pushing the dough back together. (If the dough is soft and sticky, slip it onto a baking sheet and refrigerate until workable, 20 to 30 minutes.) Transfer the dough to a tart pan and ease the into the pan corners by gently lifting the edge with one hand while pressing it into the corners with the other hand. Run the rolling pin over the top of the tart pan to remove the excess dough. Set the dough-lined tart pan on a large plate and freeze 30 minutes. 
  3. Meanwhile, adjust an oven rack to the middle position and heat the oven to 375 degrees. Set the dough-lined tart pan on a baking sheet, press a 12-inch square of foil into the frozen tart shell and over the edge, and fill with old beans or metal or ceramic pie weights. Bake for 30 minutes, rotating halfway through the baking time. Remove from the oven and carefully remove the foil and weights by gathering the edges of the foil and pulling up and out. Continue to bake until deep golden brown, 5 to 8 minutes longer. Set the baking sheet with the tart shell on a wire rack to cool to room temp.
It's assembly time!
  1. Spread the cold pastry cream over the bottom of the tart shell, using an offset spatula or large spoon.  Arrange the fruit on top of the pastry cream, draining peaches from whatever liquid ran off when they were macerating.
  2. Microwave the jelly and the leftover peach juice (if using peaches) together until boiling/thick, then dab, flick, and brush over the fruit.
  3. Slice and serve!