Showing posts with label cream cheese. Show all posts

Monday, December 2, 2013

Brownie Cut-Out Lintzer Cookies with Peanut Butter Cream Cheese Filling

These cookies are incredible. Like peanut butter oreos, but soft and chewy and more chocolatey.


Well, I admit this is not really a new recipe. The cookie dough is the same as in the Brownie Cut-OutCookies, but rolled thinner and cut to have the hole in the top that characterizes linzer cookies. Don't worry though--unlike most cut-out cookies, these are baked only until still soft and barely set, and their deep chocolate flavor (courtesy of dutch-process cocoa powder) belies the vanilla tradition of their sometimes hard and bland cookie kin.

You could certainly just cut two circles to make a normal sandwich cookie, but it's a beautiful and festive addition (subtraction?) to cut a little hole in the top cookie. I had linzer cutters that cut the circle and the star at the same time, but you could use a very small circle or cut a diamond with a knife. They would look beautiful this way on a holiday cookie platter.


Let's talk frosting for a minute. Joy put out a cookbook about a year ago, and she has several pages devoted to cream cheese frosting. I am so on board! The cheesieness keeps the frosting from being sickly sweet and the texture makes the frosting incomparably smooth. I only used half of her recipe (which frosts 24 cupcakes or a whole two layer round cake or a whole 9x13 sheet cake) and it was the perfect amount.

Given that the frosting is less stiff than oreo creme filling, the cookies benefit from refrigeration to firm everything up. Once chilled, the filling holds its own against the cookies and doesn't sploosh out the sides when you bite into it.


Love love love these. A bit of labor, but not that bad. This dough is seriously so easy to work with that rolling it out is a pleasure.

See recipe for Brownie Cut-Out Cookies

Roll about 1/8" thick and bake for 8 minutes, turning halfway through. Let cool on sheets for a few minutes, then transfer to wire racks to finish cooling

Peanut Butter Cream Cheese Frosting
Frosts 1 batch of cookies above in sandwiches, or double for 24 cupcakes, a round layer cake, or a 9x13 sheet cake!

Ingredients:


  • 4 oz (half a package) cream cheese, softened -- I used Neufchatel
  • 1/4 cup (1/2 stick) butter, softened
  • 1/4 cup smooth peanut butter (eyeball if you can, measuring peanut butter is a pain)
  • Pinch salt
  • 1 cup powdered sugar
  • 1 teaspoon vanilla extract

Method:


  1. Using a stand or hand held mixer, beat cream cheese alone, ensuring it's soft. Add butter and beat to combine and soften (essential if, like me, you always forget to soften the butter).
  2. Add peanut butter and salt, beat to combine. Then, slowly and carefully add the powdered sugar and beat on low to combine. Add vanilla, mix to combine, then beat the whole mixture on medium/high speed to aerate.
  3. Frost cookies above with about a teaspoon or so of frosting per sandwich. The back of a butter knife is a good tool for this. 


Eat up! Holiday cookies are coming!

Recipe for frosting from the Joy the Baker Cookbook

Tuesday, October 29, 2013

Pumpkin Whoopie Pies with Cream Cheese Frosting

Hey fall. It's been a beautiful time. I see you sneaking out that door, and letting the cold air in behind you.

But I don't even care. We had so many amazing weeks of 60s and 70s together that all I can think of is the phrase "if you love it let it go, and if it's meant to be, it'll come back."


And that's how I feel about fall. Pumpkin, apples, spices, warm socks, the heat finally coming on in my dorm room (praise be!), leaves changing color, coats, scarves, and crisp air blowing through my hair.

I took this picture on a recent hike with some friends, at the Ward Pound Ridge Reservation in New York. The sunlight was unreal, and we had a great time. It was fall break, so my acappella group (shout out to Redhot & Blue!) took the chance to do some gigs near campus, and took some time to do fun things like this hike.


And, on my day off, I baked! Oh the glory. It's so complicated here, where a trip to the grocery store requires either a car, tons of planning around their once-weekly shuttle, or a 20 minute walk through some sketchy areas (which you'd better do with a friend at 3pm). I took the car route, and being able to bake was so worth it.


I realized, pumpkin is so good because it has a particular kind of starch-moisture combination that you just don't get with flour and eggs. Or banana--I also made granola with some banana and some pumpkin, and pumpkin definitely helps it clump together and stay that way, with it's long fibers!


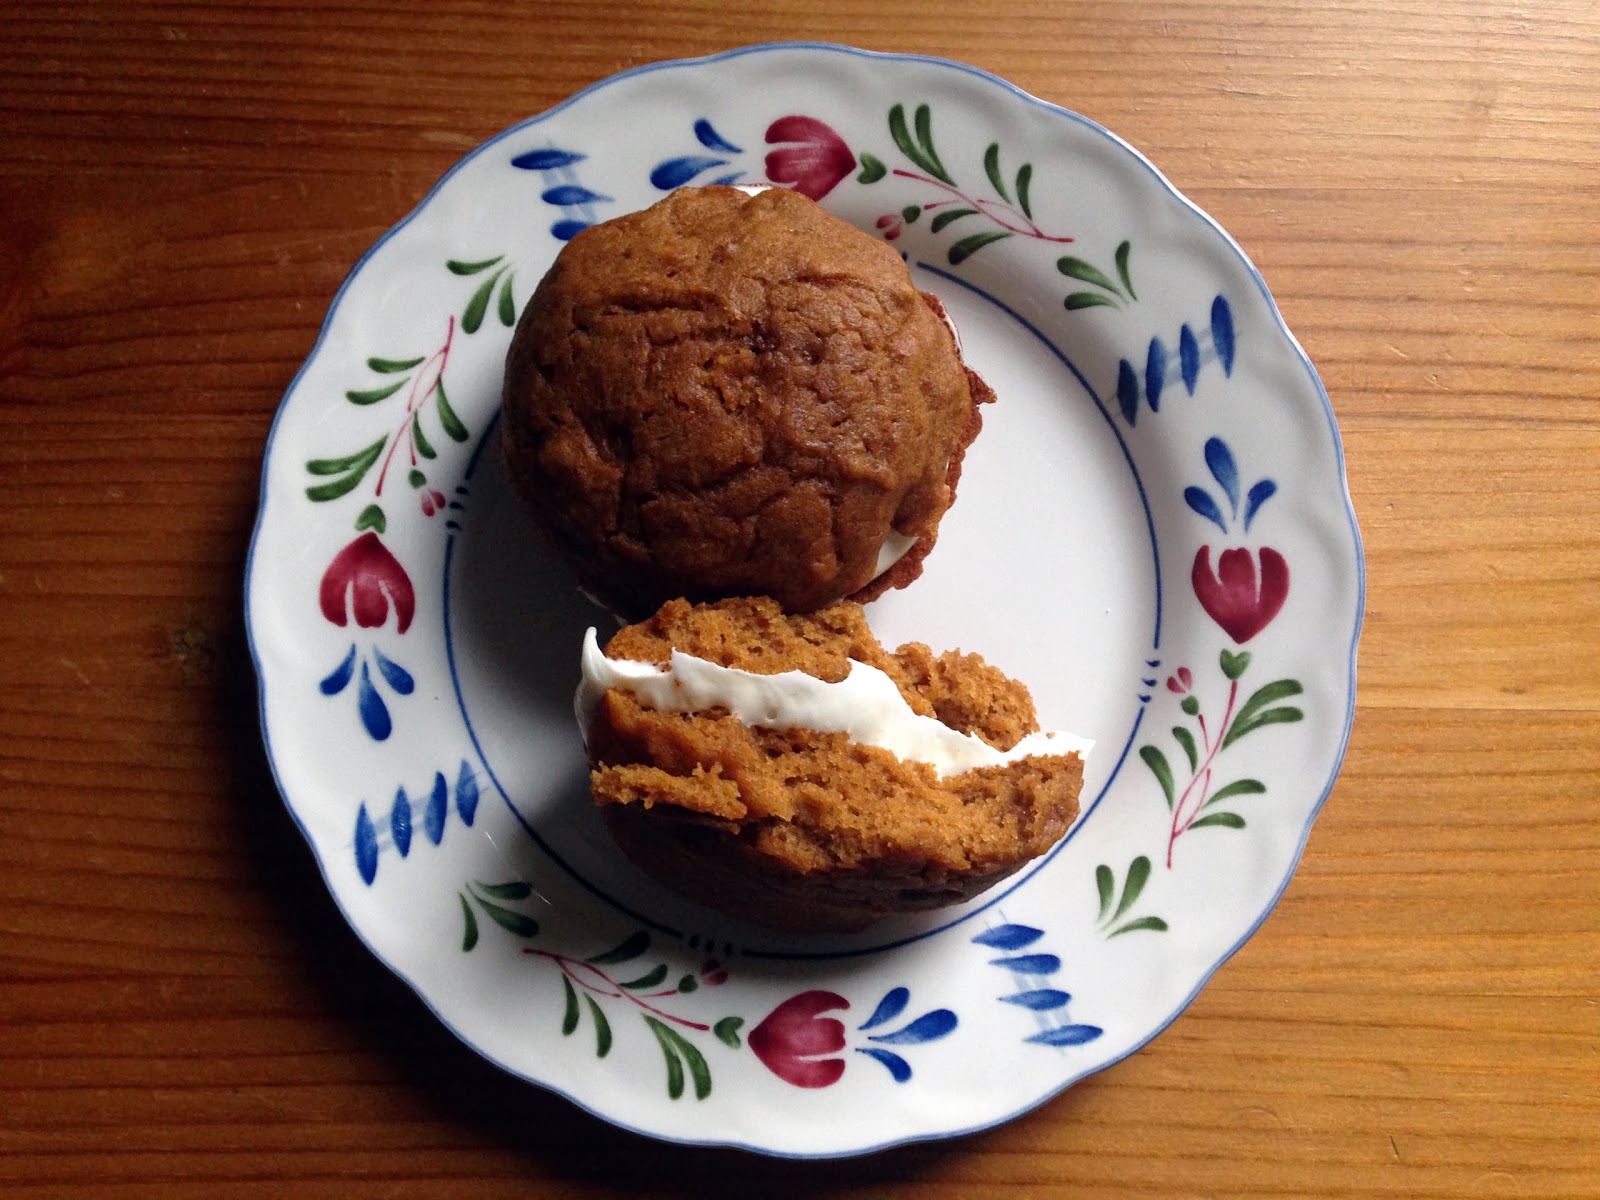
So, we get whoopie pies. Luscious, mounds of cakey pumpkin cookie, heavily spiced and smashed together with creamy, dreamy, tangy cream cheese frosting. It's like muffin tops (the ones at a certain chain bakery, not the ones around your hips!), except cupcake tops and sandwiched with frosting.

It's amazing. Believe in the power of pumpkin. I'd totally stay with Linus to wait for the Great Pumpkin on Halloween!


Pumpkin Whoopie Pies with Cream Cheese Frosting
Yield: about 2 dozen

Ingredients:
For the cookies:

  • 3 cups all-purpose flour
  • 2 tablespoons cinnamon
  • 1 teaspoon baking powder
  • 1 teaspoon baking soda
  • 1 teaspoon salt
  • 1 teaspoon ground ginger
  • ½ teaspoon ground nutmeg
  • 1 cup granulated sugar
  • 1 cup dark brown sugar
  • 1 cup canola or vegetable oil
  • 3 cups pumpkin puree
  • 2 eggs
  • 1 teaspoon vanilla extract
For the frosting:
  • 3 cups powdered sugar
  • 8 ounces cream cheese, at room temperature
  • 4 ounces (½ cup) unsalted butter, at room temperature
  • 1 teaspoon vanilla extract
Method:
  1. Preheat oven to 350 degrees F. Line baking sheets with parchment paper/silicone/grease.
  2. In a large bowl, whisk together flour, cinnamon, baking powder, baking soda, salt, ginger and nutmeg.
  3. In another bowl, whisk granulated sugar, dark brown sugar, and oil together. Add pumpkin puree and whisk to combine thoroughly. Add eggs and vanilla and whisk until combined.
  4. Gradually add flour mixture to pumpkin mixture and whisk until just combined.
  5. Drop big spoonfuls of batter onto baking sheet, about 2 inches apart (probably about 2 tablespoonfuls).
  6. Bake for 10 to 12 minutes, or until a toothpick inserted into the center of a cookie comes out clean. Let the cookies cool completely before assembly.
  7. To make the frosting, beat butter on medium speed until smooth with no visible lumps. Add the cream cheese and beat until smooth and combined (times will vary depending on your room temperature and if you actually remembered to take out the butter and cream cheese in advance). Add the powdered sugar a little at a time, beating smooth with each addition. Finally, add the vanilla extract.
  8. Assembly: dollop about a tablespoon or more (depending on the size of the cookie) of frosting onto a cookie, then top with another, making a sandwich. Refrigerate 30 mins to set.
Recipe adapted from Brown Eyed Baker, who got it from a friend but also discovered it's an adaptation from the book Baked: New Frontiers in Baking.

P.S. Anyone know a way to prevent the outsides of the cookies from getting soggy in the fridge? Mine softened up and got all sticky after just a few hours!

Friday, August 9, 2013

Lemon Blueberry Cheesecake Bars

These are dreamy, creamy, crazy bars. Like lemon bars mashed up with cream cheese and lets throw some incredibly purple swirls from fresh blueberries in there.

Like portable blueberry lemonade flavored cheesecake.
If this looks orange to you, I promise you it's lemon. Also I'm obsessed with juice/zest bowls--they look like eggs!
It has all the good parts: graham cracker crust, 2 full packages of cream cheese, and two full lemons, juice and zest. Now, about the cream cheese: I love using neufchatel cheese, which is basically low-fat cream cheese, in these kinds of recipes. I believe you get more tangy cheese flavor, while helping to keep these...umm, I was going to say "more healthy," but I think "less unhealthy" makes more sense. And I always get the store brand.


Mostly I do it for the cheesiness, even though I have no idea if that's true. Neufchatel is sold the same way as cream cheese, in 8 ounce blocks. The Kitchn has a nice explanation of the difference here.


Also (BONUS), this recipe uses one food processor. Dump ingredients and go. wipe out. repeat.


Portable, not fussy or (too) messy, and big on flavor. Glorious, creamy, fruity and summery, these bars beg to be made.

Lemon Blueberry Cheesecake Bars
Yield: 1 8x8 pan (I cut it into 9 generous pieces)

Ingredients:

  • 9 graham crackers, broken into pieces
  • 2 tablespoons granulated sugar
  • Pinch ground cinnamon
  • 4 tablespoons unsalted butter, melted
  • 16 ounces cream cheese or neufchatel (see note above), room temperature if possible
  • ½ cup granulated sugar
  • 2 eggs
  • Zest and juice of 2 lemons
  • 1½ cups fresh blueberries
Method:
  1. Preheat oven to 325 degrees F. Line an 8x8-inch baking pan with parchment paper, letting excess hang over the sides of the pan. (or grease it, and then at the end you can just cut the bars out of the pan)
  2. Make the Crust: In a food processor, process the graham crackers, sugar, and cinnamon until you have the texture of bread crumbs (do not cut your thumb on the blade reaching in to break up the crackers, like I did). Add the melted butter and pulse a couple of times to fully incorporate. Press the mixture into the lined baking pan and gently pat down evenly. Bake for 12 minutes, until golden. Set aside.
  3. Make the Filling: Wipe out the food processor. Add the cream cheese, sugar, eggs, lemon zest and lemon juice. Process until well combined. (If your cream cheese is cold, process just cream cheese and sugar for a minute or so to soften it up before adding the liquidy eggs) It should have a smooth consistency. Pour the filling onto the crust and then sprinkle the blueberries over top. The blueberries will sink slightly, but should still be half exposed. As they bake, they will sink a little more and break down.
  4. Bake in the oven for 35 minutes or until the center only slightly jiggles. Remove from the oven and cool completely to room temperature and then refrigerate for at least 3 hours before serving. Once set, remove from pan using the parchment lining and slice.

Recipe from Brown Eyed Baker. This recipe is so perfect that I changed literally nothing.

Sunday, July 29, 2012

New York Cheesecake

5 packages of cream cheese in this bad boy.


Can a get a whoop whoop?

My dad and I made this cheesecake together, trying to share the kitchen space nicely. Since our kitchen is long and narrow, when three people try to make lunch it usually involves some hungry grumbling and much kerfuffle.
But my we cooperated for the sake of this wonderful, delicious, creamy, uber-rich, tall, spectacular dessert.


Who cares if it cracks? It has character. It's not like the crack messes up the "delicate crumb and light flavor." This is a mass of cheese, sugar, and eggs. Eat up!


Though, if you're really concerned about asthetics, cracking is usually caused by the egg proteins coagulating (binding together from being cooked). So, if yours cracks, it may be that you overbaked it (using an instant read thermometer can help with this) or overwhipped the eggs.

...or maybe your dad perforated the surface too many times with his instant read thermometer, weakening the surface tension.


In any case, making your own cheesecake is as rewarding as making bread, but without the scary yeast part. It takes just as long too, so plan accordingly--you can make it the morning of the day you plan to serve it or a day before, to allow the flavors to come together. But at least this version doesn't require a water bath!


New York Cheesecake
yield: 1 cake. 16 slices is about right for portions.

Ingredients:
Graham Cracker Crust:5 tablespoons unsalted butter, melted, plus 1 tablespoon melted unsalted butter for greasing the pan
8 whole graham crackers (4 ounces), broken into rough pieces and processed in a food processor to fine, even crumbs
1 tablespoon sugar
Cream Cheese Filling:2 1/2 pounds (five 8-ounce packages) cream cheese, cut into rough 1-inch chunks, at room temperature--important because you don't want a chunky batter
1/8 teaspoon salt
1 1/2 cups (10 1/2 ounces) sugar
1/3 cup sour cream
2 teaspoons lemon juice
2 teaspoons vanilla extract
2 large egg yolks plus 6 large eggs, at room temperature

Method:

  1. To make the crust: Adjust an oven rack to the lower-middle position and heat the oven to 325 degrees. Brush the bottom of a 9-inch springform pan with 1/2 tablespoon of the melted butter. Combine the graham cracker crumbs and sugar in a medium bowl; add 5 tablespoons of the melted butter and toss with a fork or your fingers until evenly moistened. Empty the crumbs into the springform pan and press evenly into the pan bottom (the bottom of a glass works well to press down, and a the back of a spoon pushes down the corners nicely). Bake until fragrant and beginning to brown around the edges, about 13 minutes. Cool on a wire rack while making the filling.
  2. To make the filling: Increase the oven temperature to 500 degrees. In the bowl of a standing mixer, beat the cream cheese at medium- low speed to break up and soften it slightly, about 1 minute (you don't want to incorporate air, just mash down any potential lumps). Scrape the beater and the bottom and sides of the bowl well with a rubber spatula; add the salt and about half of the sugar and beat at medium-low speed until combined, about 1 minute. Scrape the bowl; beat in the remaining sugar until combined, about 1 minute. Scrape the bowl; add the sour cream, lemon juice, and vanilla, and beat at low speed until combined, about 1 minute. Scrape the bowl; add the egg yolks and beat at medium-low speed until thoroughly combined, about 1 minute. Scrape the bowl; add the remaining eggs 2 at a time, beating until thoroughly combined, about 1 minute, scraping the bowl between additions.
  3. Scraping the bowl is important. It makes the filling smooth. Starting with room temp ingredients will also help.
  4. Brush the sides of the springform pan with the remaining 1/2 tablespoon melted butter. Set the springform pan on a rimmed baking sheet (to catch any spills if the pan leaks). Pour the filling into the cooled crust and bake 10 minutes. Then, without opening the oven door, reduce the oven temperature to 200 degrees and continue to bake until the cheesecake reads about 150 degrees on an instant- read thermometer inserted in the center, about 1 1/2 hours (check at 1h15). Transfer the cake to a wire rack, run a paring knife around the edge of the pan to loosen the cake, and cool until barely warm, 2½ to 3 hours. Unmold from pan, wrap in plastic wrap, and refrigerate until cold, at least 3 hours. (The cheesecake can be refrigerated up to 4 days.)
  5. To serve, dip a long, thin knife in hot water, then wipe off the water with a paper towel. The hot knife melting the cake will create clean slices.
  6. Bon Appétit!
Recipe from Baking Illustrated

Wednesday, December 28, 2011

Cinnamon Rolls

There's really nothing like fresh cinnamon rolls and a yuletide log with dozens of family members gathered round the pine tree sipping hot tea and exchanging memories peacefully.

Wait, that's not how Christmas works at everyone's house? Sorry, I must have gotten mixed up.

We had a nice small Christmas, just my immediate family. It didn't really start until 11 or so, when my sleepyhead brother woke up, but luckily that gave time for the cinnamon rolls to proof (that's when they do their last rise before being baked, and I used a pan of boiling water in the oven to make a nice sauna for the rolls).


People always say that working with yeast is not as hard as you think it is. 

They're right. They told me so. You could let them tell you so, too, because it's worth the results.

It's just a lot of waiting. I guess when people wait, they worry, so it gives yeast a bad reputation.


Make some cream cheese frosting while you wait/worry. This stuff is seriously good.


Cinnamon Rolls
From Baking Illustrated (THE authority on baking...it's awesome)

Dough
1/2 cup milk
8 tablespoons (1 stick) unsalted butter
1/2 cup warm water (~110 degrees)
1 envelope (2 1/4 tablespoons) instant/rapid-rise yeast
1/4 cup (1 3/4 ounces) sugar
1 large egg plus 2 large egg yolks
1 1/2 teaspoons salt
4-4 1/4 cups (20-21 1/2 ounces) all-purpose flour
  1. Heat butter and milk in a saucepan or the microwave until butter melts. Remove and set aside to cool to lukewarm (~100 degrees).
  2. In a standing mixer, use the paddle to mix together the water, yeast, sugar, egg, and yolks at low speed until well mixed. I would suggest pre-"scrambling" the eggs in a bowl before adding them because low speed can't really do that for you.
  3. Add the salt, warm milk mixture and 2 cups of the flour and mix at medium speed until thoroughly blended, about 1 minute.
  4. Switch to the dough hook, add another 2 cups of flour, and knead at medium speed (adding up to 1/4 cup more flour if necessary, a tablespoon at a time) until the dough is smooth and freely clears the sides of the bowl, ~10 minutes. Hang on to your mixer...mine nearly ran itself off the counter!
  5. Scrape the dough onto a well floured surface, form into a round, place in a lightly oiled large bowl, and cover with plastic wrap. Leave to rise until doubled in bulk for 1 1/2 to 2 hours.

Frosting (make while you wait for the dough to rise for the first time if you're making everything in one day)
8 ounces (1 package) cream cheese, softened
2 tablespoons corn syrup
2 tablespoons cream (I used milk because we didn't have cream and it still worked just fine)
1 cup (4 ounces) confectioners' sugar, sifted
1 teaspoon vanilla extract
pinch salt
  1. Mix it all together in the mixer on low (so you don't inhale too much powdered sugar), gradually increasing to high so it becomes creamy and smooth.
  2. It's okay to have a spoonful. There will be plenty for the rolls :)
  3. Cover with plastic wrap and refrigerate.

Filling
3/4 cup packed (5 1/4 ounces) light brown sugar
3 tablespoons ground cinnamon
1/8 teaspoon salt

  1. Once dough has doubled, punch it down and transfer to a lightly floured surface. With a rolling pin, roll to a 16 by 12 inch rectangle (approximately).
  2. Mix together the filling ingredients and sprinkle all over the rectangle, leaving a half inch margin at the far end to seal the log.
  3. Roll the dough, starting near you, tightly and gently. When you get to the top, moisten the margin with water and pinch it to seal the roll. Fiddle with the ends to try to straighten them out if you like.
  4. Grease a 13 by 9 inch baking dish (I like butter best). Using unflavored dental floss or other plasticky thin string (or a sharp knife), cut the roll into 12 equal pieces: first in half, then each half in half again, then each piece in thirds. 
  5. Arrange in the pan, cover with plastic wrap, and let rise again for 1 1/2 to 2 hours until doubled in size.
OR

     5.  Arrange in the pan, cover with plastic wrap, and refrigerate overnight (these will rise in the 
          refrigerator)

OR

     5.  Arrange in the pan, cover with plastic wrap, and freeze. When you want to bake them, let them thaw 
          and then do rise.

To speed the rise, you can put the pan in the oven with a pan of boiling water and close the door, creating a proofing box. Keep an eye on the rolls, they'll be done in ~45 minutes (this is what I did after freezing for a day).

     6.  To bake, preheat the oven to 350 degrees. Bake the rolls for 25 to 30 minutes, or until they register 
          185 to 188 degrees. Remove to a cooling rack, let cool for 10 minutes, frost and serve!


Hypnotizing...