Showing posts with label family. Show all posts

Sunday, June 16, 2013

Quick Carrot Cake

I really wanted to bake a cake yesterday. And I really didn't want it to take a long time, and I really didn't want to go buy cream cheese for cream cheese frosting (though it is the most heavenly thing on the planet).

This is a cake for all of those concerns. Like a snack cake. There's no butter involved. I was kind of sick of running down our butter supply, so that's good.

I read an article this morning that said you increase your creativity by thinking in the box, and man was I in a box. "I don't want this, I don't want that"...well that narrows down the options! It was a happy outcome, though. Benefits of not planning...

I was in a hurry to eat this fabulous cake...sorry for the iPhone photo
On the other hand, a disadvantage of not planning is that I thought, "Oh, I'll make an orange glaze." Because I didn't want to buy cream cheese (see above). But we had no oranges or orange juice concentrate in the house. So I settled by putting in some orange oil, but I accidentally put in a little much (a little goes a long way with that stuff) and ended up with glaze that's too orangy.

My recipe also included cornstarch, which gelatinized over the stove, rendering the glaze kind of gloppy and not as syrupy as I would have liked. I peeled it off in a fit of rage!!! The cake is really good as is, with or without a better glaze. I would have rather made a soaking syrup as opposed to a glaze, and used real orange juice if I were to do a glaze, and those changes are included in the recipe below.


The cake method is novel...eggs and sugar are beaten until frothy, then oil is slowly drizzled in to make an emulsification, and then the wet team meets the dry team (plus carrots) for a batter that comes together quickly and dirties only two bowls. Win. You shred the carrots in the food processor before mixing the wet ingredients, so the whole thing has this cohesion, a yin-yang sort of feel.

Kumbaya, let's eat cake.

Quick Carrot Cake
Yield: 1 8x8 pan of carrot cake! (I cut mine into 9 squares, and we finished it in 2 days)

Ingredients:
Cake:

  • 1 1/4 cups (6 1/4 oz) all-purpose flour
  • 1/2 teaspoon (rounded) baking powder
  • 1/2 teaspoon baking soda
  • 1/2 teaspoon ground cinnamon
  • 1/4 teaspoon grated (or ground) nutmeg
  • pinch ground cloves
  • 1/4 teaspoon salt
  • 1/2 pound (3-4) carrots
  • 3/4 cup (5 1/4 oz) granulated sugar
  • 1/4 cup packed (1 3/4 oz) brown sugar
  • 2 large eggs
  • 3/4 cup vegetable oil
Glaze:
  • 1/4 cup sugar
  • 1/4 cup orange juice
  • a squeeze of lemon juice
  • a pat of butter
  • a piece of orange rind (take a vegetable peeler to it; this is optional)
Method:
  1. Preheat oven to 350 degrees, and move a rack to the middle position. Spray 8x8" cake pan with baking spray (line it with a parchment paper sling if you want to be able to take the cake out of the pan easily after baking) or grease and flour.
  2. Whisk flour, baking powder, baking soda, spices, and salt in a large bowl, set aside.
  3. In a food processor, shred the carrots with the big grater (into large shreds). Add these to the flour, then wipe out the food processor bowl and lid.
  4. Process sugars and eggs in the food processor fitted with the metal blade for about 20 seconds, until slightly foamy. Start the machine again, and slowly stream in the oil, continuing to process for another 20 seconds until well emulsified.
  5. Add this egg/sugar/oil mixture to the dry ingredients and carrots, and fold with a spatula to combine. Pour into prepared pan and bake until a toothpick or skewer comes out clean, 35-40 minutes.
  6. While cake is baking, prepare the glaze. Combine all ingredients in a small saucepan, stirring to dissolve the sugar. Once it starts to boil, and is slightly thicker, it is ready. Take it off the heat and remove the orange peels.
  7. Pour warm glaze over cake (you can poke the cake first with a toothpick or fork for maximum absorption). Cut, serve, and enjoy!
Recipe adapted from Baking Illustrated (I halved their carrot cake recipe) and the Seattle Times (for the glaze)

Friday, December 21, 2012

Butter Fingers

These are not the butterfingers people pass out at Halloween. Nothing wrong with peanut butter crispy candy covered in chocolate, but these cookies are awesome. Lightly sweetened shortbread is jam packed full of crispy, buttery pecans. And I mean jam packed...there are basically as many pecans as there is dough, volume wise.

Rolled into finger shapes, baked, then rolled in a soft, thick blanket of powdered sugar.


Common scents: don't wear black while eating. Because that fabulousness just can't be contained.

Recipe courtesy of my boyfriend's mom, who makes these often (with good reason, too). I tried one he brought back after a break, and oh man, was I honored to get the recipe!

I made them in my grandmother's tiny kitchen while my dad made a lamb roast (yumyumyumyum.). And let me just set the scene: we're talking the grandmother who melts a See's candy on her toast for breakfast. She loved them, as did the aunts, uncles, cousins, and other family members who passed through her living room throughout the week and were greeted with a hug and the leftover chinese takeout container full of cookies.


Another plus of being at my grandmother's house is that she has beautiful china. She collects teacups and saucers, so as you drink cups and cups of tea--I love tea--you get to enjoy the unique patterns and delicate handles.

Saucers make great cookie plates, because the dainty cookies look substantial in comparison to the small size of the plate and beautiful against the similar daintiness of the china.


These few ingredients leave a strong impression of butter and sweetness and crunch and holidays.

Butter Fingers
Yield: about 3 dozen

Ingredients:
1 cup (2 sticks) unsalted butter
1/2 cup powdered sugar
2 cups flour
2 teaspoons vanilla
2 cups (one 8 ounce bag) chopped pecans
about 1 1/2 cups powdered sugar (to roll the cookies in)

Method:

  1. Preheat oven to 325 degrees.
  2. Cream the butter, then add the 1/2 cup powdered sugar a tablespoon at a time.
  3. Add in the flour and vanilla, mixing until just combined. Then, add the pecans and mix to combine.
  4. Roll 1 tablespoon-ish of the dough to make "finger" shape.
  5. Bake for 15-20 minutes, until firm. Remove from oven and let cool for about 5 minutes on the baking sheets.
  6. Carefully roll the still-warm cookies in the powdered sugar. Note: If they crack, it's chef's treat! It helps to press the sugar onto the cookies from all sides. Coat completely so the cookies are entirely white.
  7. Eat up!

Sunday, July 29, 2012

New York Cheesecake

5 packages of cream cheese in this bad boy.


Can a get a whoop whoop?

My dad and I made this cheesecake together, trying to share the kitchen space nicely. Since our kitchen is long and narrow, when three people try to make lunch it usually involves some hungry grumbling and much kerfuffle.
But my we cooperated for the sake of this wonderful, delicious, creamy, uber-rich, tall, spectacular dessert.


Who cares if it cracks? It has character. It's not like the crack messes up the "delicate crumb and light flavor." This is a mass of cheese, sugar, and eggs. Eat up!


Though, if you're really concerned about asthetics, cracking is usually caused by the egg proteins coagulating (binding together from being cooked). So, if yours cracks, it may be that you overbaked it (using an instant read thermometer can help with this) or overwhipped the eggs.

...or maybe your dad perforated the surface too many times with his instant read thermometer, weakening the surface tension.


In any case, making your own cheesecake is as rewarding as making bread, but without the scary yeast part. It takes just as long too, so plan accordingly--you can make it the morning of the day you plan to serve it or a day before, to allow the flavors to come together. But at least this version doesn't require a water bath!


New York Cheesecake
yield: 1 cake. 16 slices is about right for portions.

Ingredients:
Graham Cracker Crust:5 tablespoons unsalted butter, melted, plus 1 tablespoon melted unsalted butter for greasing the pan
8 whole graham crackers (4 ounces), broken into rough pieces and processed in a food processor to fine, even crumbs
1 tablespoon sugar
Cream Cheese Filling:2 1/2 pounds (five 8-ounce packages) cream cheese, cut into rough 1-inch chunks, at room temperature--important because you don't want a chunky batter
1/8 teaspoon salt
1 1/2 cups (10 1/2 ounces) sugar
1/3 cup sour cream
2 teaspoons lemon juice
2 teaspoons vanilla extract
2 large egg yolks plus 6 large eggs, at room temperature

Method:

  1. To make the crust: Adjust an oven rack to the lower-middle position and heat the oven to 325 degrees. Brush the bottom of a 9-inch springform pan with 1/2 tablespoon of the melted butter. Combine the graham cracker crumbs and sugar in a medium bowl; add 5 tablespoons of the melted butter and toss with a fork or your fingers until evenly moistened. Empty the crumbs into the springform pan and press evenly into the pan bottom (the bottom of a glass works well to press down, and a the back of a spoon pushes down the corners nicely). Bake until fragrant and beginning to brown around the edges, about 13 minutes. Cool on a wire rack while making the filling.
  2. To make the filling: Increase the oven temperature to 500 degrees. In the bowl of a standing mixer, beat the cream cheese at medium- low speed to break up and soften it slightly, about 1 minute (you don't want to incorporate air, just mash down any potential lumps). Scrape the beater and the bottom and sides of the bowl well with a rubber spatula; add the salt and about half of the sugar and beat at medium-low speed until combined, about 1 minute. Scrape the bowl; beat in the remaining sugar until combined, about 1 minute. Scrape the bowl; add the sour cream, lemon juice, and vanilla, and beat at low speed until combined, about 1 minute. Scrape the bowl; add the egg yolks and beat at medium-low speed until thoroughly combined, about 1 minute. Scrape the bowl; add the remaining eggs 2 at a time, beating until thoroughly combined, about 1 minute, scraping the bowl between additions.
  3. Scraping the bowl is important. It makes the filling smooth. Starting with room temp ingredients will also help.
  4. Brush the sides of the springform pan with the remaining 1/2 tablespoon melted butter. Set the springform pan on a rimmed baking sheet (to catch any spills if the pan leaks). Pour the filling into the cooled crust and bake 10 minutes. Then, without opening the oven door, reduce the oven temperature to 200 degrees and continue to bake until the cheesecake reads about 150 degrees on an instant- read thermometer inserted in the center, about 1 1/2 hours (check at 1h15). Transfer the cake to a wire rack, run a paring knife around the edge of the pan to loosen the cake, and cool until barely warm, 2½ to 3 hours. Unmold from pan, wrap in plastic wrap, and refrigerate until cold, at least 3 hours. (The cheesecake can be refrigerated up to 4 days.)
  5. To serve, dip a long, thin knife in hot water, then wipe off the water with a paper towel. The hot knife melting the cake will create clean slices.
  6. Bon Appétit!
Recipe from Baking Illustrated

Sunday, June 17, 2012

Apple Upside Down Cake


Happy Father's Day!

I have a pretty fantastic dad...here's to him! *clink*


This cake was his choice, and once again, ATK came through with an excellent execution.

It's surprisingly sweet.
The cake is really moist from the caramel apple syrup soaking through what used to be the bottom. (P.S. Lick it off the wax paper for me, will you?)
One layer.
...which means you can have a bigger piece, right?


Apples are always in season. (Could you use peaches or nectarines or something? Probably, and it would probably be awesome!)
Cornmeal adds just a bit of coarse, humble texture to the cake.


Gah...it's wonderful. I've been eyeing Deb's snack cakes (not this kind of snack cake) for a while now. They're so summery and not fussy, something that deserves to be eaten en famille.

Happy Father's Day! Make a lovely cake for Dad, or bake together!

Apple Upside Down Cake
Yield: one 9" round cake (or see other pan options below in #1)


Ingredients:

for the topping...
2 pounds Granny Smith or Golden Delicious apples, peeled and cored (that was 4 apples for me)
4 tablespoons unsalted butter
2/3 cup packed (4 2/3 ounces) brown sugar
2 teaspoons lemon juice

for the cake...
1 cup (5 ounces) all-purpose flour
1 tablespoon cornmeal (optional)
1 teaspoon baking powder
½ teaspoon salt
3/4 cup (5¼ ounces) granulated sugar
¼ cup packed (1 3/4 ounces) light brown sugar
2 large eggs
6 tablespoons unsalted butter, melted and cooled
½ cup (4 ounces) sour cream
1 teaspoon vanilla extract


Method:

  1. Grease and flour a 9" cake pan (sides at least 2" high, or your cake will overflow), or a 10" skillet or 8" square pan. Adjust oven rack to lowest position and preheat oven to 350 degrees.
  2. Halve apples from stem to blossom end. Cut 2 apples into  ¼-inch-thick slices; set aside. Cut remaining 2 apples into ½-inch-thick slices. Melt butter in 12-inch skillet over medium-high heat. Add 1/2-inch-thick apple slices and cook, stirring 2 or 3 times, until apples begin to caramelize, 4 to 6 minutes (do not fully cook apples). Add 1/4-inch-thick apple slices, brown sugar, and lemon juice and continue cooking, stirring carefully (the pan will be quite full), until sugar dissolves and apples are coated, about 1 minute longer. Transfer apple mixture to prepared cake pan and lightly press into even layer.
  3. Whisk flour, cornmeal, if using, baking powder, and salt together in medium bowl. Whisk granulated sugar, brown sugar, and eggs together in large bowl until thick and thoroughly combined (do this by hand for the full homey effect, it's really not too strenuous!), about 45 seconds. Slowly whisk in butter until combined. Add sour cream and vanilla and whisk until combined. Add flour mixture and whisk until just combined. Pour batter into pan and spread evenly over fruit. Bake cake until golden brown and toothpick inserted in center comes out clean, 35 to 40 minutes.
  4. Let cake cool in pan on wire rack for 20 minutes. Run paring knife around sides of cake to loosen. Place wire rack over pan and, holding rack tightly, invert cake pan and wire rack together. Lift off pan. Place wire rack with cake over baking sheet or large plate lined with wax paper to catch any drips. If any fruit sticks to pan bottom, remove and position it on top of cake. Let cake cool completely, about 20 minutes, then transfer to serving platter and serve.
Recipe from The Cook's Illustrated Cookbook, which happens to be my dad's book. So thematic.

A note about garnishes: powdered sugar and whipped cream


I like to use this tea ball or some similar tea-straining sieve to dust things with powdered sugar...it makes a smaller mess and is lots of fun! But for this cake, since the top is sort of wet from the apples, it doesn't make a lot of difference. The sugar dissolves quickly and disappears.

We used Reddi-wip, but bonus points if you whip your own. Or just eat it plain, no one will ask you where the whipped cream is (unless they're my dad).

Saturday, January 28, 2012

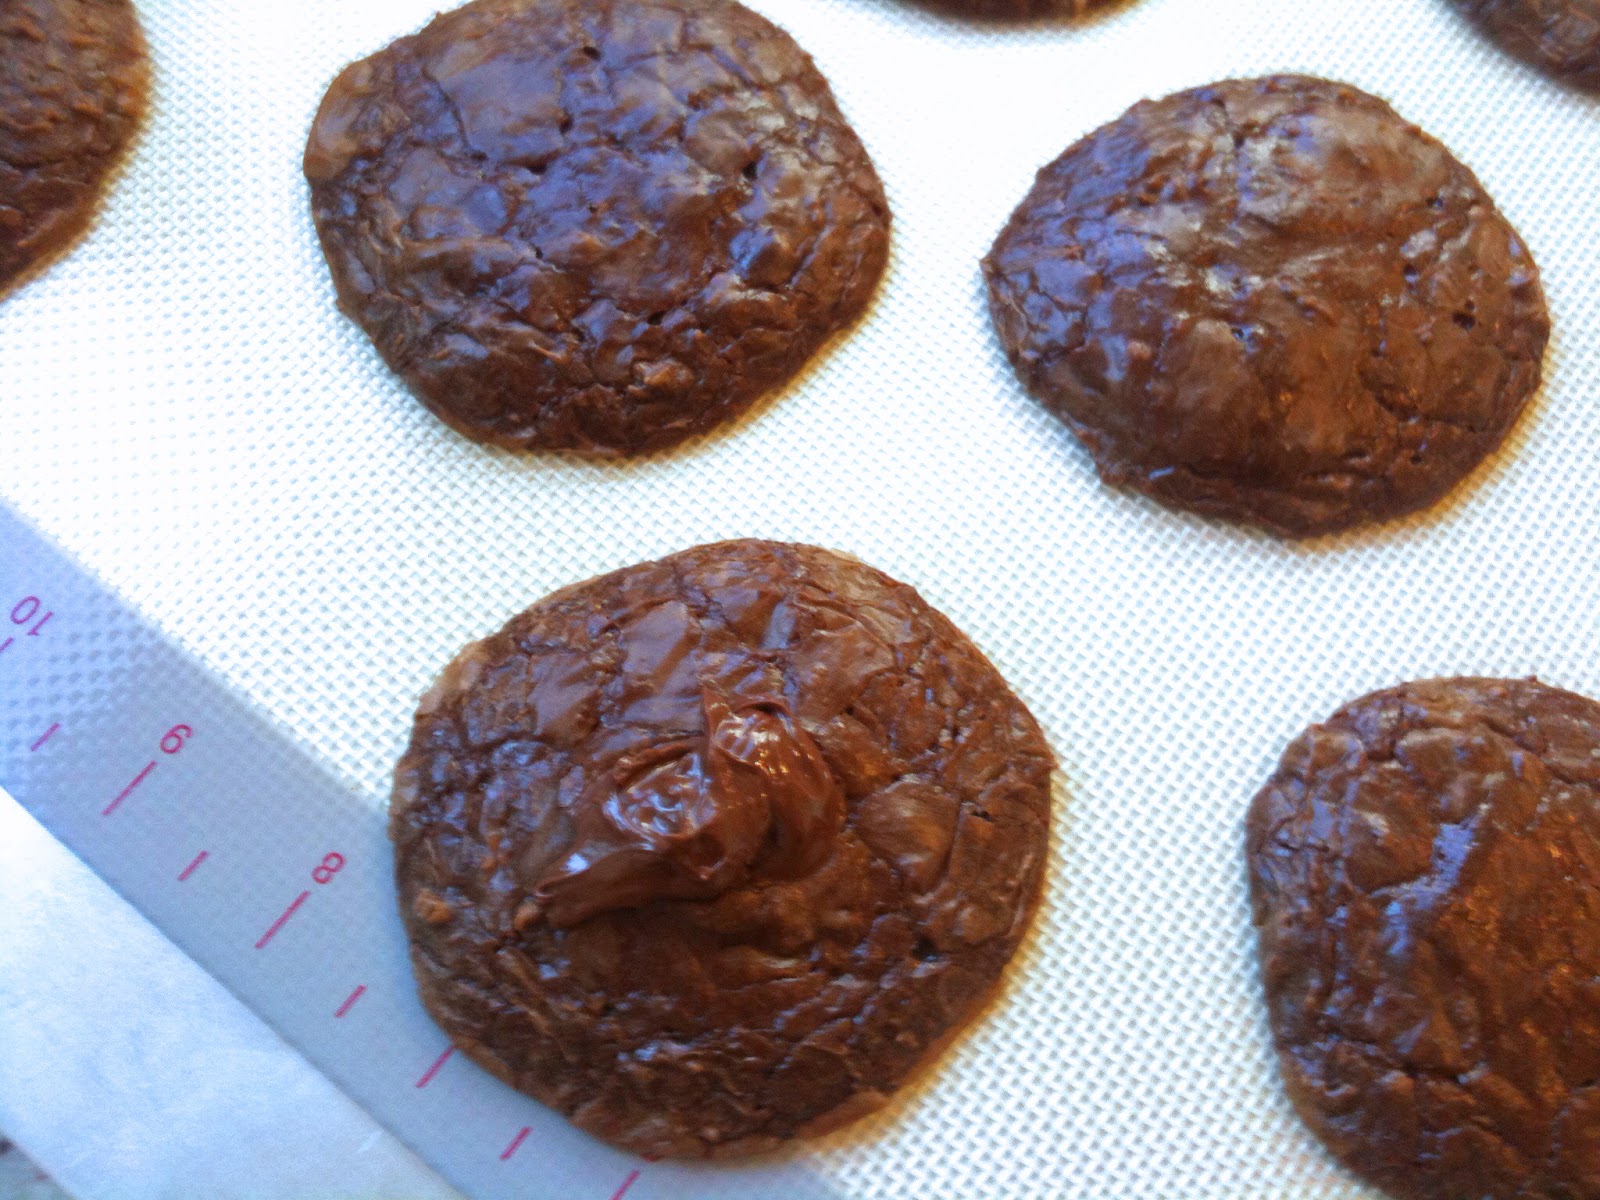
Chocolate Brownie Cookies

Today, I did everything you're not supposed to do.

My melted chocolate seized up so I added some water (why does it do that in the microwave? maybe too much stirring?) from our hot water spigot.
These cookies have water in them they shouldn't, long story short.

Ooooh, crinkly crust. How I love thee.

After the eggs and butter had been warming up on the windowsill, the eggs dropped on the counter and all three cracked. So I cracked them into another bowl and went on with life.

I didn't wait the full hour for the dough to chill.

I used Nestlé chocolate chips, not good chocolate. Oh and it was semisweet, not bittersweet.


Oh right. Plus it's January, and everyone's resolutions to eat well, be nice, exercise, not procrastinate, and save the whales.
Does the fact that these cookies only have three tablespoons of butter in them make them better?


When they came out of the oven, I plopped a droople of nutella on top of one and scraped the battery cookie onto a plate to scoop it up with a fork.
Into my mouth.

Photoshop could not fix the blurry, awkward coloring of this hastily taken camera phone photo...
Then I realized they were underbaked so, after eating half raw hot batter with nutella on top, the sheets of cookies went back into the oven after they had already sort of almost maybe cooled.

So what?

You know what the world said? The world is indifferent.
But my parents...my parents loved the cookies.

Common Scents: you don't have to do the recipe right for it to turn out delicious. And don't apologize for something you don't have to.

And,
put nutella on it.


Recipe from Joy the Baker.

Saturday, December 31, 2011

Harvey Mudd Brownies


My brother's girlfriend, Courtney, is visiting for the holidays. There she is, in the picture, smiling and looking perdy!


This pan of deliciousness was hatched up by her inspiration. We were talking about Harvey Mudd College (since I'm a senior and college is sort of a ubiquitous topic these days). Her reaction:

"Harvey Mudd...that sounds like a brownie. You know what I mean? Like, maybe a brownie with peanut butter."


Thus was born the Harvey Mudd Brownie.


This recipe is from Brown Eyed Baker. My notes are in blue, and my suggestions for next time are in green!

Harvey Mudd Brownies
Yield: 24 brownies
Prep Time: 35 minutes | Bake Time: 30 minutes

For the Brownies:
1¼ cups (6.25 ounces...we just got a new scale!) all-purpose flour
1 teaspoon salt
2 tablespoons dark unsweetened cocoa powder
11 ounces dark chocolate, coarsely chopped
1 cup (8 ounces or two sticks) unsalted butter, cut into 1-inch pieces
1 teaspoon instant espresso powder
1½ cups (10.5 ounces) granulated sugar
½ cup (3.5 ounces) packed light brown sugar 
(or do like we did and make your own...you want a total of 14 ounces of granulated sugar plus 1/2 tablespoon molasses)
5 eggs, at room temperature
2 teaspoons vanilla extract

For the Peanut Butter Swirl: (We thought there was too much...hardly any brownie showed through the top)
1/4 cup (8 tablespoons) unsalted butter, melted
1/2 cup (2 ounces) powdered sugar
3/4 cups (6.75 ounces) creamy peanut butter
1/4 teaspoon salt
1/2 teaspoon vanilla extract

1. Preheat the oven to 350 degrees F. Butter the sides and bottom of a 9×13-inch glass or light-colored baking pan. Line the pan with parchment paper.

2. In a medium bowl, whisk the flour, salt, and cocoa powder together.

3. Put the chocolate, butter and instant espresso powder in a large bowl and set it over a saucepan of simmering water, stirring occasionally, until the chocolate and butter are completely melted and smooth. Turn off the heat, but keep the bowl over the water and add the sugars. Whisk until completely combined, then remove the bowl from the pan. The mixture should be room temperature.

4. Add 3 eggs to the chocolate mixture and whisk until combined. Add the remaining eggs and whisk until combined. Add the vanilla and stir until combined. Do not overbeat the batter at this stage or your brownies will be cakey.

5. Sprinkle the flour mixture over the chocolate mixture. Using a rubber spatula (not a whisk), fold the flour mixture into the chocolate until just a bit of the flour mixture is visible.

6. Pour the batter into the prepared pan and smooth the top.

7. In a medium bowl, whisk together all of the peanut butter swirl ingredients. Using a spoon, place dollops (Courtney called these drooples) of the peanut butter mixture all over the top of the brownie batter. It's very important to droople it. Using a butter knife, swirl the chocolate and peanut butter, running the knife crosswise and lengthwise through the batters.

8. Bake in the center of the oven for 40 minutes (We needed some extra time, you might need anywhere from 30 to 40 minutes if you use a half batch of the swirl), rotating the pan halfway through the baking time, until a toothpick inserted into the center of the brownies (not the peanut butter part, since it stays gooey) comes out with a few moist crumbs sticking to it. Let the brownies cool completely, then lift them out of the pan using the parchment paper. Cut into squares and serve.

9. Store at room temperature in an airtight container or wrap with plastic wrap for up to 3 days.

And, it's New Years! What a way to celebrate! Do you have any traditions?
My family always watches the Rose parade the next morning, since my Dad hails from SoCal.

Wednesday, December 28, 2011

Cinnamon Rolls

There's really nothing like fresh cinnamon rolls and a yuletide log with dozens of family members gathered round the pine tree sipping hot tea and exchanging memories peacefully.

Wait, that's not how Christmas works at everyone's house? Sorry, I must have gotten mixed up.

We had a nice small Christmas, just my immediate family. It didn't really start until 11 or so, when my sleepyhead brother woke up, but luckily that gave time for the cinnamon rolls to proof (that's when they do their last rise before being baked, and I used a pan of boiling water in the oven to make a nice sauna for the rolls).


People always say that working with yeast is not as hard as you think it is. 

They're right. They told me so. You could let them tell you so, too, because it's worth the results.

It's just a lot of waiting. I guess when people wait, they worry, so it gives yeast a bad reputation.


Make some cream cheese frosting while you wait/worry. This stuff is seriously good.


Cinnamon Rolls
From Baking Illustrated (THE authority on baking...it's awesome)

Dough
1/2 cup milk
8 tablespoons (1 stick) unsalted butter
1/2 cup warm water (~110 degrees)
1 envelope (2 1/4 tablespoons) instant/rapid-rise yeast
1/4 cup (1 3/4 ounces) sugar
1 large egg plus 2 large egg yolks
1 1/2 teaspoons salt
4-4 1/4 cups (20-21 1/2 ounces) all-purpose flour
  1. Heat butter and milk in a saucepan or the microwave until butter melts. Remove and set aside to cool to lukewarm (~100 degrees).
  2. In a standing mixer, use the paddle to mix together the water, yeast, sugar, egg, and yolks at low speed until well mixed. I would suggest pre-"scrambling" the eggs in a bowl before adding them because low speed can't really do that for you.
  3. Add the salt, warm milk mixture and 2 cups of the flour and mix at medium speed until thoroughly blended, about 1 minute.
  4. Switch to the dough hook, add another 2 cups of flour, and knead at medium speed (adding up to 1/4 cup more flour if necessary, a tablespoon at a time) until the dough is smooth and freely clears the sides of the bowl, ~10 minutes. Hang on to your mixer...mine nearly ran itself off the counter!
  5. Scrape the dough onto a well floured surface, form into a round, place in a lightly oiled large bowl, and cover with plastic wrap. Leave to rise until doubled in bulk for 1 1/2 to 2 hours.

Frosting (make while you wait for the dough to rise for the first time if you're making everything in one day)
8 ounces (1 package) cream cheese, softened
2 tablespoons corn syrup
2 tablespoons cream (I used milk because we didn't have cream and it still worked just fine)
1 cup (4 ounces) confectioners' sugar, sifted
1 teaspoon vanilla extract
pinch salt
  1. Mix it all together in the mixer on low (so you don't inhale too much powdered sugar), gradually increasing to high so it becomes creamy and smooth.
  2. It's okay to have a spoonful. There will be plenty for the rolls :)
  3. Cover with plastic wrap and refrigerate.

Filling
3/4 cup packed (5 1/4 ounces) light brown sugar
3 tablespoons ground cinnamon
1/8 teaspoon salt

  1. Once dough has doubled, punch it down and transfer to a lightly floured surface. With a rolling pin, roll to a 16 by 12 inch rectangle (approximately).
  2. Mix together the filling ingredients and sprinkle all over the rectangle, leaving a half inch margin at the far end to seal the log.
  3. Roll the dough, starting near you, tightly and gently. When you get to the top, moisten the margin with water and pinch it to seal the roll. Fiddle with the ends to try to straighten them out if you like.
  4. Grease a 13 by 9 inch baking dish (I like butter best). Using unflavored dental floss or other plasticky thin string (or a sharp knife), cut the roll into 12 equal pieces: first in half, then each half in half again, then each piece in thirds. 
  5. Arrange in the pan, cover with plastic wrap, and let rise again for 1 1/2 to 2 hours until doubled in size.
OR

     5.  Arrange in the pan, cover with plastic wrap, and refrigerate overnight (these will rise in the 
          refrigerator)

OR

     5.  Arrange in the pan, cover with plastic wrap, and freeze. When you want to bake them, let them thaw 
          and then do rise.

To speed the rise, you can put the pan in the oven with a pan of boiling water and close the door, creating a proofing box. Keep an eye on the rolls, they'll be done in ~45 minutes (this is what I did after freezing for a day).

     6.  To bake, preheat the oven to 350 degrees. Bake the rolls for 25 to 30 minutes, or until they register 
          185 to 188 degrees. Remove to a cooling rack, let cool for 10 minutes, frost and serve!


Hypnotizing...

Saturday, December 17, 2011

Pumpkin Bread


There are two ways I could spin this story.

Pumpkin bread is a holiday tradition in my family. My mom (who is not the primary cook in our family, though she certainly can cook!) ALWAYS makes it. On the top of the recipe, it indicates that the loaf is my brother's favorite. The original copy got so dirty that we had to retype it.

I am making this bread because it's a tradition. My mom's traveling, but I still love the smell emanating from the oven.


She used to step in halfway through the sifting and help out my aching wrists. It was always my job to flour the pans. We never ever used a stand mixer--always handheld.

The other half of the story is that I'm pretty sure the recipe came from the label off a can of pumpkin.


And, our kitchen's a mess.

But it's still our family recipe.


Mom's Pumpkin Bread


3 cups sugar
1 cup vegetable (canola) oil
4 eggs
1 can (16 oz...though now they're 15 oz! What's happening to the world? I just used the 15 oz can anyways) pumpkin
3 1/2 cups flour
2 teaspoons baking soda
2 teaspoons salt
1 teaspoon baking powder
1 teaspoon nutmeg
1 teaspoon allspice
1 teaspoon cinnamon
1/2 teaspoon cloves
2/3 cup water

  1. Preheat oven to 350 F. Butter and flour 2 9x5 inch loaf pans. 
  2. Cream sugar and oil together. Mixture will be grainy.
  3. Add eggs and pumpkin, mix well.
  4. Sift together dry ingredients in another bowl.
  5. Add dry ingredients alternately with water, mixing as you go.
  6. Pour into the prepared pans and bake for 1h 20 or until a skewer inserted a few places comes out clean.
  7. Let stand 10 minutes before removing from the pans to cool completely on wire racks.
Yield 2 loaves.