Showing posts with label summer. Show all posts

Monday, August 1, 2016

Peach and Blueberry Freeform Tart

This week I meditated on how some food combinations seem inevitable. Sure, chocolate and peanut butter, strawberries and cream, steak and potatoes, the usual suspects.


But then there're the ones we don't really think about. They're convenient and they just seem right.
Nectarines and Raspberries
Peaches and Blueberries
Apricots and Blackberries.
(these are basically the combos suggested by Cook's Illustrated, who wrote this recipe...so I don't take full credit, but I do agree wholeheartedly that they are good and somewhat inevitable combinations).

Maybe it's just the slight seasonal shifts in what the two-week peak season is for each fruit. Any subset of pitted fruit and berry is delicious, but somehow peaches feel like they go with blueberries.


And throw it all in a homemade flaky pie crust, no crimping skills required, and straight into the oven. It's like, I can do crimping, and I can do making homemade pie crust dough, but doing both at once is pretty overwhelming. Let's side with taste and throw caution to the wind today.


The other nice thing is that they're a bit smaller than most pies. The whole thing is basically gone by the time you're done with dinner and breakfast the next day. It has no time to go soggy. If you're three people, maybe you can eke out another dinner dessert from it, but I dare you to let it last that long!


Choose whatever combination of summer fruit your heart desires...just adjust the sugar as you like. You can add a vanilla bean, or lemon zest, or other fanciness. Or not - I didn't miss a thing in this simple version.

Peach and Blueberry Free Form Tart
Yield: 1 tart (6 good slices)

Ingredients:
For the dough:

  • 1½ cups unbleached all-purpose flour (7½ oz)
  • ½ teaspoon table salt
  • 10 tablespoons unsalted butter, cold, cut into cubes
  • 3 - 6 tablespoons cold water (I put an ice cube in mine)

For the filling:

  • Fruit for about 3 cups of filling - I used 3 medium peaches sliced into ½-inch wedges and a few handfuls of blueberries
  • 3-5 tablespoons granulated sugar
  • 1 tablespoon granulated sugar for sprinkling the crust
Method:
  1. Note: this dough uses a food processor, but my favorite trusty method of grating frozen butter into the flour and salt and then working in the liquid by hand would probably also work well! Just jump to step 3 in that case.
  2. Combine flour and salt in a food processor and pulse a few times to combine. Sprinkle butter cubes over and pulse until most of the flour is the texture of bread crumbs and some pieces of butter are the size of peas. Add the water a tablespoon or two at a time, pulsing to combine, until you can squeeze a bit and it sticks together (dough will still be sandy/dry in places. That's okay!).
  3. Dump out the dough onto a countertop and gather into a rectangle taller than it is wide, about the width of your two hands. Farthest from you, press 1/6th of the dough away from you, then repeat with the next 1/6th until all the dough has been pressed into the counter (this creates butter flakes!). Gather back up into a pile and smear the dough against the counter once again. Now, when you gather it up it should form a pretty cohesive dough. Form into a 4-inch disk, wrap in plastic wrap, and refrigerate for one hour.
  4. With 30 minutes to go on the dough, slice up your fruit but don't sugar it yet. Preheat your oven to 400 degrees F and put a rack in the lower-middle position. 
  5. When the hour is up, take the dough out and roll on a lightly floured piece of parchment paper. Just fix the cracks on the edges as they appear and keep rolling until you have a circle approximately 12 inches across. Put this, parchment and all, on a baking sheet and place the whole assembly back in the refrigerator for another 15 minutes. 
  6. With 5 minutes left on the dough, sprinkle sugar on fruit to taste, then pull out the dough and mound the fruit in the center. You should aim to have a 2½-inch border all around the fruit. Fold the edges in over the fruit, leaving a bit of dough space for the fruit to slide into as it cooks (about ½ inch). Fold over but don't pinch the dough or press it down.
  7. Working quickly, brush the dough with water and sprinkle the remaining 1 tablespoon of sugar evenly over the crust. 
  8. Bake for 45-55 minutes, or until crust is golden and fruit juices are bubbling. Cool 10 minutes on baking sheet, then slide off onto a rack to finish cooling. Dig in in half an hour for warm tart or an hour for room temperature. 
Enjoy! Recipe from Cook's Illustrated.

Friday, August 9, 2013

Lemon Blueberry Cheesecake Bars

These are dreamy, creamy, crazy bars. Like lemon bars mashed up with cream cheese and lets throw some incredibly purple swirls from fresh blueberries in there.

Like portable blueberry lemonade flavored cheesecake.
If this looks orange to you, I promise you it's lemon. Also I'm obsessed with juice/zest bowls--they look like eggs!
It has all the good parts: graham cracker crust, 2 full packages of cream cheese, and two full lemons, juice and zest. Now, about the cream cheese: I love using neufchatel cheese, which is basically low-fat cream cheese, in these kinds of recipes. I believe you get more tangy cheese flavor, while helping to keep these...umm, I was going to say "more healthy," but I think "less unhealthy" makes more sense. And I always get the store brand.


Mostly I do it for the cheesiness, even though I have no idea if that's true. Neufchatel is sold the same way as cream cheese, in 8 ounce blocks. The Kitchn has a nice explanation of the difference here.


Also (BONUS), this recipe uses one food processor. Dump ingredients and go. wipe out. repeat.


Portable, not fussy or (too) messy, and big on flavor. Glorious, creamy, fruity and summery, these bars beg to be made.

Lemon Blueberry Cheesecake Bars
Yield: 1 8x8 pan (I cut it into 9 generous pieces)

Ingredients:

  • 9 graham crackers, broken into pieces
  • 2 tablespoons granulated sugar
  • Pinch ground cinnamon
  • 4 tablespoons unsalted butter, melted
  • 16 ounces cream cheese or neufchatel (see note above), room temperature if possible
  • ½ cup granulated sugar
  • 2 eggs
  • Zest and juice of 2 lemons
  • 1½ cups fresh blueberries
Method:
  1. Preheat oven to 325 degrees F. Line an 8x8-inch baking pan with parchment paper, letting excess hang over the sides of the pan. (or grease it, and then at the end you can just cut the bars out of the pan)
  2. Make the Crust: In a food processor, process the graham crackers, sugar, and cinnamon until you have the texture of bread crumbs (do not cut your thumb on the blade reaching in to break up the crackers, like I did). Add the melted butter and pulse a couple of times to fully incorporate. Press the mixture into the lined baking pan and gently pat down evenly. Bake for 12 minutes, until golden. Set aside.
  3. Make the Filling: Wipe out the food processor. Add the cream cheese, sugar, eggs, lemon zest and lemon juice. Process until well combined. (If your cream cheese is cold, process just cream cheese and sugar for a minute or so to soften it up before adding the liquidy eggs) It should have a smooth consistency. Pour the filling onto the crust and then sprinkle the blueberries over top. The blueberries will sink slightly, but should still be half exposed. As they bake, they will sink a little more and break down.
  4. Bake in the oven for 35 minutes or until the center only slightly jiggles. Remove from the oven and cool completely to room temperature and then refrigerate for at least 3 hours before serving. Once set, remove from pan using the parchment lining and slice.

Recipe from Brown Eyed Baker. This recipe is so perfect that I changed literally nothing.

Friday, August 3, 2012

Three Berry Pie


It was (is...) summer. And although, out of all the dessert categories, pie and ice cream are my least favorite (as in, I don't crave them hardly ever), I had a craving to make a pie.


Let's be clear here. Although I did eat lots of pie, and loved it...

I had a craving to craft pie dough by hand, roll it out, buy enormous quantities of berries at costco, and bake a pie.

Before, and

...after!
What a great experience! Granted, I definitely "screwed up" the crust by overmixing it or adding too much water or something. I'm still not sure what I did wrong. I'm no experienced pie baker. But it was beautiful and tasty.
In fact, the crust was sort of shortbread-y in a delectable way! It was also thick, stood up to the filling, and the bottom didn't get soggy.

Celebrate the wins in life. You are a champion.


The filling was out. of. this. world.

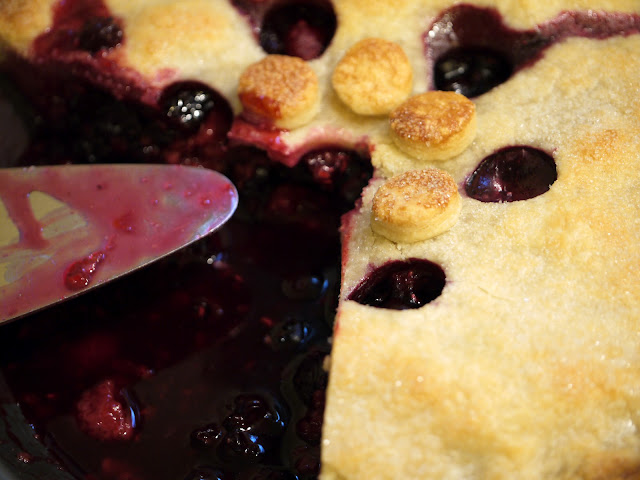
Blackberries, raspberries, and blueberries playing off each other in a simple filling, which by the way stayed together to make lovely slices on the second day, after what was left was refrigerated.


Enjoy, guys! Use whatever berries that are sort of like the ones I did, in whatever combo you have, just make sure you have 5 1/2 - 6 cups of berries.

Common Scents: Eat some of this with lightly sweetened (with honey) greek yogurt for breakfast. Carbs from the crust, fruit in the pie, and protein from the yogurt. Complete breakfast? Check.

Three Berry Pie
Yield: 1 pie

Make crust 1 hour ahead and refrigerate:


Ingredients:

3 cups all-purpose flour
1 tablespoon sugar
1 teaspoon salt
1/2 cup (1 stick) cold unsalted butter, cut into 1/4-inch pieces
1/2 cup cold vegetable shortening, cut into pieces
1/2 cup cold water

Method:

  1. Combine the flour, sugar, and salt in a large bowl. Toss well, by hand, to mix. Scatter the butter over the dry ingredients and toss to mix. 
  2. Using a pastry blender, 2 knives, or your fingertips (or toss this whole shooting match into a food processor), cut or rub the butter into the flour until it is broken into pieces the size of small peas. Add the shortening and continue to cut until all of the fat is cut into small pieces. 
  3. Sprinkle half of the water over the mixture. Toss well with a fork to dampen the mixture. Add the remaining water, l 1/2 to 2 tablespoons at a time, and continue to toss and mix, pulling the mixture up from the bottom of the bowl on the upstroke and gently pressing down on the downstroke. 
  4. Form into two disks, one slightly larger (this will be the bottom crust) than the other. Wrap in plastic and refrigerate until firm enough to roll, about 1 hour.
Then, assemble the pie:

Ingredients:
1 recipe pie dough (see above)
5 1/2 to 6 cups berries (blueberries, raspberries, strawberries, blackberries, and cranberries all work well, wash if fresh and thaw partially if frozen. Drain if canned)
1/2 cup sugar
1 1/2 tablespoons cornstarch
pinch salt
1 tablespoon fresh lemon juice
1 teaspoon grated lemon zest

Heavy cream (or half and half or milk if you don't have cream)
sugar

Method:
  1. On a sheet of lightly floured waxed paper or a silpat, roll the larger portion of the pastry into a 12-inch circle with a floured rolling pin. Invert the pastry over a 9-inch standard pie pan, center, and peel off the paper or silpat. Gently tuck the pastry into the pan, without stretching it, and let the overhang drape over the edge. Place in the refrigerator for 15 minutes.
  2. Meanwhile, combine the berries in a large bowl. Mix the sugar and cornstarch together in a small bowl, then stir the mixture into the fruit. Stir in the nutmeg, salt, lemon juice, and lemon zest. Set aside for 10 minutes. Preheat the oven to 400°F.
  3. Roll the other half of the pastry into a 10-inch circle on a sheet of lightly floured waxed paper. Turn the filling into the chilled pie shell, smoothing the fruit with a spoon. Moisten the outer edge of the pie shell with water with a pastry brush. Invert the top pastry over the filling, center, and peel off the paper. Press the top and bottom pastries together along the dampened edge. Trim the edge to an even 1/2 inch all around, then sculpt the overhang into a pretty ripple, folding under as you go to make a thick ridge. Poke or cut several steam vents in the top of the pie with a fork, paring knife, or cookie cutter. Brush the top of the pie generously with heavy cream and sprinkle with sugar.
  4. Place the pie on the center oven rack and bake for 30 minutes. Reduce the oven temperature to 375°F and rotate the pie 180 degrees, so that the part that faced the back of the oven now faces forward. Just in case, slide a large aluminum foil—lined baking sheet onto the rack below to catch any spills. Continue to bake until the juices, most likely visible at the steam vents, bubble thickly, 25-30 minutes. If the top pastry starts to get too brown, cover with loosely tented aluminum foil during the last 10 minutes.
  5. Transfer pie to a wire rack and let cool for at least 1 hour before serving with vanilla ice cream.
From Pie (thanks, library!).

Saturday, July 21, 2012

Chocolate Ice Cream

Oh my goodness. 

This is basically the reason I keep trying to make macarons. Because without the promise of rich, creamy, custardy ice cream from the leftover yolks, it would just be depressing to make cracked, foot-less (feet-less?) meringue cookies. That still taste amazing, but for the foodie in me, I just want it to be pretty too, you know?

But let's talk about this. Somehow this ice cream manages to be simultaneously dark/rich and milky/creamy. It is so dang decadent.


The recipe hails from a cookbook I keep seeing around the blogosphere, Perfect Scoop by David Lebovitz. It's apparently the ice cream bible, and I can attest to the greatness of his recipes.

I got it at the library. I'm pretty sure the checkout lady thought I was downright crazy when I checked out with Toy Story 3, a Carole King CD, a summer fluff (the quote on the cover says "[A] thoroughly enjoyable girlish romp") novel, and cookbooks focusing on ice cream, pie (recipe coming soon!!), and cheesecake, respectively. 

And I came out feeling like I had just gotten so much amazing stuff for free. One reason I absolutely love the library. 


P.S. The highlighted words in this post say: rich creamy custardy so dang decadent downright crazy free love. 
Food for thought. 


Chocolate Ice Cream
Yield: 1 quart

Ingredients:
2 cups heavy cream
3 tablespoons unsweetened Dutch-process cocoa powder (I didn't have it, so I just used Hershey's. Seemed fine, but it couldn't hurt to use Dutch-process)
5 ounces bittersweet or semisweet chocolate (good quality makes all the difference!)
1 cup milk
¾ cup granulated sugar
Pinch of salt
5 large egg yolks
½ teaspoon vanilla extract

Method:
  1. Warm 1 cup of the cream with the cocoa powder in a medium saucepan, whisking to thoroughly blend the cocoa. Bring to a boil, then reduce the heat and simmer at a very low boil for 30 seconds, whisking constantly. Remove from the heat and add the chopped chocolate, stirring until smooth. Then stir in the remaining 1 cup cream. Pour the mixture into a large bowl, scraping the saucepan as thoroughly as possible, and set a mesh strainer on top of the bowl.
  2. Warm the milk, sugar, and salt in the same saucepan. In a separate medium bowl, whisk together the egg yolk. Slowly pour the warm milk into the egg yolks, whisking constantly, then scrape the warmed egg yolks back into the saucepan.
  3. Stir the mixture constantly over the medium heat with a heatproof spatula, scraping the bottom as you stir, until the mixture thickens and coats the spatula (170°F on an instant-read thermometer). Pour the custard through the strainer and stir it into the chocolate mixture until smooth, then stir in the vanilla. Stir until cool over an ice bath.
  4. Chill the mixture thoroughly in the refrigerator, then freeze it in your ice cream maker according to the manufacturer’s instructions. (If the cold mixture is too thick to pour into your machine, whisk it vigorously to thin it out.)
Recipe from Brown Eyed Baker, the blog queen of ice cream.

Wednesday, July 4, 2012

Store-bought from Scratch


Happy Fourth of July!!

Our town has fireworks the third, and the neighboring towns do it the fourth...so we get double!! Everyone's got their favorite ones: I love the ones that branch and the ones that trickle down like weeping willows, other people flip for the ones that change colors or the smiley faces or the hearts. Either way, fireworks are special because you don't get to see them most of the year.


So few things are rare anymore, given the internet. You could watch someone's youtube video of fireworks, I guess. Knock yourself out. But it's not the same! You don't get the whole perspective of their huge-ness.


And it's pretty rare, as families get older and children move across the country, to see each other.

In person. Not skype or facetime or google hangout.

Celebrate the rare moments of life!

A bench scraper makes cutting brownies super easy!
For our Independence day gathering, I made homemade brownies and homemade ranch dressing.
Two things that yes you can get from a box/bottle, but that's not rare! That's what happens in real, everyday life. Today, you have time to throw some ingredients in a bowl and have it taste miles better than a corporate chemical concoction (which, by the way, is darn good).
Both of these are one bowl, one whisk commitments.

So don't be shy! They won't bite.

From ingredients you most likely have in your pantry, these come together in a snap.


For the ranch, sub in what you like! I tried to use yogurt in place of sour cream (which was fine) and mayo (since I don't like mayo but without it the dressing was too tart and watery, for my taste), but then decided to add a bit of mayo. Experiment, taste with some carrots as you go, and don't sweat it.

P.S. If we had had some cream cheese open, I'd have been all over putting some in the ranch. I think it would have been great! Alas, we didn't, but you might!

See that crackly coating?
Chewy Brownies


Ingredients:

1/3 cup (1 ounce) Dutch-processed cocoa
1 1/2 teaspoons instant espresso powder (optional but delicious)
1/2 cup plus 2 tablespoons boiling water (boil, then measure)
2 ounces unsweetened chocolate, chopped fine
1/2 cup plus 2 tablespoons vegetable oil
4 tablespoons unsalted butter, melted
2 large eggs plus 2 large yolks
2 teaspoons vanilla extract
2 1/2 cups (17 1/2 ounces) sugar
1 3/4 cups (8 3/4 ounces) all-purpose flour
3/4 teaspoon salt
6 ounces bittersweet chocolate, cut into 1/2-inch pieces (or 6 ounces chocolate chips--that's 1 cup!)


Method:

  1. Adjust oven rack to lowest position and heat oven to 350 degrees. Make sling by folding 2 sheets of parchment paper so that they are as wide as 13 by 9-inch baking pan (one 13-inch sheet and one 9-inch sheet). Lay sheets in pan perpendicular to one another, with extra hanging over edges. Push parchment into corners and up sides of pan, smoothing flush to pan (it doesn't have to be perfect!) Spray with non-stick spray and set aside.
  2. Whisk cocoa, espresso powder, if using, and boiling water together in large bowl until smooth. Add unsweetened chocolate and whisk until chocolate is melted. Whisk in oil and melted butter. (Mixture may look curdled.) Add eggs, egg yolks, and vanilla and continue to whisk until smooth and homogeneous. Whisk in sugar until fully incorporated. Add flour, salt and chocolate pieces, and mix into batter with rubber spatula until combined. 
  3. Transfer batter to prepared pan spread batter into corners of pan and smooth surface. Bake until toothpick inserted in center of brownies comes our with few moist crumbs attached, 30 to 35 minutes, rotating pan halfway through baking. Transfer pan to wire rack and let cool for 1½ hours. If your pan is glass, take the sling out of the pan after 10 minutes of cooling, so the heat-retaining glass doesn't overcook them!
  4. Remove sling from pan (if you haven't already), peel sides of sling down, cut and serve. A bench scraper cuts the brownies nicely, just press down, don't drag it through the brownies. Store in airtight container at room temp for 3 days, if they last that long.

Recipe from Cook's Illustrated.

Ranch Dip
Yield about 1 1/2 cups dip


Ingredients:
1 cup greek yogurt (or combo of mayo and sour cream)
Buttermilk (or milk) to desired consistency
about 1/4 cup mayonnaise
1 teaspoon lemon juice
1 teaspoon Dijon mustard (my favorite thing in the world)
1/2 teaspoon onion powder
1/2 teaspoon salt (or to taste)
Black pepper (to taste)
1/2 teaspoon dried parsley (use fresh if possible)
1/2 teaspoon dried chives (ditto)
1/4 teaspoon dried dill (double ditto and a lot of alliteration)

Method:

Mix together the yogurt, buttermilk, and mayo first to the desired consistency, then add the rest of ingredients. Stir, taste, adjust, using what you have on hand!
Keep refrigerated and enjoy with everything!

Based off recipe from Serious Eats.

Friday, June 8, 2012

Macarons

It's summer! Joy and Tracy have been getting folks on board with their summer bucket lists, so I was inspired to return to my bucket list.

And it hit me.
Macarons.


These are different from macaroons, which are coconut or almonds covered in sticky sweetened condensed milk, mounded up into little haystacks, and baked. Sometimes people cover them in chocolate. They're really smart.

No, although macaroons are on my bucket list too, macarons were the project du jour. Supremely light and yet totally chewy (we all love a good chewy cookie, amirite?), these are perfect for the warmer weather.


I used Bravetart's method, which is fantastic. These are great summer baking.

Wait, you're saying. Macarons, they're killed by humidity, right? According to Bravetart, no. After all, pastry chefs make pastries whether or not it's humid, hot, dry, raining. No biggie!

Because I'm lazy, and because I love chocolate, I made ganache instead of buttercream...just boil some cream in the microwave (1 minute and then 30 second bursts on high), add an equal amount of chocolate by weight, and whisk until smooth and supple.
Supple?
Yup.
Add a pinch of salt and 1/2 teaspoon of vanilla extract, chill and fill!


It's for summer. They go in the fridge. They stay there. It helps the flavors get mellow with one another and keeps the chocolate from splooshing everywhere.

I'll be honest with y'all. Half of my macaron shells didn't get feet and cracked on the top.

You know what? They still taste amazing. Yeah, sure, it's not the pinnacle of macaron glory, but no one's complaining when it's this good.

Summer bucket list:
Tackle something hard.


Check!

The recipe I used was Bravetart's basic macaron.
She also has fantastic posts on the Ten Commandments and the Ten Myths of macaron making.

Thanks Stella!!