Showing posts with label homemade. Show all posts

Monday, December 30, 2013

Homemade Peppermint Marshmallows

Oh whoa. Flavor bomb y'all.


Homemade marshmallows. Who would've thought that was a thing? But ask the blogiverse--it's a thing. They're light, airy, softer than storebought, and the blankest canvas for all of your flavor inspirations.

I just imagined lavender marshmallows! That would be incredible. Gotta get on that one soon!
(in other news, I have the attention span of a squirrel).


But these--these are peppermint marshmallows. The refreshing answer to holiday cookies and richness, a light airy sugar cloud scented with mint.

before...
Marshmallows are not that difficult to make: gelatin gets a bit of water to swell up while sugar, corn syrup, and a bit of water boil away on the stove. Whip together (with a mixer unless you want your arm to fall off) for ten minutes, pour in a pan, shake some confectioners sugar over the whole shebang, and cool your jets for several hours. Flip out the slab of fluffy goodness, cut into squares, and shake it like a polaroid picture with the confectioners sugar.

in progress...
Plop in a mug of not too sweet hot chocolate, and die of bliss. It's so dang good! They melt and make a lovely insulation for the hot chocolate, flavoring every sip along the way until you give up and dig in with a spoon.

and...DONE! 

Homemade Peppermint Marshmallows
Yield: 9x13 inches of marshmallow, cut as you like (that's about 100 square inches)

Ingredients:
  • ⅔ cup (2 2/3 ounces) powdered sugar
  • ⅓ cup (1 1/3 ounces) cornstarch
  • 1 cup cold water, divided in halves
  • 2½ tablespoons (2 1/2 packets) unflavored gelatin
  • ⅔ cup (7 1/3 ounces) light corn syrup
  • 2 cups (14 ounces) granulated sugar
  • ¼ teaspoon salt
  • 2 teaspoons vanilla extract
  • ½ teaspoon peppermint extract
Method:
  1. Line a 9x13-inch pan with foil, enough so that excess foil hangs over the sides of the pan. Spray with non-stick cooking spray and set aside.
  2. In a small bowl, whisk together the powdered sugar and cornstarch. Put in a ziplock bag and set aside.
  3. Pour ½ cup of the cold water into the bowl of an electric mixer fitted with the whisk attachment. Sprinkle the gelatin over the water. Let stand until the gelatin becomes very firm, about 15 minutes.
  4. Meanwhile, combine the remaining water and the corn syrup in a medium saucepan. Pour the sugar into the center of the saucepan and add the salt. Place the pan over medium-high (full high on my stove) heat and bring to a boil, gently swirling the pan, until the sugar has dissolved completely and the mixture reaches 240 degrees F, about 10-12 minutes.
  5. Turn the mixer on low speed and carefully pour the hot syrup mixture into the gelatin mixture, avoiding the side of the bowl as much as possible. Gradually increase the speed to high and whip until the mixture is very thick and stiff, 10 to 12 minutes, scraping down the bowl as needed. Add the vanilla and peppermint extract and mix until incorporated, about 15 seconds.
  6. Scrape the mixture into the prepared pan with a spatula (non-stick spray may temporarily help, but I found I didn't want to have to keep spraying it and it wasn't that bad without the spray). Smooth the top into an even layer. Sift 2 tablespoons of the powdered sugar mixture over the pan. Cover and let sit overnight at room temperature.
  7. The next day, turn the marshmallow slab out onto a cutting board and peel off the foil. Sift 2 tablespoons of the powdered sugar mixture over the slab. Using a pizza cutter or a sharp knife that has been sprayed with non-stick cooking spray (see note above, I gave up on that), cut into 1-inch strips one way, and then across the other way for square marshmallows. You could use cookie cutters to cut them out, too, if you like.
  8. Place the remaining powdered sugar mixture in a large ziploc bag. Working with 3 or 4 marshmallows at a time, toss the marshmallows in the bag with the powdered sugar mixture, then toss in a fine-mesh strainer to remove any excess powder. Marshmallows can be stored in an airtight container or bag for up to 2 weeks.

Friday, June 14, 2013

Homemade Marshmallow Fluff

Ok, so most of these pictures are of the peanut butter chocolate chip oatmeal cookies about which I posted a while back...


But I also made a fluffernutter sandwich!


Low fat lifestyle! Not. It was amazingly delicious, though!

Is it a coincidence that both of these things have peanut butter in them?


I think not. I think people just haven't realized what a good smear of peanut butter does to the s'more flavor combination of marshmallow (and chocolate). It adds the salty dimension and the umami dimension, rendering both of these dishes perfect.


Can I get a whoop for this almost whoopie pie? Though the cookies are more dense and chewy than cakey, the homemade marshmallow fluff stood up to their strength and it makes for a delicious combination.

I made these cookies with my blogger friend Maxine--we also made peanut butter and jelly muffins together a while back! Peanut butter is definitely one of the adhesives that keeps us together.

Speaking of adhesives, let's talk marshmallow fluff. This is very similar to the fluff you get out of a jar...maybe a little more spring/stick/toughness but similar texture and flavor. And it's a fun way to try your hand at an Italian meringue (when you pour hot sugar syrup into egg whites and beat the you-know-what out of them). It's crazy, it feels like you're going to cook the eggs and end up with gross hard sugar stuck to the mixing bowl, but it all comes together like a heavenly cloud. An inescapable cloud, given how sticky it is.

You want to know how to make these? They're also from Michele!
Homemade Marshmallow Fluff
Yield: about 2 cups

Ingredients:

  • ¾ cup granulated sugar
  • ½ cup light corn syrup
  • ¼ cup water
  • Pinch of salt
  • 2 egg whites
  • ¼ teaspoon cream of tartar
  • 1½ teaspoons vanilla extract
Method:

  1. Combine the sugar, corn syrup, water and salt in a small saucepan over medium-high heat. Boil, stirring occasionally, until the mixture reaches 240 degrees F on a candy thermometer (or get it boiling and then boil vigorously for another 5 ish minutes).
  2. While the sugar mixture is boiling, add the egg whites and cream of tartar to a stand mixer fitted with a whisk attachment. Whip on medium-high speed until soft peaks form. The egg whites should be ready and waiting when the sugar mixture reaches 240 degrees F. If the egg whites reach soft peaks before the sugar mixture reaches its temperature, turn off the mixer.
  3. Once the sugar mixture reaches 240 degrees F, turn the mixer speed to low and very slowly drizzle the syrup down the side of the mixer bowl. Once all of the syrup has been added, increase the speed to medium-high and beat until stiff, glossy peaks form and the mixture has cooled substantially, about 7 to 9 minutes. Add the vanilla extract during the last minute or two of beating.
  4. Use immediately, or store in an airtight container in the refrigerator for up to 2 weeks.
Recipe from Brown Eyed Baker

Friday, November 23, 2012

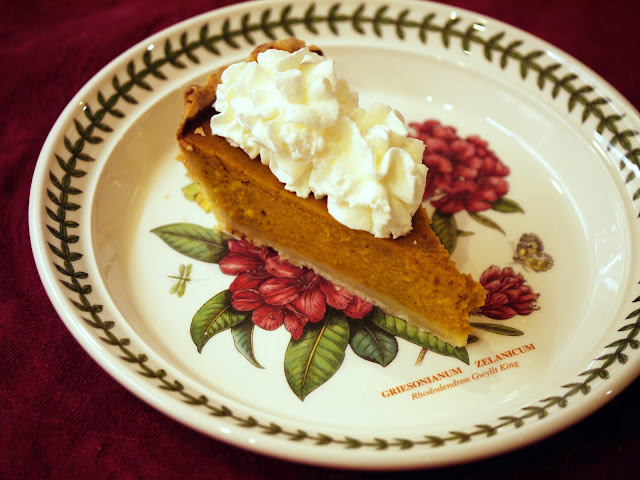
Homemade Pumpkin Pie

So much pumpkin.


My mom, though usually generous with compliments on things I make, proclaimed this the best pumpkin pie she had ever eaten.

Let's start at the very beginning
A very good place to start.
When you read you begin with ABC,
When you bake you begin with 
Butter Eggs, Flour

Ok, so that's not how the song goes. This particular song of a recipe begins with pumpkins. 


Real. Pumpkins. Tear off the stem, halve 'em, scoop out the guts (save them!!), and then quarter. Straight onto a baking sheet and roast.

Boom, roasted.

Chunks of tender pumpkin flesh are scooped out of their skins and beaten to a pulp in a food processor. It's not violent in the least. 

The resultant puree is so purely pumpkin and so gosh dang fresh it's ridiculous. Note that smaller pumpkins are better for making pie with (the ones you carve for Halloween, not so much. The Pioneer Woman, whose recipe this is, has great pictures to give you an idea of how big the pumpkins should be).

And because we can, and we should, we will use those pumpkin seeds! Rinse and pull off the pulpy bits, not taking too much care because time is money, and then let them dry on a baking sheet lined with foil. 


I stuck them in my cooling down oven from roasting the pumpkin to speed up the drying.

Roasted with olive oil and salt, these are an excellent snack.


Because I wanted to make pumpkin pie entirely homemade, I also made crust, with guidance from my dad, the king of pie. He taught me how to let those chunks of shortening be.

Just let it be. There will be huge chunks of fat. That makes it flaky and wonderful...let it be.

The last component, the filling, comes from a family recipe handed down from my cousins. It's moussier and lighter than the recipe on the back of a can of pumpkin.

The homemade crust and puree really elevated this pie. It's nothing fancy looking, but the flavor and texture are unbeatable. Butchering three innocent pumpkins is worth it for fresh, punchy aroma.


Homemade Pumpkin Pie
Yield: 1 12-inch pie

Pumpkin Puree:
Follow Pioneer Woman's tutorial on how to make homemade pumpkin puree!
(you can freeze extra or make granola!)

Crust: (makes two crusts, you'll only need one)
Ingredients:
1 1/2 cups (12 1/2 ounces) all-purpose flour 
2 tablespoons sugar
1 teaspoon salt
12 tablespoons unsalted butter, cut into 1/4-inch pieces and chilled
8 tablespoons vegetable shortening,cut into 8 pieces and chilled
1/4 cup vodka, chilled
1/4 cup ice water

Method:
  1. Process 1 1/2 cups flour, sugar, and salt together in food processor until combined, about 5 seconds. Scatter butter and shortening over top and continue to process until incorporated and mixture begins to form uneven clumps with no remaining floury bits, about 15 seconds.
  2. Scrape down bowl and redistribute dough evenly around processor blade. Sprinkle remaining 1 cup flour over dough and pulse until mixture has broken up into pieces and is evenly distributed around bowl, 4 to 6 pulses.
  3. Transfer mixture to large bowl. Sprinkle vodka and ice water over mixture. Stir and press together, using stiff rubber spatula, until dough sticks together.
  4. Divide dough into 2 even pieces. Turn each piece of dough onto sheet of plastic wrap and flatten each into 4-inch disk. Wrap each piece tightly in plastic and refrigerate for 1 hour. Before rolling dough out, let it sit on counter to soften slightly, about 10 minutes. (Dough can be wrapped tightly in plastic and refrigerated for up to 2 days or frozen for up to 1 month. If frozen, let dough thaw completely on counter before rolling it out.)

To make the pie:
Ingredients:
3 eggs
1/2 cup (3.5 ounces) granulated sugar
1/2 cup (3.5 ounces) brown sugar
1 can (12 ounces) evaporated milk (the only non-homemade thing in this pie)
15 ounces pumpkin puree
1/8 teaspoon salt
2 teaspoons pumpkin pie spice (=1 tsp cinnamon, 1/2 tsp ginger, 1/4 tsp each allspice, cloves, nutmeg)

Method:
  1. Roll out 1 pie crust to fit in 12 inch pie plate and press in. Bake at 400 degrees with pie weights for 8 minutes, then take out the pie weights and bake another 2 minutes. Set aside.
  2. For the filling: Beat eggs first to break up yolk. Then, whisk all ingredients.
  3. Pour in prebaked pie crust and bake at 350 for 1 hour or until done. Start checking at 50 minutes; the pie should be set mostly but the center will still jiggle a bit.
  4. Cool on baking rack.
  5. Serve at room temperature or refrigerated! (This pie is just as good, if not better, the day after it's made).
P.S. When you're making pie crust, you might as well make two crusts. Although you only need one to make this pie, why not make two pies? Another recipe is a-comin' (see the first picture of this post for a sneak peak!). Or freeze and make another pumpkin pie a couple of weeks later!