Showing posts with label dessert. Show all posts

Wednesday, November 30, 2016

Chocolate Bundt Cake with Ganache Frosting

Ooooh chocolate cake.
Ooooooooh bundt.
Ooooooooooohhh baby.


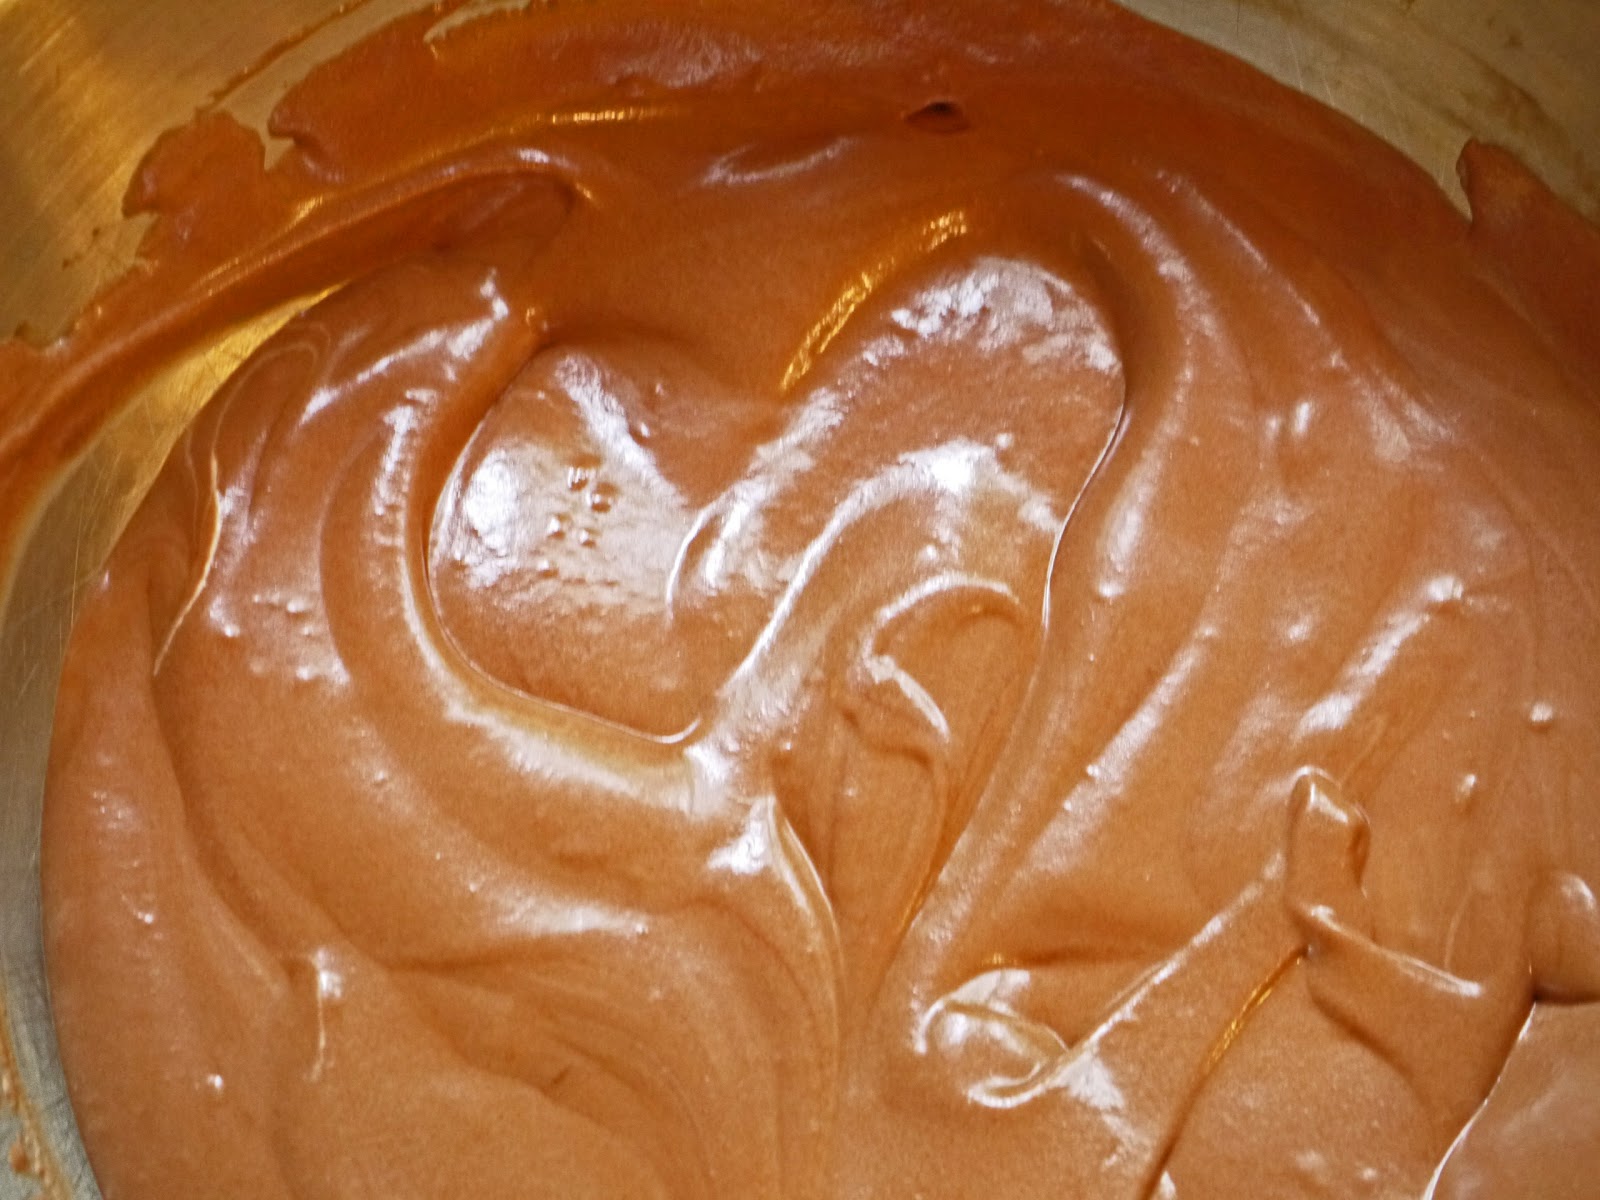
This is a delicious, moist, decadent cake complete with ganache. Ganache is a fancy word for the laziest frosting made with two of the most delicious manmade compounds, cream and chocolate. 


Our ganache had a smidge too much cream, so it was a bit runny, but we made up for that by warming up extra and pouring it over our slices. No harm, no foul.


The cake is lovely--deeply chocolatey, spongey, not too sweet. A perfect pairing for the rich ganache. I love the ridges provided by the bundt pan...it looks so fancy!


All in all, it's a delicious cake for chocolate-lovers, and just might convert some not-so chocolate lovers too.


Oh yes, I forgot to mention...it's fussy. It calls for buttermilk and fancy cocoa (though cocoa is really usually okay if you switch it out, just a different result), separated eggs, brewed coffee, awkward measurements, yadda yadda. The original recipe even calls for sifting the flour, but ain't nobody got time for that. I promise, it's worth (most of) the trouble :).

Chocolate Bundt Cake with Ganache Frosting
Yield: a bundt cake, what do you think??

Ingredients:

cake:
  • 1 1/4 cups plus 1 Tablespoon brewed coffee
  • 3/4 cup (Dutch process prefered, Hershey's if you can't find anything else!) cocoa powder
  • 2 1/4 cups sugar
  • 1 1/4 teaspoons kosher salt
  • 2 1/2 teaspoons baking soda
  • 2 whole eggs
  • 1 egg yolk
  • 1 1/4 cups plus 1 Tablespoon buttermilk
  • 1 cup plus 2 Tablespoon canola oil
  • 1 1/2 teaspoons vanilla extract
  • 2 1/2 cups, plus 2 Tablespoons all-purpose flour (whisk it up for a bit to aerate, or sift if you'd like)
ganache:
  • 10 ounces chocolate (chips are okay but block chocolate is better)
  • 6 ounces (3/4 cup) cream
  • ^note that I changed the ratio from 8:8 to 10:6 in order to account for the fact that ours was too thin 
Method:
  1. Preheat the oven to 350 F and move the rack to the middle position. Grease and flour a 10-inch bundt pan.
  2. Boil coffee and cocoa powder on the stove, or microwave the coffee until very hot and mix in the cocoa powder. The idea is to bloom the cocoa so it's aromatic compounds are activated in the hot liquid. Whisk carefully or risk getting cocoa powder all over yourself! Set aside to cool.
  3. Using a stand mixer, hand mixer, or strong arm, whisk sugar, salt, baking soda, eggs and egg yolk until combined. Then, add the buttermilk, oil, and vanilla, and whisk again until fully combined. 
  4. Mix in flour for 2 minutes, then add the coffee-cocoa mixture and mix another few minutes or so until your batter is thin, runny, and smooth. Pour into prepared pan and bake 1 hour or until a skewer comes out clean.
  5. When cake is done, cool in the pan until it reaches room temperature, then invert onto a plate.
  6. For the ganache: microwave or heat on stove the cream until just scalding (not boiling). Pour immediately over the chocolate chips in a medium bowl and let sit for about 1 minute. Then, stir to combine. If the chocolate is not entirely melted, microwave for short (15 sec) bursts until you are able to just combine the two. Aim for a smooth, homogeneous, glossy mixture. 
  7. Let cool on the counter about 20 minutes, then spread over cooled cake. Extra ganache makes delicious hot fudge sauce for ice cream, if there's any left!
Video of stirring ganache, one of those weirdly meditative things to watch...


Adapted from Joy the Baker

Wednesday, March 23, 2016

Mini Apple Crostatas

Mini pies...perfect. No weepy slices, no soggy bottom crust. The recipe multiplies the crust to filling ratio by about 5 which is just enough to be majorly delicious and still very apple-y.


Honestly the streusel topping turned into a sort of soft dough in the oven, so I've suggested another crumble that I've used before. It would hold up better, I'd think. These would also be great sans crumble. Then you'd see the apples from the top, which would be beautiful!

My dad was really excited!
While a little labor intensive, each step only takes a few ingredients, and you can prep all the parts for assembly later. It's a great way to start with pie crust since your circles are smaller, so they're easier to move around. If they're a weird shape, no biggie.


Fun to make, fun to eat, and a perfect landing pad for a scoop of vanilla ice cream!

Mini Apple Crostatas
Yield: 8 mini pies

Ingredients:

  • CRUST:
  • 1 1/2 cups all-purpose flour
  • 2 tablespoons granulated sugar
  • 3/4 teaspoon kosher salt
  • 1/2 cup (1 stick) unsalted butter, cold, cut into 1/2-inch cubes
  • 1/4 cup cold water

  • CRUMBLE:
  • [this is not the crumble pictured, but I think it would be better... from Strawberry Rhubarb Crisp]
  • 1/2 cup all purpose flour
  • 1/2 cup old fashioned oats
  • 1/2 cup (packed) brown sugar
  • 1/4 teaspoon ground cinnamon
  • 1/8 teaspoon ground nutmeg
  • 1/8 teaspoon ground allspice
  • Generous pinch of salt
  • 6 tablespoons (3/4 stick) unsalted butter, cold, cut into 1/2-inch cubes

  • APPLES:
  • 4 apples (all granny smith or granny smith and another kind)
  • 1/4 cup packed brown sugar
  • 1 tablespoon all-purpose flour
  • 1/2 teaspoon cinnamon
  • 2 teaspoons fresh lemon juice
  • 1/2 teaspoon lemon zest (eyeball it!)

  • TO TOP CROSTATAS:
  • 1 egg, beaten
  • granulated sugar to top
Method
  1. Make the pie crust: In a medium bowl, whisk together flour, sugar, and salt. Work quickly to cut the butter into the flour with your fingers, a pastry cutter, a food processor, whatever floats your boat. Butter bits should be some the size of oats, some the size of pebbles.
  2. Make a well in the center of the flour mixture and dump in the water. Use your hands to fold the flour over the water and start mixing gently until the water is all absorbed and the mixture is somewhat homogenized. Turn out onto a piece of plastic wrap, form into a rectangle, and refrigerate for at least an hour.
  3. Make the crumb topping: Don't wash your bowl! In the same bowl, put all ingredients for the topping except the butter and mix to combine. Add the butter, then work in with your fingers (or whatever you did before) until the mixture resembles wet sand (moist clumps). 
  4. Peel and slice the apples into thin, even pieces. toss with all other ingredients and let sit while you wait for the dough to chill. 
  5. Preheat oven to 400 degrees F and line two baking sheets with parchment. (you'll need two racks in the middle ish of the oven)
  6. Remove the crust from the refrigerator, and cut dough into 8 approximately equal pieces. Roll each into a ball. On a lightly floured countertop and with a lightly floured rolling pin, roll to about 1/8 inch thickness. Watch so that they don't stick to the counter! Set on prepared baking sheets. Brush each with beaten egg.
  7. For each round of crust, put about 1/3 cup apples (and the juices they made), then crimp up the sides. Brush the crust edges that you've folded up with egg again, then sprinkle with granulated sugar. Put about 2 tablespoons of topping on each, trying to keep it inside each crostata.
  8. Bake for 20-35 minutes, until golden brown and bubbly. Allow to cool for 15 minutes before serving, a la mode if desired. 
  9. Crostatas keep in the fridge for a few days. To reheat, either microwave if you're lazy or reheat, wrapped in foil, in a 300 degree F oven for 15 minutes. 
Recipe from the Joy the Baker Cookbook.

Saturday, July 4, 2015

Millionaire Shortbread

Happy Fourth of July!

Here's to food and family and fireworks.

I actually made these a couple of weeks ago, and they were the first thing I brought in to work. Food is universal--everyone eats, and most people like sweets!--so it was a great way to meet more people and share something enjoyable in the middle of the work day.


Though I brought them in when I arrived that morning, I didn't announce their presence until 2 o'clock or so. You gotta wait until the hunger and fatigue strikes, then BAM! make some friends! They're a layer of shortbread, followed by a dulce de leche-like caramel filling, and a chocolate ganache on top.


Anyway, everyone raved. And people were super impressed with the diamond cutting pattern.


I'm going to let you in on a little secret: it takes the same amount of effort as cutting regular squares.

But people think they're fancier. Just like spreading sauce artfully on a plate, or swirling frosting on a cake. Food psychology is almost as cool as food science!

Each layer is simple to make, so though there are three, there's not a ton of waiting between steps. The whole shebang took me about an hour, or a bit over. The original recipe calls for cooking the caramel to a precise temperature, but I did it by look and feel and it still turned out delicious. Make these...and revel in sinking your teeth into something decadent, sweet, and beautiful!


Millionaire Shortbread
Yield: as many diamonds as you can cut! (9x9 inch pan--I split between two smaller pans with similar area)

Ingredients:

  • 1 cup all-purpose flour
  • ¼ cup dark brown sugar
  • 2 teaspoons cornstarch
  • ¼ teaspoon salt
  • 1/2 cup cold unsalted butter, cut into ½-inch cubes
  • 1 tablespoon ice water
  • 1 egg yolk
  • 1 (14-oz) can sweetened condensed milk
  • ½ cup dark brown sugar
  • 6 tablespoons unsalted butter
  • 2 tablespoons Lyle's Golden Syrup (or dark corn syrup, or honey, or agave...)
  • 1 teaspoon vanilla extract
  • Pinch of salt
  • 6 ounces semisweet chocolate, finely chopped
  • 3 tablespoons heavy cream
Method:

  1. For the crust: Preheat oven to 350 degrees F. Prepare a 9x9 inch baking pan with slings of aluminum foil (greased) or parchment paper.
  2. Whisk flour, brown sugar, cornstarch, and salt in a large bowl. Add butter, then cut in with a pastry cutter, two forks, two knives, or however your soul tells you is right. I like to grate frozen butter on the biggest holes of a box grater and then fluff everything together!
  3. Add ice water and egg and mix with a fork until the dough starts to come together in clumps. Press into the pan and bake 20 minutes, or until golden brown.
  4. While the shortbread is baking, get the caramel ingredients ready. Dump everything except the vanilla together in a medium saucepan. When the shortbread has about 5 minutes left, turn on the stove to medium heat and whisk while the sugar dissolves and the caramel cooks. Let it cook until the mixture starts to boil around the edges, then keep whisking constantly until the caramel is thick and browning (you'll feel it get thicker). Stir in vanilla extract, then pour over the shortbread.
  5. Let the shortbread and caramel cool for about 15 minutes, then microwave the chocolate and cream together for 30 second bursts, until the chocolate is melted. Stir to combine, then spread over the caramel. 
  6. Put the pan in the fridge to set, at least an hour, and then pull out by the foil sling and cut as desired (I suggest diamonds!). Serve and impress, eat and delight!
  7. Store in the fridge for up to a week.

Thursday, June 18, 2015

Chocolate Pudding

This.


THIS.

This took less than half an hour. It's rich, but not too rich. Very chocolaty. Simple, comforting. Magic as the cornstarch thickens sweet, cocoa-lush milk.

I put a few raspberries on top, because I didn't have the courage to pour straight cream like Alice suggests. But I'm sure it's divine.


A few days later, sitting in the fridge (I too, am a lover of pudding skin), it becomes fudgy, almost like pot de creme or a thick custard.

So deeply chocolate. If you're used to making this, try this instead. It will blow your mind off with endorphins!

Chocolate Pudding
Yield: 6 pots of pudding

Ingredients:

  • 1/3 cup (66 grams) sugar 
  • 1/3 cup (28 grams) unsweetened cocoa powder, preferably natural 
  • 2 tablespoons (17 grams) cornstarch 
  • 1/8 teaspoon salt 
  • 1 3/4 cups milk (whole is best but don't sweat it. Or, figure out the percentages
  • 1/4 cup heavy cream 
  • 3 to 4 ounces (85 grams to 115 grams) dark chocolate, very finely chopped 
  • 1 teaspoon vanilla extract 
  • rum, if you want!

Method:
  1. Whisk together the dry ingredients (sugar, cocoa, cornstarch, and salt) in a medium saucepan. Add a splash or two of the milk and whisk to combine into a smooth paste. Then, add the rest of the milk and cream and whisk to combine.
  2. Heat mixture over medium heat, stirring constantly, until mixture begins to thicken and bubble (about 5 mins). Make sure to scrape the corners of the pan. Heat and stir for an additional minute after the mixture starts bubbling.
  3. Take the pan off the heat, then add the chocolate. Stir to melt and combine. Add the vanilla (and rum if desired) and stir to combine.
  4. Divide into 6 ramekins, teacups, or whatever small vessels grace your kitchen. Refrigerate or eat warm, with or without cream/whipped cream.

From Food52, recipe by Alice Medrich (Chocolate Goddess)
*Note: this recipe is called "Chocolate Pudding You Can Serve Naked (or Top With Cream)"--I would not suggest that you parade around au natural offering people pudding. I would instead suggest serving it without accompaniment, or putting a bit of cream on top :).

Thursday, November 21, 2013

Dining Hall Hacks

Get ready. Thanksgiving is coming!

I'm sure your feeds are packed with stuffing, pies, brussels sprouts, turkey tips, tablescapes, and more. This is not that.

This is a collection of my dining hall creations, ways to make meals special and your own with just the microwave and toaster available. Obviously I'm doing this from the perspective of my dining hall, so you probably have different food and equipment available, but if you live in a house and have a kitchen and stuff, these are still great hacks!

I've spared you the experiments that didn't work, like olive oil on vanilla ice cream...just, don't do that.

On to the list...

Microwave:

  • Warm (cold) cereal: Heat up milk before putting it on your cereal. Great for mornings when it's chilly but you still want the taste of your favorite cold cereal. Be warned, the cereal gets soggy faster this way! (Granola this way is like the sweetest, crunchiest, yummiest oatmeal you ever had).
  • Apple dip: peanut butter, honey, and cinnamon heated in the microwave, dip sliced apples in this!
  • Makeshift apple pie: "dice" up an apple as well as you can with the knives available. Mix with butter, brown sugar, and cinnamon and microwave for 3 minutes, stirring halfway through. Add granola on top for crust if you want! (Thanks to Emma for showing me the beauty of this!)
  • Custard sauce: (I haven't actually tried this one, but I imagine it would be wonderful) Heat up a small scoop of vanilla ice cream, then add a slice of cake on top. Boom, instant custard sauce.
Toaster:
  • Toast: This is important. Toast it to your liking, even if that means putting it through the toaster twice. It is worth it
  • Butter and Jam. I forget how dang good this is. Or just butter and salt!
  • Tartine: Cut a big hunk of any bread that isn't presliced, and cut it in half lengthwise as if to make a sub sandwich if it's baguette style. Toast, add whatever toppings you like
Other:
  • Yogurt dip: Mix the plain yogurt with the fruity/vanilla yogurt for a less sweet flavor, use as a dip for fruit (melon is great)
  • Tropical Oatmeal: Oatmeal with brown sugar, pineapple, and coconut shreds
  • Coffee S'mores Dessert: Coffee ice cream with chocolate syrup drizzle and golden grahams. Best dessert ever!
  • Soup as a sauce: ladle it on rice/potatoes/pasta, meat, or veggies as a sauce
  • Soup with your own extras: Add in rice/potatoes/pasta, meat, or veggies. I want to try wilting spinach from the salad bar into soup at some point...  (the only difference between these last two is proportions)
  • Vinaigrette: combine about 1 tablespoon oil, about 1 teaspoon vinegar, and a squeeze of mustard with a fork in a to-go cup. Make twice as much and share with a friend!
  • No-Mayo Coleslaw: cabbage, shredded carrots, and any other veggies you like, with vinaigrette (or homemade vinaigrette, see above!)
  • Carrot Raisin Salad: shredded carrots, raisins, pineapple, yogurt, and cinnamon. My dad makes this so it tastes like home...a sweet way to get some veggies and pretty healthy, all things considered! Make in a mug or cup, this is pretty dang dense.
  • Chopped Salad: Get two bowls, make a salad in one of them. Go at it with fork and knife, then put the extra bowl over the first one to make a spherical shaking vessel. Shake shake shake!
  • Cream cheese on any sandwich instead of mayo
  • Egg sandwich: toast, eggs, and cream cheese. Toast can be a bagel. This is a really great brunch to get from 11am to 5pm studying on a Sunday.
  • Trashy waffle: Peanut butter, jam, and/or nutella on a waffle.
  • Mocha: Half coffee, half hot chocolate
  • Virgin Mimosa: Soda water and OJ

Yes, I have dedicated a whole section to the toaster. I feel strongly that waiting for your favorite done-ness of toast is always worth it. It's one of the ways, as a college student, that you can have control over your food.

Happy Thanksgiving! More recipes to come as I am home and baking again next week!

Tuesday, August 13, 2013

Plum Crisp

Crisp is really wonderful.

I'm on vacation with my family, and we're staying in a condo. First day here, I was ready to bake.

When you're traveling, baking from scratch is more difficult. Cookies have rather a lot of ingredients, considering baking soda, baking powder, two kinds of sugar, eggs, vanilla...the list goes on and on.


Crisp is fast, forgiving, easy to make, flexible to the seasons, and amazing with ice cream. Plums were on sale and good. I threw in a nectarine before I discovered they were pretty unripe.

Enter "forgiving." It was still good, even the less-ripe nectarine. Toss it with sugar, add lemon juice. Top with brown sugary buttery oat crumbly crisp, and everything is forgiven.


But, it's a double edged really good chef's knife. Because when the fruit is good, like the plums, the fruit is the star of the show, and elevates the crisp. It is a transcendental experience with melty vanilla ice cream (gold star if you get the kind with a caramel swirl...Dad).

Almost a member of the clean plate club!
So, here's a "recipe"

Plum (or anything) Crisp

Ingredients:

  • Fruit, cut into pieces
  • Granulated sugar
  • Juice and zest of 1/2 lemon
  • Oats
  • Salt
  • Flour
  • Brown Sugar
  • 1 stick butter, cold and cut into pieces or frozen and grated on a box grater
Method:
  1. Mix fruit with a few big spoonfuls of granulated sugar and the lemon juice and zest. Let rest for a while (half an hour is good).
  2. Preheat oven to 375 degrees. Grease a casserole dish (I used a 9x13 pan). Drain off the liquid that has accumulated from the fruit/sugar, and reduce in a large bowl/measuring cup/mug in the microwave until it starts to thicken (let it go for a minute at a time and watch it to make sure it doesn't boil over).
  3. Put the fruit in the casserole dish and drizzle the reduced juice over it. Mix about a cup of flour and about a cup of brown sugar, add in several spoonfuls of oats (the amount you like), then cut in the butter until the mixture starts to hold together a bit when you squeeze it.
  4. Spread crumble topping over fruit, press into cracks and corners, then poke it with your fingertips to create some texture. Bake for about 30 minutes, or until topping is golden.

Slightly adapted from Food52

Monday, July 29, 2013

Madeleines au Citron et Crêpes Suzette

Another (the last) class with Hélène! There is no chocolate in this post. That sort of made me sad!
...but not that sad.


Because can we talk oranges? I love them. My dad's dad was a citrus farmer so we're into it at my house. Marmelade is such a good jam-like thing, because of the bitterness in the peel. It balances the sweetness the same way the bitterness of cocao balances the sweetness in chocolate.


Crêpes Suzette is a delicious dessert of crêpes with orange juice/zest caramel sauce and flambé-ed Grand Marnier.


I didn't really taste the alcohol (or what was left--all of the alcohol burns, so it's kid-friendly!) but the orange was out of this world. We melted granulated sugar, freshly squeezed orange juice, and all of the zest from both oranges to make a caramel, then dipped each crêpe.


It is a sticky situation. I was totally scraping my plate.

We also made Madeleines with lemon oil. Hélène swears by it, as opposed to lemon extract, because it has a much stronger flavor. But, be forewarned...too much essential oil is nasty. A little bit is heavenly!


These were amazing! The baking process is really interesting: you preheat to a hot temperature, immediately lower the temperature when you put the cakes in, then lower another two times in the process.


The heat-shock at the beginning of the cooking process allows the outer sides to attach to the mold and the middle to puff up dramatically, and the lower tempuratures allow the cakes to fully cook through without burning. It's a scientific miracle.

Butter the dish with your fingers...it's the most fun you'll have all day. Also, a nice coating of butter gives the outsides a lovely golden brown as if they were fried, but they're not too greasy. It's fantastic!


So yeah...not missing chocolate. That's the first time I think I've ever said that!


P.S. Also...none of these recipes have salt in them. I think if you want to add a pinch, it could help balance/intensify the sweetness!

Crêpes Suzette
Yield: probably around 12-16

Ingredients:

  • 250 g flour
  • 4 eggs
  • 1/2 liter milk (2 cups plus a tablespoon or so)
  • 5 tablespoons vanilla sugar (leave a vanilla pod in a bunch of sugar for about a week, or just use 5 tablespoons sugar and a teaspoon of vanilla extract)
  • 120 g sugar
  • 2 oranges, zested and juiced
  • Butter, to cook crepes
  • Grand Marnier (about 1 cup)
Method:


  1. Mix eggs and milk. Add vanilla sugar and mix to combine. Add flour and mix to combine. Allow batter to rest, and add milk after resting if you flour is feeling particularly absorbative today.
  2. Melt in a wide, flat saucepan the orange juice, zest, and sugar to caramalize and reduce. Gentle, low heat.
  3. Cook crepes: put a pad of butter in a small saucepan over low heat (we made small crepes--they're easier to flip), ladle in a thin layer of batter, swirl to coat. Flip once the first side is golden/brown in spots, using a butter knife/frosting spatula and fork. Cook all crepes like this, layering on a plate on the side as you finish them
  4. Put the Grand Marnier in a saucepan and heat to warm. Set on fire and let burn until all of the alcohol has burned off (liquid will be very hot).
  5. Put each crepe in the orange sauce, fold over, and place on a plate. Pour a bit of the Grand Marnier on the top and serve warm.


Madeleines au Citron
Yield: 2-3 dozen Madeleines

Ingredients:

  • 3 eggs
  • 130 g sugar
  • 20 g honey
  • 150 g flour
  • 150 g butter (soft)
  • 5 g baking powder
  • 3-4 drops of lemon essential oil


Method:

  1. Preheat oven to 230 degrees C (450 F). Butter madeleine mold.*
  2. Mix sugar, honey, and butter to combine. Add eggs and lemon oil and mix to combine. Mix flour and baking powder in a separate bowl, then add and mix to combine. Smell, if it needs more lemon add 1-2 more drops. Fill molds (not all the way to the top; see picture above) with batter.
  3. Put pan in oven and immediately lower temperature to 200 degrees C (about 400 F). Bake 5 minutes, then lower temp to 180 degrees C (350 F) for another 5 minutes.
  4. Unmold as soon as they come out of the oven!

*Note: if you don't have a madeleine mold, you can make these cakes in real shells off the beach! Just wash them and butter them up. The cakes will be bigger...is that a bad thing or something?

Recipes courtesy of Hélène Biesse.

Sunday, June 16, 2013

Quick Carrot Cake

I really wanted to bake a cake yesterday. And I really didn't want it to take a long time, and I really didn't want to go buy cream cheese for cream cheese frosting (though it is the most heavenly thing on the planet).

This is a cake for all of those concerns. Like a snack cake. There's no butter involved. I was kind of sick of running down our butter supply, so that's good.

I read an article this morning that said you increase your creativity by thinking in the box, and man was I in a box. "I don't want this, I don't want that"...well that narrows down the options! It was a happy outcome, though. Benefits of not planning...

I was in a hurry to eat this fabulous cake...sorry for the iPhone photo
On the other hand, a disadvantage of not planning is that I thought, "Oh, I'll make an orange glaze." Because I didn't want to buy cream cheese (see above). But we had no oranges or orange juice concentrate in the house. So I settled by putting in some orange oil, but I accidentally put in a little much (a little goes a long way with that stuff) and ended up with glaze that's too orangy.

My recipe also included cornstarch, which gelatinized over the stove, rendering the glaze kind of gloppy and not as syrupy as I would have liked. I peeled it off in a fit of rage!!! The cake is really good as is, with or without a better glaze. I would have rather made a soaking syrup as opposed to a glaze, and used real orange juice if I were to do a glaze, and those changes are included in the recipe below.


The cake method is novel...eggs and sugar are beaten until frothy, then oil is slowly drizzled in to make an emulsification, and then the wet team meets the dry team (plus carrots) for a batter that comes together quickly and dirties only two bowls. Win. You shred the carrots in the food processor before mixing the wet ingredients, so the whole thing has this cohesion, a yin-yang sort of feel.

Kumbaya, let's eat cake.

Quick Carrot Cake
Yield: 1 8x8 pan of carrot cake! (I cut mine into 9 squares, and we finished it in 2 days)

Ingredients:
Cake:

  • 1 1/4 cups (6 1/4 oz) all-purpose flour
  • 1/2 teaspoon (rounded) baking powder
  • 1/2 teaspoon baking soda
  • 1/2 teaspoon ground cinnamon
  • 1/4 teaspoon grated (or ground) nutmeg
  • pinch ground cloves
  • 1/4 teaspoon salt
  • 1/2 pound (3-4) carrots
  • 3/4 cup (5 1/4 oz) granulated sugar
  • 1/4 cup packed (1 3/4 oz) brown sugar
  • 2 large eggs
  • 3/4 cup vegetable oil
Glaze:
  • 1/4 cup sugar
  • 1/4 cup orange juice
  • a squeeze of lemon juice
  • a pat of butter
  • a piece of orange rind (take a vegetable peeler to it; this is optional)
Method:
  1. Preheat oven to 350 degrees, and move a rack to the middle position. Spray 8x8" cake pan with baking spray (line it with a parchment paper sling if you want to be able to take the cake out of the pan easily after baking) or grease and flour.
  2. Whisk flour, baking powder, baking soda, spices, and salt in a large bowl, set aside.
  3. In a food processor, shred the carrots with the big grater (into large shreds). Add these to the flour, then wipe out the food processor bowl and lid.
  4. Process sugars and eggs in the food processor fitted with the metal blade for about 20 seconds, until slightly foamy. Start the machine again, and slowly stream in the oil, continuing to process for another 20 seconds until well emulsified.
  5. Add this egg/sugar/oil mixture to the dry ingredients and carrots, and fold with a spatula to combine. Pour into prepared pan and bake until a toothpick or skewer comes out clean, 35-40 minutes.
  6. While cake is baking, prepare the glaze. Combine all ingredients in a small saucepan, stirring to dissolve the sugar. Once it starts to boil, and is slightly thicker, it is ready. Take it off the heat and remove the orange peels.
  7. Pour warm glaze over cake (you can poke the cake first with a toothpick or fork for maximum absorption). Cut, serve, and enjoy!
Recipe adapted from Baking Illustrated (I halved their carrot cake recipe) and the Seattle Times (for the glaze)

Sunday, June 9, 2013

Strawberry-Rhubarb Crisp

Welcome to the auto-blog post generator. Generating first paragraph...

"This dish is perfect for a light lunch with a sliced chicken breast, or even breakfast with a fried egg on top! And, if you can manage to wait to slice these until they've cooled, you can cut them with cookie cutters and decorate with royal frosting for a superbowl party! Sure to please any guest, these are also vegan (so healthy) since they are made with coconut oil and quinoa."

None of this is true of the recipe I made today.


It's messy; there's no way you could cookie-cutter it for a theme party. And although fried eggs are pretty, I think greek yogurt makes for a delicious breakfast combination.


There's no quinoa to rinse (that's seriously the biggest thing that keeps me from making quinoa...and I know they make a pre-washed version, but we have a big costco bag of the regular stuff. First world problems, for real). The only specialty ingredients are rhubarb and strawberries. And it's a strawberry-rhubarb recipe.


You can totally use this as a general crisp recipe, though, changing up the spices and fruits as you see fit. This article has a nice explanation of which fruits are high in pectin (the jelly-like stuff that makes fruit in fruit pies. cobblers, crisps, etc. thicken up). If your fruits have more pectin, you won't need as much flour or tapioca starch to thicken; if they have less, like strawberry/rhubarb, you'll need more.

Before and after!
And crisp is special...people can really only get it if someone makes it for them. It's not exactly something keebler sells on the grocery store shelf.

This crisp is:
gooey
tart
flavorful
perfect for dessert or breakfast
sweet but not too sweet
...and the crumb topping is perfectly buttery, chewy in parts where it soaked up the fruit juice and crisp on top.


In short, delicious.

Strawberry-Rhubarb Crisp
Yield: about 8 servings

Ingredients:
For the topping:

  • 1/2 cup old-fashioned oats
  • 1/2 cup all purpose flour
  • 1/2 cup (packed) golden brown sugar
  • 1/3 cup sliced almonds
  • 1/4 teaspoon ground nutmeg
  • Generous pinch of salt
  • 6 tablespoons (3/4 stick) unsalted butter, cut into 1/2-inch cubes


For the filling:

  • 5 cups 1/2-inch-thick slices fresh rhubarb (from about 2 pounds)
  • 1 pint quartered/halved (depending on size) strawberries
  • 3/4 cup sugar
  • juice from one orange
  • 2 tablespoons all purpose flour
  • zest from one orange
  • 1/4 teaspoon cinnamon
  • scant 1/2 teaspoon ground nutmeg

Method:

  1. For topping: Mix first 6 ingredients in medium bowl. Add butter; rub in with fingertips until moist clumps form.
  2. Preheat oven to 375°F. Combine all filling ingredients in large (and I mean LARGE) bowl; stir to blend. Let stand until juices form, about 15 minutes.
  3. Pour rhubarb mixture into large baking (casserole) dish; sprinkle topping evenly over mixture. 
  4. Bake until topping is golden brown and crisp and filling is bubbling thickly around edges, about 45 minutes. Serve warm with whipped cream, vanilla ice cream, greek yogurt, or simply straight up.
Recipe adapted from Epicurious (which I'm rediscovering as an excellent source!)

Tuesday, June 4, 2013

Wacky Cake

I had some friends over for dinner the other night.

And seriously, I see bloggers with mason jars and flowers and ribbons and none of it's particularly difficult, but the overall effect is impressive and takes a bit of effort.


My parties are, um, effortless (and that's putting it in a nice way). Like, "oh, could you open that drawer over there and grab some napkins?" after we'd already dug into take-out pizza. But...

My mom did clean up the piles of paper on our dining room table. That's a big deal.

And spinach deep dish pizza? Also a big deal. Especially because we've been at college where the pizza is good, but not Chicago-style deep dish. One slice of this and you're full.

To give you an idea of the size, this is a full-size dinner plate, and the pie is about an inch thick. 
It's from Piero's, our favorite place to get deep dish. Spinach is the best because you get some vegetables, but also it makes the cheese layer twice as thick so you feel like you get twice as much cheese.

For dessert, we dug into this cake. Have this recipe in your back pocket. Literally all of the ingredients come together in one pan, and then you throw in in the oven.


It is more moist than any box cake with pudding in the mix and full of rich chocolate flavor.
[Bonus: it's also dairy, nut, and egg-free!]

Nutella warmed up in the microwave makes a nice, lazy-man's frosting. Everyone had seconds. I kid you not, we are 4 college girls, and we ate the majority of the cake in one evening.

It's a keeper.

Wacky Cake
Yield: 1 8x8 inch cake

Ingredients:

  • 1 1/2 cups (7 ounces) all-purpose flour
  • 1/4 cup (0.75 ounce) cocoa powder
  • 1/2 teaspoon baking soda
  • 1/2 teaspoon salt
  • 1 cup (7 ounces) granulated sugar
  • 1 teaspoon vanilla extract
  • 1 tablespoon white or cider vinegar
  • 6 tablespoons vegetable oil
  • 1 cup water

Method:
  1. Position a rack in the center of the oven and preheat to 375°F. Lightly grease an 8-inch square pan.
  2. Sift the flour, cocoa, baking soda, and salt directly into the baking pan, then add the sugar. With your finger, poke 2 small holes and 1 large one in the dry ingredients. Into one of the small holes pour the vanilla, into the other one the vinegar, and into the larger one the oil.
  3. Pour the water over all the ingredients and stir the ingredients together with a table fork, reaching into the corners, until you can’t see any more flour and the batter looks fairly well homogenized.
  4. Bake for 35 to 40 minutes, or until the top is springy and a tester inserted in the center comes out dry. Cool the cake in the pan on a wire rack, then cut and serve it from the pan. 
  5. A drizzle of warm nutella is an optional but amazing finishing touch. A drizzle of cherry jam would make a great quick black forest cake. Or simply a dusting of powdered sugar to keep it simple.
Recipe courtesy of Epicurious.

Note: Though I haven't tried it, you could probably replace the cocoa powder with flour for a vanilla version of the cake. (I wouldn't, but some people prefer vanilla...different folks, different strokes, man.)

Monday, June 3, 2013

Chocolate Mousse (Eggless)

My mom asked me the other day how I choose which recipe to make when I decide to bake/cook.

I replied surprisingly cogently, given the long time it sometimes takes me to pick the perfect recipe to try. Since I'm not home in a well-stocked, well-equipped kitchen that often anymore, it's a treat, and one I try to use to its fullest.


But I told her there are basically two kinds of recipes I like to make: experiments and old standbys. Sure, there's crossover. A new variation on a oatmeal raisin cookie is not that much of an experiment, but it's a recipe I've never used before. But generally I either try a crazy layer cake that takes hours to make or something like learning how to temper chocolate, or make these chocolate chip cookies which never fail to make people happy.

An empty cup, and a full tummy!
The former are often things on my bucket list. And so we perch on the edge of discovery with this recipe for chocolate mousse, a fancy, rich dessert I have really only ever eaten at a restaurant. It's an experiment. Even more so for the recipe's lack of eggs, a usual backbone ingredient in mousse.

But this recipe toed the line while I was making it. A short list of ingredients and easy instructions made me feel like I had already made the recipe--it was comfortable.

The kitchen counter--a knife and cutting board for my Dad's incredible bread, the newspaper clipping with this recipe, and a cup of coffee from needing a couple of tablespoons for this recipe
After making it once, I have firmly decided it falls in the "old standby" category. Yes, I'll make this for friends when they come over, with no sweat. Heck, we can make it together. (Stay tuned for another recipe in this category soon!)


A couple of other notes on this recipe:
It's excellent food for recovering wisdom tooth patients (me).
It makes a mess of the kitchen, requiring many bowls, but really takes hardly any time since there's no cooking involved.
It looks adorable in teacups, though you could also use ramekins if you have them.

Chocolate Mousse
Yield: 6

Ingredients:

  • 7 oz chocolate, chopped (as good quality as possible, and dark is good but not more than 62% cacao)
  • 1/3 cup milk
  • 2 tablespoons sugar
  • pinch kosher salt
  • 2 tablespoons vegetable oil
  • 1 1/2 tablespoons prepared coffee
  • 2 teaspoons vanilla extract
  • 1 cup heavy cream, cold
Method:
  1. Finely grind chocolate in food processor.
  2. Bring milk, sugar, and salt to a simmer in small saucepan, stirring to dissolve. Start food processor and slowly drizzle in milk to melt chocolate. Process until smooth, about 10 seconds.
  3. Add oil, vanilla, and coffee, then process again to combine. Pour mixture into large bowl to cool for about 10 minutes.
  4. Meanwhile, beat cream with an electric mixer (handheld was my choice, to make less cleanup) to soft peaks.
  5. Fold 1/3 of cream into chocolate mixture, then gently fold in the rest, just to combine. It'll look like this...          

          Then it'll look like this...

Love ya!
     6.  Scoop into pretty glasses, ramekins, or teacups. Refrigerate for 1.5 hours, serve and enjoy.
          (Optional: sprinkle with a pinch of fleur de sel or bit of ground pepper before serving)

Recipe courtesy of the Wall Street Journal.

Sunday, January 6, 2013

Galette des Rois

As I write, I am somewhere in the bright, clear, U.S. air, flying to San Francisco to do a tour with my a capella group. I could not be more excited!

The sun is streaming in from the window. The light reflects off the pebbly clouds below like bloggers and journalers everywhere at the end of the year, who fill with resolutions and intents for the new year ahead.


And I made a Galette des Rois, or King Cake, an epiphany tradition in France. Maybe there's an epiphany hidden in the cake...more likely though, there's a monopoly hotel, because I didn't have a dried bean or baby Jesus figurine to hide inside.
What? That doesn't make any sense, does it. Or does it?

Well, traditionally, a bean or figurine is hidden near the crust inside the cake, and the cake is divided into as many pieces as there are people, plus one (the extra piece was kept in case a beggar came to the door for food.) Whoever gets the piece with the bean is King (or Queen) for the day.


This cake is one of my oldest taste memories, too. I lived in France for a year when I was 3, and very distinctly remember the flavor and texture. It's amazing to me that I could still remember after so long, but as such, Galette des Rois has been on my baking bucket list for a while, and I'm glad I finally got around to making it.

I was always disappointed in French class at school when we would get king cake, and every year I hoped I could taste again what I remember so strongly, and every year we got the traditional New Orleans-style king cake. Which is also good, just not what I remember.


Alas, I blab. This cake is kind of a tart, with an almond "frangipane" filling surrounded by a puff pastry crust and sealed at the edges. Mine wasn't entirely sealed, so some filling seeped out, but you know what? It tastes fantastic scraped off the baking sheet with a spoon. It's brushed with egg yolk, which creates a beautiful leathery lacquered sheen, and decorated with a simple pattern drawn in the top crust with a sharp knife.


Galette des Rois
Yield: one galette

Ingredients:
  • 125g (about 1 cup) almond meal 
  • 125g sugar 
  • 125g (about 1 stick) unsalted butter 
  • 1 teaspoon rum 
  • 1 teaspoon vanilla extract 
  • 1 teaspoon corn flour (omit if you don't have...I tried cornmeal and it detracted from the smoothness of the frangipane) 
  • 2 eggs 
  • 1 package (2 sheets) puff pastry (I used Pepperidge Farm) 
  • 1 egg yolk 
Method:
  1. Preheat oven to 400 degrees. 
  2. Cream almond meal, butter, and sugar with an electric mixer until smooth. 
  3. Add rum, vanilla extract, and corn flour and mix to combine. 
  4. Add the eggs and mix again to combine. 
  5. Lay one piece of puff pastry on a baking sheet. Fix cracks with fingers dipped in water. Use a plate (or eyeball) to give and cut form of circle. 
  6. Put frangipane on this circle of dough and smooth towards edges. Leave about an inch on all sides to seal. 
  7. Cut the other piece of puff pastry to make a circle, then lay it gently on top of the frangipane (do not press down). Seal the edges of the top and bottom with a bit of water and by pressing down with your fingers. 
  8. Brush the top of the galette with egg yolk, then cut a pattern in the top. You could do a diamond pattern, like I did, or a flower, or make your own pattern. 
  9. Bake for 20-30 minutes or until deep golden brown and puffy. Cool to room temperature or just slightly warm before serving--cut into as many pieces as you have people plus one, and see who's your king for the day! 
Recipe from Mme. Strock, my parent's friend from France.

P.S. You know those corners you cut off to make the galette round? They are awesome with some cinnamon sugar, folded in half and baked for 20 mins at 400. Little cookie/croissant/turnover babies.

Thursday, December 27, 2012

Bûche de Noël

I used to love craft projects when I was a kid. Clay, beading, those beads that fuse together when you iron them to make coasters, loop looms, painting various terra cotta vessels, you name it. I went through phases of knitting and crocheting, macrame, friendship bracelets, embroidery, bedazzeling...you get the picture.

Making a cake like this Bûche de Noël is half craft project, half science experiment, and half culinary exploration. Except unlike that scarf that refuses to be long enough to wrap even once about your neck, it's done in less than a day. People eat it, it's gone, and there's room for another project to be made!


This was a fun project:
Getting messy? Check, you'll separate 7 eggs.
Decorating? Check, do as much or as little as you want to the outside of the cake.
Science? Check, cooking the meringue syrup for the frosting (it's not hard, don't worry, and there's no chance to mess it up) and weighing ingredients.

And besides, it tastes amazing! Bûche de Noël is often made with a vanilla Génoise or sponge cake, rolled with chocolate frosting, but this one has a chocolate sponge cake and espresso Swiss meringue buttercream filling. My family swooned over it. The rich, creamy frosting, the light, deeply chocolaty cake, and soon it was gone.


To half of the espresso buttercream you add some melted chocolate to make a mocha frosting for the outside. There is definitely more frosting than cake in this situation.

The buttercream has 3 sticks of butter. But it also has 4 egg whites--protein, right? Hmmm, nevermind. Just enjoy and luxuriate.


This recipe comes from Portuguese Girl Cooks, a wonderful blog. It's a bit tricky, and you basically need a dozen eggs, but once you get going, it's not too hard. Make it a project, experiment, have fun, get messy. Go forth with confidence into the world of meringue and chocolate and holiday tradition!

Monday, November 26, 2012

Pecan Pie

Pecan pie is so amazingly decadent. Pecans are buttery, rich, and crunchy. Encased in buttery, flaky pie crust and gooey, syrupy sweet filling, it's like candy (except it's actually socially acceptable for pieces of pie to be bigger than candy bars).


You'll notice in the corner of the picture above the digits of pi. Yes, it's a pi pie plate.

I totally took a fork to it after we had finished the pie and scraped off the good goop that was left.

Gloppy goopy sugary caramely buttery delicious pecan-scented goodness.


And this is what the pie looks like when you eat it like a normal person on a plate. That's good too!


Pecan Pie
Yield: one pie (you decide if it's sharable...)

Ingredients:
  • 1 whole Unbaked Pie Crust
  • 1 cup granulated sugar
  • 3 tablespoons brown sugar
  • 1/2 teaspoon salt
  • 1 cup corn syrup
  • 3/4 teaspoons vanilla
  • 1/3 cup melted butter
  • 3 whole eggs beaten
  • 1 1/2 cups chopped pecans

Method:


  1. Mix sugar, brown sugar, salt, corn syrup, butter, eggs, and vanilla together in a bowl.
  2. Pour chopped pecans in the bottom of the unbaked pie shell.
  3. Pour syrup mixture over the top. Cover top and crust lightly/gently with foil. Bake pie at 350º for 30 minutes. Remove foil, then continue baking for 20 minutes, being careful not to burn the crust or pecans.
  4. Bake until pie is not too jiggly. If it shakes a lot, cover with foil and bake for an additional 20 minute or until set. Baking time varies, find what works for you!
  5. Allow to cool for several hours or overnight. Serve and die of bliss.