Friday, April 7, 2017

Alfajores

Hey it's been a while...but not as long as the amount of time I had this can of dulce de leche in my pantry wasting away *not* being in these cookies.


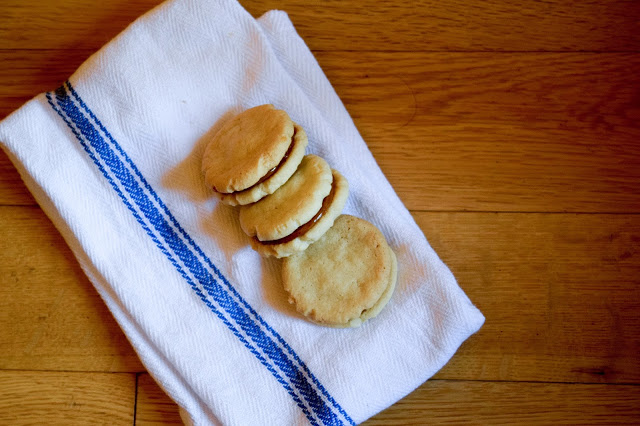
Alfajores are somewhat a cross between a snickerdoodle and a sugar cookie. With cream of tartar, the flavor reminds me of snickerdoodles, and, come to think of it, rolling them in cinnamon sugar sounds amazing.


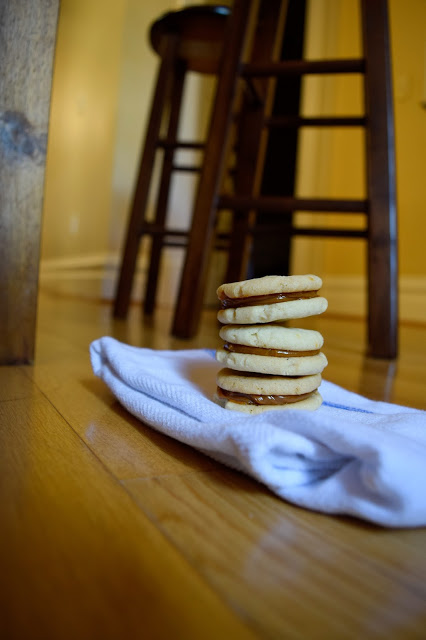
They're crunchy out of the oven but the next day soften to a delectable chew and become one with the dulce de leche. You can eat them the first day you make them, but save at least one to try on day 2. That's when I thought they were at their peak deliciousness!


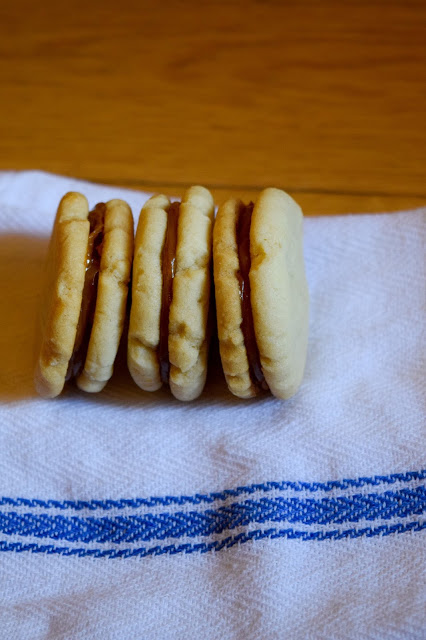
And, even though these are sandwich cookies (code for: lots of work) they are less than most. I bought premade dulce de leche so there was no prep for the filling, and the cookies are simple as can be with not too many ingredients.


Make them today! These are going in my file to make again, which is saying a lot considering they don't have any chocolate.

Alfajores
Yield: 32 2-inch sandwich cookies

Ingredients:
  • 2 1/2 cups (10 1/8 ounces) all-purpose flour
  • 1 teaspoon cream of tartar
  • 1 teaspoon baking soda
  • 1/4 teaspoon salt
  • 1 stick (8 tablespoons) butter, very soft (just leave it out overnight if you can think of it, microwave it if not)
  • 1 cup (7 ounces) granulated sugar
  • 1 large egg
  • [2 tablespoons brandy--the recipe calls for this, but I didn't have it so I used a teaspoon or two of vanilla extract]
  • optional: cinnamon sugar for a snickerdoodly treat
  • 1 can prepared dulce de leche (look near the sweetened condensed milk at the supermarket)
Method:

  1. Preheat oven to 325 degrees F or 300 degrees F convection. Put racks in upper and lower thirds of the oven, prepare baking sheets with parchment or ungreased foil.
  2. Combine flour, cream of tartar, baking soda, and salt in a medium bowl and whisk to combine.
  3. Beat butter and sugar until smooth and well blended, but not fluffy (by hand or with a mixer). Add egg and brandy and/or vanilla and mix until smooth. Fold or gently beat in the flour mixture gradually until completely incorporated.
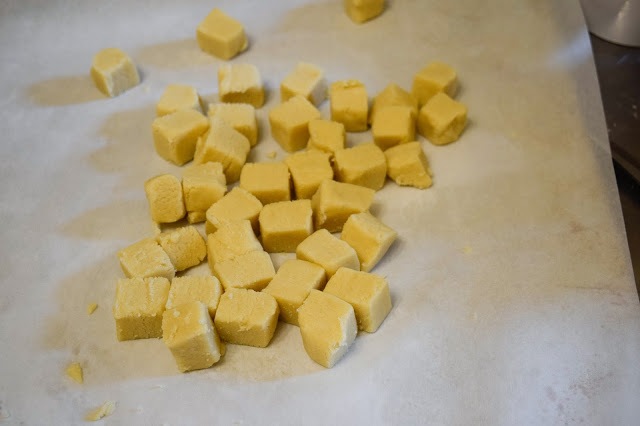
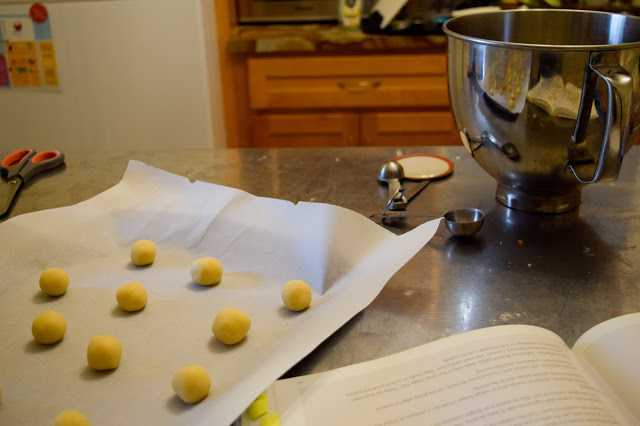
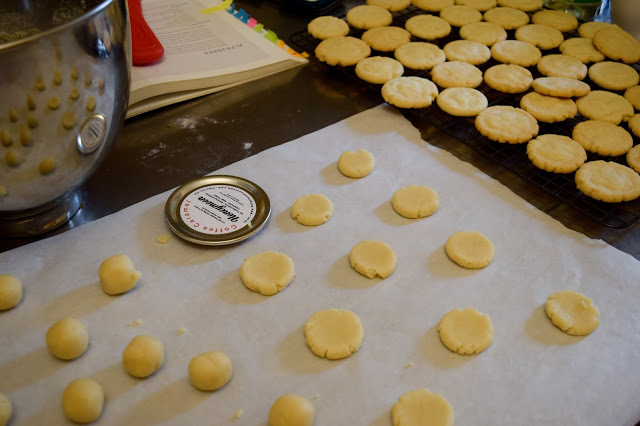
  4. On one of your prepared baking sheets, press all of the dough into a square about an inch tall. Cut into 8 strips, then cut the other way to make 64 equally sized pieces using a bench scraper or table knife. Roll each piece into a ball, place on baking sheet at least an inch and a half away from other dough. Press each ball into a round about 3/8-1/2 inch tall using the bottom of a glass or a mason jar lid insert...anything flat will do. 
  5. Bake cookies 14-16 minutes, rotating pans halfway through and checking for doneness the last few minutes. The cookies should be lightly browned and firm around the edges, softer and paler in the middle. Cool on the sheets, then remove and bake another batch.
  6. Once the cookies are completely cool, spread about a teaspoon of dulce de leche on half of the cookies and sandwich with another cookie (of a similar size if yours vary a bit like mine!). It helps to rotate the cookies as you press the filling to get even distribution.
  7. Let rest to firm up a bit, then enjoy or store overnight (wax paper between layers to keep them clean from dulce drips) for day-two delightfulness!


Saturday, December 3, 2016

Lime Cinnamon Macaroons

These are a tropical explosion of flavor...a lovely twist on a classic cookie.

Crunchy edges dusted with cinnamon give way to a soft, chewy interior of lime and coconut. Big flake coconut makes these cookies substantial and less stringy than their shredded counterparts.


The recipe comes from Dorie Greenspan's cookie cookbook, my cookie bible since loosing Baking Illustrated in the mail. It makes me very happy and I was smitten with all of her macaroon variations...especially this tropical theme on macaroons.


They'd make lovely non-traditional christmas cookies (since they're basically a chewy meringue, they keep very well, other than becoming a bit soggy on the edges). But they also just make a nice tupperware-full of cookies to dip into day and night.

I swear, the flavor combination (which is not something I usually wax on about with cookies, being more concerned with texture and richness and chocolate intensity :) ) is addictive!


Lime Cinnamon Macaroons
Yield: aprox. 2 dozen cookies

Ingredients:

  • 4 large egg whites
  • 3 1/2 cups (5.25 ounces) dried flaked coconut
  • 3/4 cup (5.25 ounces) granulated sugar
  • 2 teaspoons vanilla extract
  • rounded 1/4 teaspoon salt
  • 1 1/2 to 2 teaspoons lime zest (from 1-2 limes)
  • cinnamon (either powdered, or stick to grate with a microplane)
Method:
  1. Combine egg whites, coconut, sugar, and salt in a large metal bowl. Set the bowl over a large skillet of gently simmering water, stirring as the mixture heats. Keep stirring until the mixture is very hot to touch, is slightly thicker, and has turned from transparent to opaque, approximately 5-7 minutes. Set aside for half an hour to let the mixture thicken further.
  2. Preheat oven to 350 degrees F. Put racks in upper and lower thirds.
  3. Mix in vanilla extract and lime zest. Spoon out pretty heaps of batter, about 2 tablespoons each, 2 inches apart on baking sheets lined with parchment paper (or silpat, or greased foil). 
  4. Bake 5 minutes, rotating top/bottom and front/back halfway through. Lower oven to 325 degrees F and continue to bake 10-15 minutes, rotating again. Bake until cookies are deeply golden on the tips and around the edges, lowering oven to 300 if it seems like they are cooking too fast. 
  5. Let cool on baking sheets or on racks with just parchment. Wait until the cookies are completely cool before peeling off the cookies. Grate cinnamon over the cookies or lightly dust with powdered cinnamon. Though the cookies are best the first day, since they are crispy on the edges, they keep well 5 or so days in an airtight container.

Wednesday, November 30, 2016

Chocolate Bundt Cake with Ganache Frosting

Ooooh chocolate cake.
Ooooooooh bundt.
Ooooooooooohhh baby.


This is a delicious, moist, decadent cake complete with ganache. Ganache is a fancy word for the laziest frosting made with two of the most delicious manmade compounds, cream and chocolate. 


Our ganache had a smidge too much cream, so it was a bit runny, but we made up for that by warming up extra and pouring it over our slices. No harm, no foul.


The cake is lovely--deeply chocolatey, spongey, not too sweet. A perfect pairing for the rich ganache. I love the ridges provided by the bundt pan...it looks so fancy!


All in all, it's a delicious cake for chocolate-lovers, and just might convert some not-so chocolate lovers too.


Oh yes, I forgot to mention...it's fussy. It calls for buttermilk and fancy cocoa (though cocoa is really usually okay if you switch it out, just a different result), separated eggs, brewed coffee, awkward measurements, yadda yadda. The original recipe even calls for sifting the flour, but ain't nobody got time for that. I promise, it's worth (most of) the trouble :).

Chocolate Bundt Cake with Ganache Frosting
Yield: a bundt cake, what do you think??

Ingredients:

cake:
  • 1 1/4 cups plus 1 Tablespoon brewed coffee
  • 3/4 cup (Dutch process prefered, Hershey's if you can't find anything else!) cocoa powder
  • 2 1/4 cups sugar
  • 1 1/4 teaspoons kosher salt
  • 2 1/2 teaspoons baking soda
  • 2 whole eggs
  • 1 egg yolk
  • 1 1/4 cups plus 1 Tablespoon buttermilk
  • 1 cup plus 2 Tablespoon canola oil
  • 1 1/2 teaspoons vanilla extract
  • 2 1/2 cups, plus 2 Tablespoons all-purpose flour (whisk it up for a bit to aerate, or sift if you'd like)
ganache:
  • 10 ounces chocolate (chips are okay but block chocolate is better)
  • 6 ounces (3/4 cup) cream
  • ^note that I changed the ratio from 8:8 to 10:6 in order to account for the fact that ours was too thin 
Method:
  1. Preheat the oven to 350 F and move the rack to the middle position. Grease and flour a 10-inch bundt pan.
  2. Boil coffee and cocoa powder on the stove, or microwave the coffee until very hot and mix in the cocoa powder. The idea is to bloom the cocoa so it's aromatic compounds are activated in the hot liquid. Whisk carefully or risk getting cocoa powder all over yourself! Set aside to cool.
  3. Using a stand mixer, hand mixer, or strong arm, whisk sugar, salt, baking soda, eggs and egg yolk until combined. Then, add the buttermilk, oil, and vanilla, and whisk again until fully combined. 
  4. Mix in flour for 2 minutes, then add the coffee-cocoa mixture and mix another few minutes or so until your batter is thin, runny, and smooth. Pour into prepared pan and bake 1 hour or until a skewer comes out clean.
  5. When cake is done, cool in the pan until it reaches room temperature, then invert onto a plate.
  6. For the ganache: microwave or heat on stove the cream until just scalding (not boiling). Pour immediately over the chocolate chips in a medium bowl and let sit for about 1 minute. Then, stir to combine. If the chocolate is not entirely melted, microwave for short (15 sec) bursts until you are able to just combine the two. Aim for a smooth, homogeneous, glossy mixture. 
  7. Let cool on the counter about 20 minutes, then spread over cooled cake. Extra ganache makes delicious hot fudge sauce for ice cream, if there's any left!
Video of stirring ganache, one of those weirdly meditative things to watch...


Adapted from Joy the Baker

Wednesday, October 12, 2016

Decadent Crispy Chocolate Chip Cookies

I feel apologetic about these cookies. They seem to need justification, in the form of a "decadent" before their name. Like many people, my favorite cookies are the large, chewy, thick, bakery-style cookies. But...these were...incredible.


The flavor of a super caramelized, shatteringly crisp (Mary Barry would be proud...just imagine her saying "crisp" in her perfectly articulated British accent) cookie laced with lots of chocolate chips, in a just right batch size of 15 cookies.


I was so excited to try a recipe from Alice Medrich's cookie book. Cookies are my favorite, and she is the queen of chocolate. My cookbooks were lost in the mail (well, the post office hasn't found them 2 months later), so I bought myself this cookbook at my neighborhood used bookstore. I'm so glad I did: the first week, I put approximately 50 post-it flags in the book on recipes I want to try!


So, these cookies. They are unapologetically crisp, despite my apology at the top of this post. They have no egg, contributing to their crispness, and start with melted butter (thank goodness for not having to soften the butter).


The batter is rested overnight in the fridge, or for however long you can spare, which is recommended for lots of cookie recipes. It's a bit fussy, but if you think ahead it breaks up the work nicely over two days. I wanted to try the recipe exactly as written, but on tasting, I think a sprinkle of nice sea salt would not go amiss.


A radically different cookie than both Chips Ahoy and the typical chewy chocolate chip cookie, they are delicious with a glass of cold milk or just snuck in shards from the cookie jar.

Decadent Crispy Chocolate Chip Cookies
Yield: 15 large, flat, and delicious cookies

Ingredients:

  • 1 1/3 cups (6 ounces) all-purpose flour
  • 1/2 teaspoon baking soda
  • 10 tablespoons (1 1/4 sticks) unsalted butter, melted
  • 1/2 cup (1.5 ounces) rolled oats
  • 1/2 cup (3.5 ounces) granulated sugar
  • 1/4 cup (1.75 ounces) brown sugar (dark brown is best) 
  • 2 tablespoons plus 1 teaspoon (2 ounces) light corn syrup
  • 2 tablespoons milk
  • 1/2 teaspoon salt
  • 8 ounces or 1 generous cup chocolate chips or chopped bitter/semisweet chocolate

Method:

  1. Combine flour and baking soda in a small bowl and mix to combine.
  2. In a large bowl, combine the butter, oats, sugar (granulated and brown), corn syrup, milk, and salt. Whisk to combine, then gently mix in the flour mixture. If the mixture is still warm from the butter, let it cool down a bit before mixing in the chocolate.
  3. Let batter rest in the fridge for a few hours or overnight, up to probably 3 days would be fine!
  4. When ready to bake, heat oven to 325 degrees F. Position racks in upper and lower thirds of the oven.
  5. Line 2 baking sheets with foil, dull side up, and put an extra foil liner on a spare part of countertop. Divide dough equally into 15 pieces, roll each into a ball, and place 5 on each baking sheet/liner. Smoosh each ball down until the dough balls are about 3.5" in diameter.
  6. Bake sheets 20-25 minutes, rotating and flipping sheets halfway through baking, until the cookies are thin and quite brown. This makes the caramelization and makes them completely dry (that is, amazingly easy to store). Slide the extra liner onto one of the baking sheets and bake the third sheet like the others. 
  7. Let cool to room temperature on wire racks, then store in an airtight container as long as they stick around.
Recipe from Chewy Gooey Crispy Crunchy Melt-in-Your-Mouth Cookies by Alice Medrich.

Saturday, October 8, 2016

Ginger Veggie Udon Soup

It's a warm fall in SF, but a little veggie soup never went amiss. This one is gingery/miso-y, with yummy soft udon noodles. It would be great for fending off a cold, with all the vitamin-filled veggies, lime juice, miso, and ginger. Knock on wood...


I bought a pack of udon noodles from the Japanese supermarket, and couldn't even read the numbers to tell how long to cook it for...Google Translate to the rescue! Their app allows you to take a picture of text and it will translate!


In a nutshell: You simmer the broth for about 15 minutes, and while that's happening boil the noodles. Chop up a whole lot of veggies in small strips, then cook some with the broth and leave some raw to be softened by the residual heat of the broth. It takes less than half an hour and is immensely satisfying.


Get your bowl, plop in a bunch of noodles, add raw carrots, then pour the broth over the whole thing. The result is a fresh, bright, light soup. Finish it all off with a squeeze of lime, green onions, and some sort of spicy situation if you want (I used a serrano chile, seeds removed and chopped fine).

To make it heartier, you could always add a soft boiled egg or some tofu. I'll probably do this with my leftovers!

Ginger Veggie Udon Soup
Yield: 3 servings

Ingredients:

  • Broth:
    • 3 inch piece of fresh ginger, peeled (use a spoon to scrape off the skin) and chopped into 1/4 inch thick rounds
    • 1/2 large carrot, chopped into 1/2 inch rounds
    • 2 cloves garlic, roughly chopped
    • 5 cups vegetable stock or water
    • 10 sprigs cilantro
  • Other ingredients:
    • 7 ounces udon (find in a Japanese supermarket/specialty store or online)--rice noodles or soba would also be good!
    • 1/2 head of broccoli (mind was leftover from roasting a head)
    • 1 red pepper, cut into thin strips
    • 1/2 large carrot (the other half), cut into matchsticks
    • 1 rounded teaspoon red miso paste
    • 5-6 green onions, white and light green parts thinly sliced
    • *Note: use whatever veggies you have leftover! Thug Kitchen suggests thinly sliced snowpeas in place of the red pepper, but I bought red peppers at Costco so....
  • For serving:
    • lime
    • serrano chile or sriracha
    • sesame oil (I didn't do this but it sounds good!)
Method
  1. In a medium/large pot, heat over medium heat and then add the carrot and ginger chunks. Cook without oil, stirring occasionally, for a few minutes, until the carrots start to brown. Add garlic and stir again for about a minute to take the edge off. Add the stock or water and cilantro and bring to a simmer for 15 minutes.
  2. While you're waiting, cook the noodles according to the package. Mine went for 5 minutes into boiling water and were rinsed after cooking. Set the noodles aside (it's okay if they don't stay hot).
  3. Chop up the rest of the veggies! Once the stock is done with its 15 minutes, remove the ginger, garlic, cilantro, and carrot as best you can. 
  4. Add anything that you want to cook a bit to the stock now: broccoli if it's raw, red peppers, etc. I left the carrots raw, but you do you. Cook for just long enough for the veggies to lose their rawness--a couple of minutes. 
  5. Stir the miso paste and a ladle or two of stock together in an extra bowl, then dump back in the soup. and stir to combine.
  6. Put some noodles and carrots in a bowl, and ladle the soup over everything. Serve with garnishes or an egg as desired! (if you let this sit for a minute the carrots and noodles can warm up a bit).
  7. Enjoy!
Recipe slightly adapted from Thug Kitchen.

Saturday, October 1, 2016

Saag Paneer [mini-post]

So, this kind of blew my mind. Once you get the ingredients for Indian food, you can make Indian food!


Aarti's party on Food Network gave me the glory of this recipe, so I'm not going to wax on too much. Just know that the paneer is marinated and fried. As in, fried cheese!! Find the recipe here.

P.S. I didn't make my own paneer and it was still amazing. We got ours at Costco, and apparently you can freeze it so...looking forward to many more paneer filled meals.

P.P.S. Don't overeat on this. It's easy to because it is dense and delicious, but you will regret it.

P.P.P.S. I bought naan from safeway to eat with this. There are only so many new things one can try at once. Don't let anything limit you from trying new food!

Sunday, September 18, 2016

Banana Granola

Hello! I hope you are feeling as sunny and warm as the bay area was today!


Even if not, though, this granola will bring the sun inside. Our whole house smelled like the most glorious baking for aproximately 6 hours. The granola was not even baking for an hour, but its fragrance lingered in a wonderful way.


My housemates and I hovered over the pan all morning, grabbing bites here and there. You can also make this delicious, crunchy, addictive granola to give away as gifts (I don't know anyone who wouldn't be thrilled with a bag of their own!). It's easy to make and a crowd pleaser.


The golden clusters are hearty from banana, oats, and slivered almonds, and indulgent with coconut oil, honey, and a long caramelization time in the oven! It's great over yogurt with banana and honey.

Also, this was my first time baking with coconut oil...I loved how it complemented the sweet, toasty flavors of this granola. I will definitely be using it again in the future!


Banana Granola
Yield: About 5 cups of granola

Ingredients:
  • 3 cups rolled oats (no quick oats here--the texture is important!)
  • 1 cup (or more) puffed rice
  • 1 cup slivered blanched almonds (I got mine at the bulk bins at Safeway)
  • 1 tablespoon brown sugar
  • 1/2 teaspoon coarse sea salt
  • 1/2 tablespoon cinnamon
  • 1/4 cup (50 g) coconut oil
  • 1/4 (approx 85 g) maple syrup, agave or honey if not vegan
  • 1 teaspoon vanilla extract
  • 1 1/2 ripe bananas, mashed
Method:
  1. Preheat oven to 350 degrees F, convection if you have it. Line a rimmed baking sheet (or two, if you have two) with foil or parchment paper.
  2. Mix oats, puffed rice, almonds, brown sugar, salt, and cinnamon together in a large bowl.
  3. In a small saucepan or microwave container, melt together coconut oil, syrup/honey, and banana. Stir in vanilla extract.
  4. Pour wet ingredients over dry and mix well to combine. Spread on prepared baking sheet(s).
  5. Bake for 25-35 minutes, or until the granola is well caramelized and mostly dried. Since there's more banana, it might take longer to dehydrate than normal granola, but stick with it.
  6. *Note: if you like more clumps, don't stir the granola, but be aware that if you only have one baking sheet like me, the edges will probably burn before the middle is dried out, so you might have to take the cooked parts out while you wait for the middle to dry.
  7. Serve with yogurt, honey, and more banana! Or...eat handfuls...
A few notes:
The recipe did seem a bit sweet for my taste, so the recipe above is adjusted to have a slightly reduced quantity of sugar/honey.
I also love to include puffed rice in granola (I found it at whole foods, though I'm sure it's available elesewhere too--or try rice krispies!) since it lightens the mixture. Next time, I'd probably add some more, or change the ratio with oats, so use as much or as little as you would like!

Adapted from Minimalist Baker